Back to Contents Page
Camera (optional)
Dell™Studio1735/1737ServiceManual
Removing the Camera
Replacing the Camera
Removing the Camera
1. Follow the instructions in Before You Begin.
2. Follow the instructions in Display Assembly.
3. Remove the display bezel (see Display Bezel).
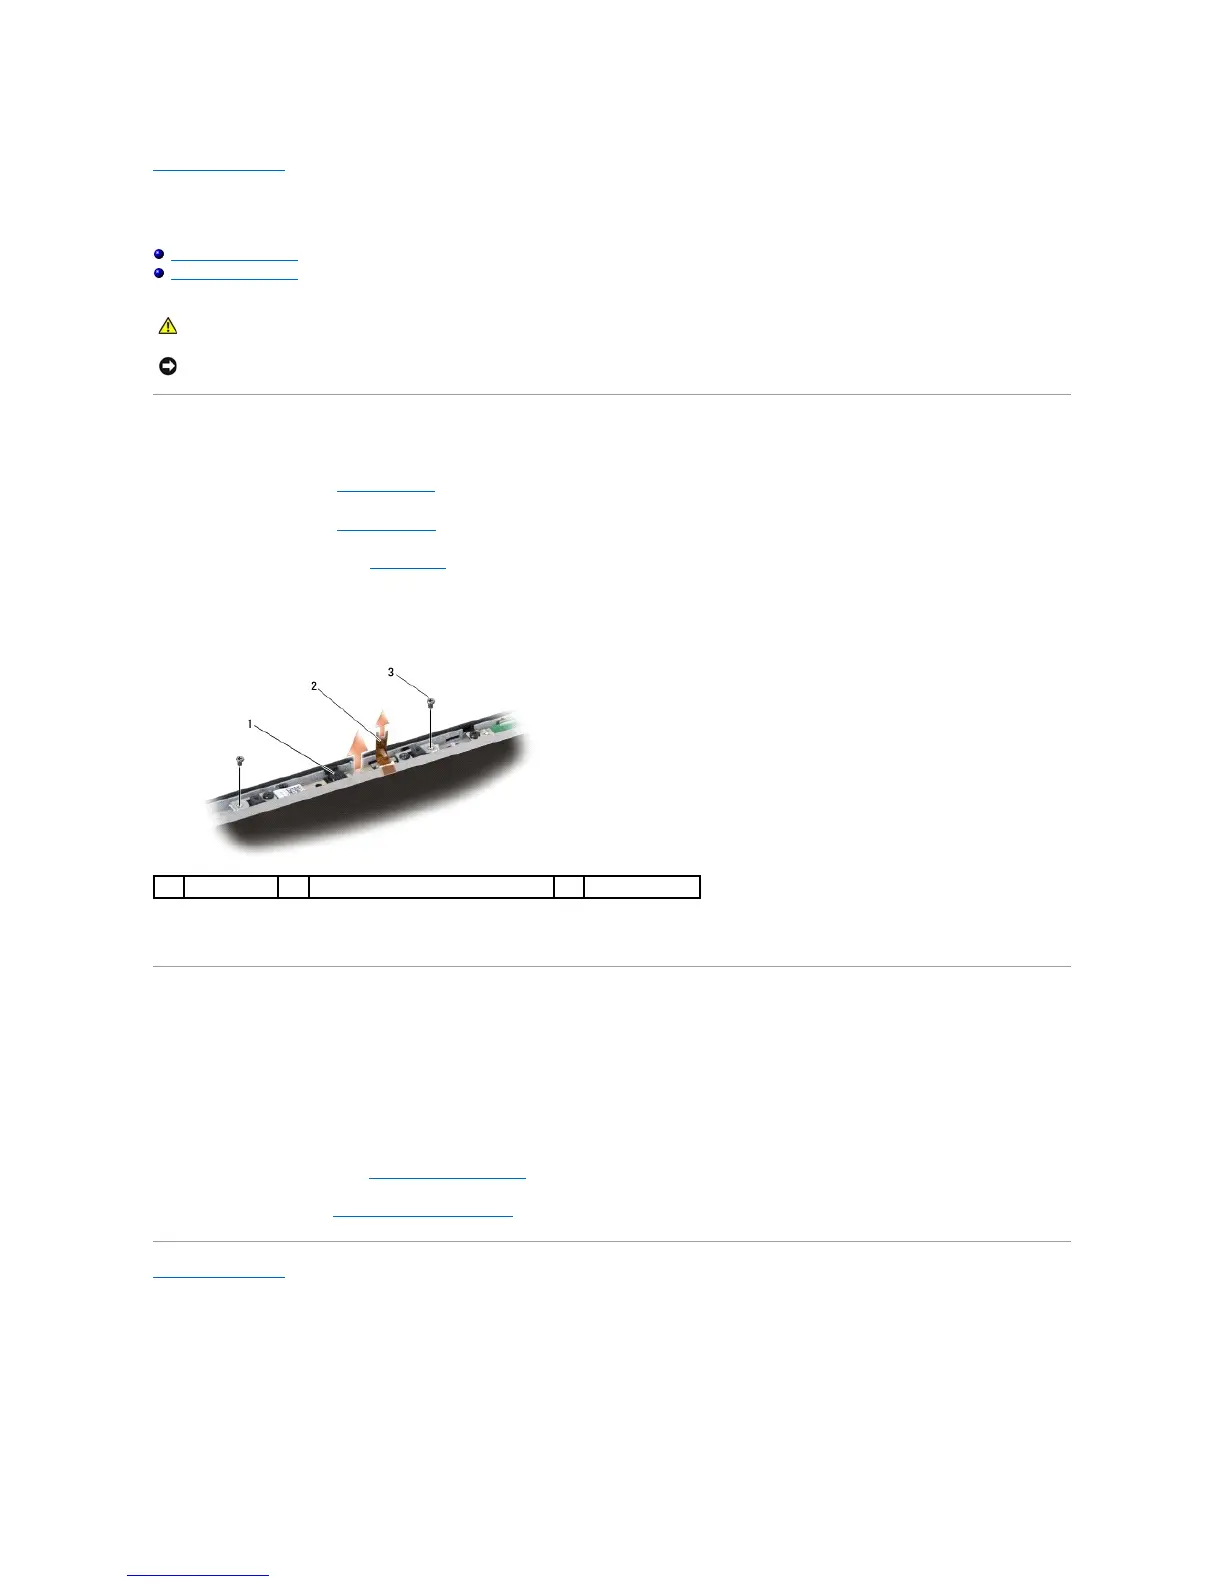
4. Pull the camera cable pull-tab to disconnect it from the connector on the camera board.
5. Remove the two screws securing the camera board.
6. Remove the camera board.
Replacing the Camera
1. Align the camera board over the screw holes.
2. Replace the two screws that secure the camera board to the display.
3. Connect the camera cable to the connector on the display board.
4. Replace the display bezel (see Replacing the Display Bezel).
5. Follow the instructions inReplacing the Display Assembly.
Back to Contents Page
NOTICE: To avoid electrostatic discharge, ground yourself by using a wrist grounding strap or by periodically touching an unpainted metal surface
(such as a connector on the back of the computer).