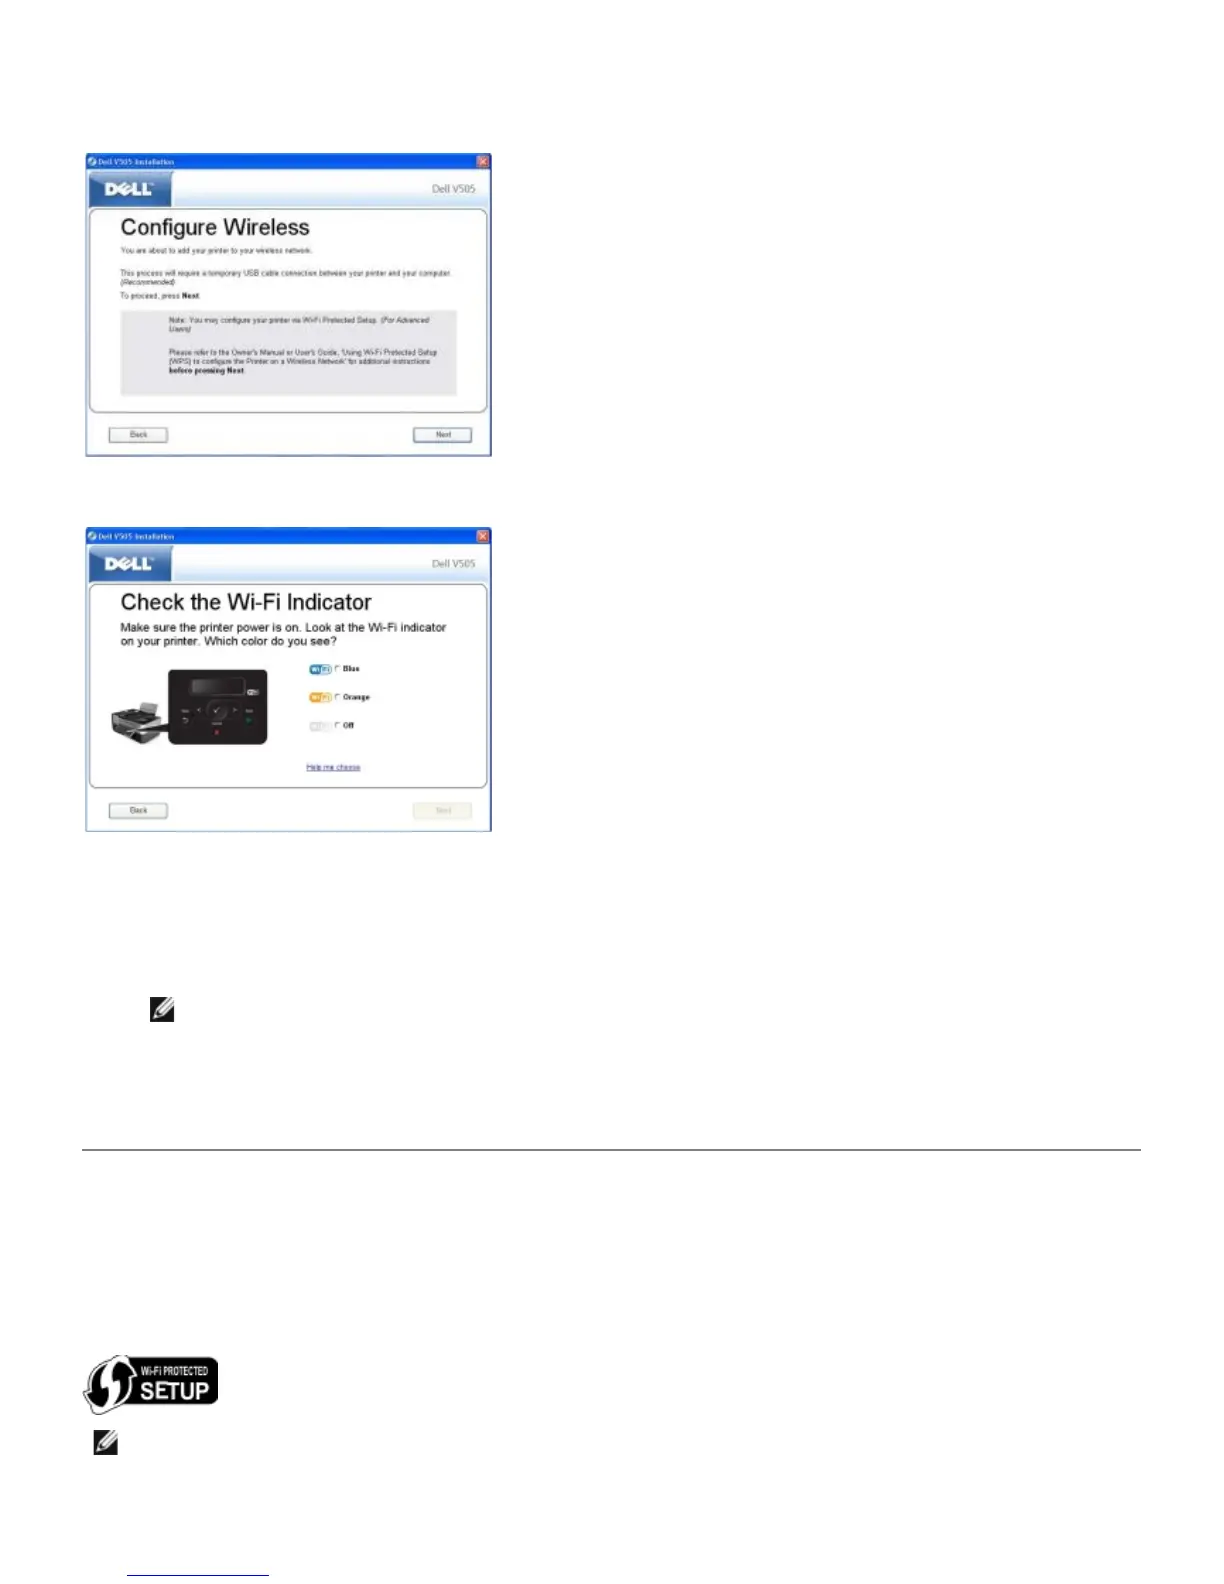
The Configure Wireless screen appears.
6. From the Configure Wireless screen, click Next.
7. From the Check the Wi-Fi Indicator screen, select the color on the operator panel, and then click Next.
8. Connect the installation cable, and then click Next.
9. From the Choose a Network screen, select Connect to Another Network, and then click Next.
10. From the network list, select your ad hoc profile, and then click Next.
NOTE: The Wi-Fi LED turns blue, indicating that the printer has successfully connected to a wireless network.
11. Remove the installation cable, and then click Next.
12. Follow the instructions on the installation screen to complete setup.
Configuring the Printer on a Wireless Network using Wi-Fi
Protected Setup
Wi-Fi Protected Setup (WPS) is available only if you are using a WPS-enabled router. If you are not sure if your router is
WPS-enabled, check the router for the WPS logo.
Before beginning WPS-enabled setup, you must know the router IP address for the following WPS methods:
NOTE: Wi-Fi Protected Setup (WPS) is recommended only for advanced users.