6
1
Select the language
2. Press the ag corresponding to the desired language and
conrm the selection by pressing “Done”.
Now follow the instructions indicated on the display of the
appliance:
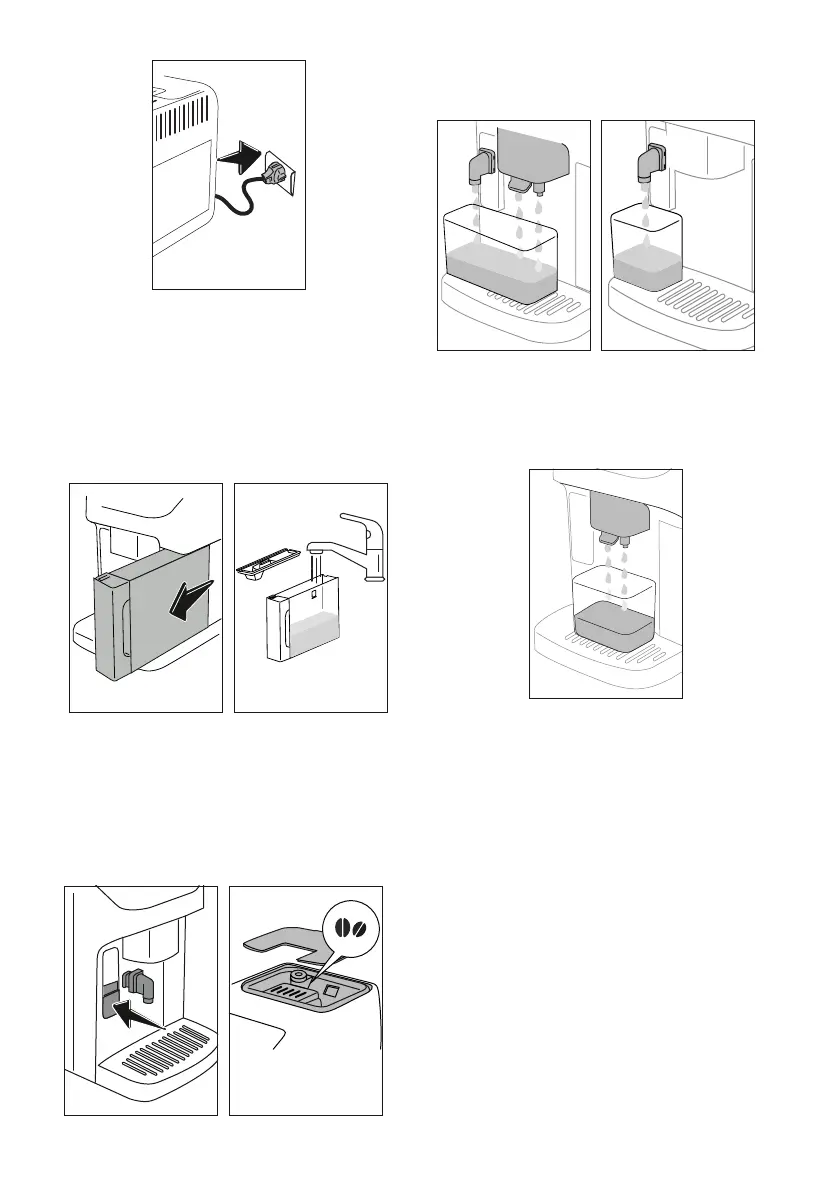
Fill the water tank
3. Remove the water tank (A9) (g. 2), and ll to the MAX line
with fresh drinking water (g. 3);
2 32 3
MAX
4. Reposition the tank, then conrm by pressing “Next”;
Fit the hot water spout
5. Lift the ap and t the hot water spout (D5) to the accesso-
ries connector (A17) (g.4): Press "Next";
Fill the beans container
6. Fill the beans container (A4) (g. 5), then conrm by press-
ing "Next";
4 5
Filling the water circuit and rinsing
7. Position a container of at least 200 ml capacity under the
coee spout (A16) and the hot water spout (g. 6);
6 7
8. Press “Yes” to ll the water circuit: the appliance delivers
water from the hot water spout (g. 7);
9. At the end of delivery, the machine proceeds with heating
and terminates the procedure with a rinse cycle, delivering
hot water from the coee spout (g. 8).
8
Please note:
• The rst time the appliance is used, it will be necessary to
make 4-5 cappuccinos before the drink in the cup tastes
as it should.
• The rst time the machine is used, the water circuit will
be empty and the appliance could be very noisy. The noise
becomes less as the circuit lls.
Measuring water hardness
The descaling alarm is displayed after a period of time estab-
lished according to water hardness. The machine can also be
programmed according to the actual hardness of the local water
supply, so that the descaling procedure will be required less
frequently. Accordingly, it is advisable to set the correct value
without delay, following the machine’s step by step guide:
1. Take out the test strip (D1): press “Start” to proceed.
2. Immerse the strip completely in a glass of water for about
one second.
3. Remove the strip from the water and shake lightly. Press
"Next".