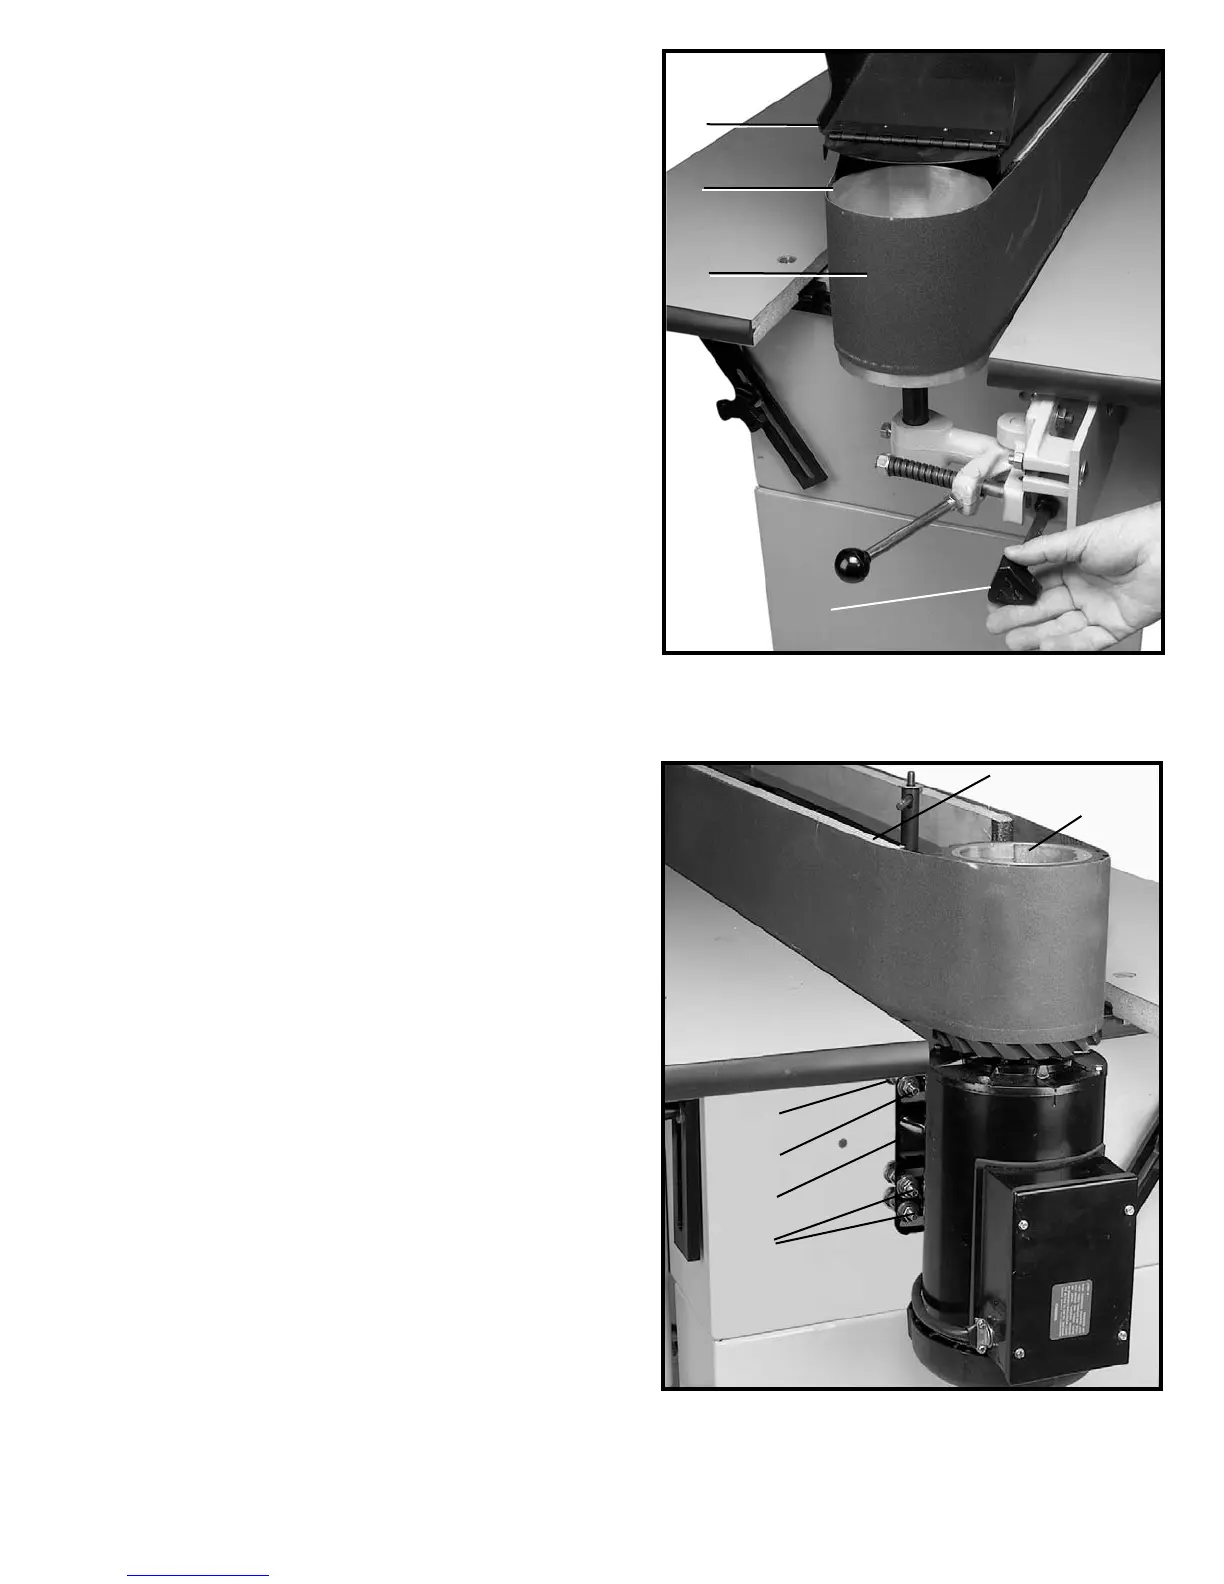
ADJUSTING BELT TRACKING
To check and adjust the tracking of the sanding belt on
the pulleys, proceed as follows:
1. Raise the dust chutes (A) Fig. 34, at both ends of the
top guard and dust chute assembly.
2. Make certain the top guard and dust chute assembly
is not interfering with the rotation of the sanding belt.
3. Apply power to the machine. Jog the on/off switch
several times and check to see if the sanding belt (B) Fig.
34, is tracking correctly on the pulleys, one of which is
shown at (C). If an adjustment is necessary, turn the
tracking knob (D) slightly right or left as needed until the
belt is tracking properly. NOTE: The belt tracking
adjustment can be made with the machine running
however, make certain the surface of the sanding belt is
freely moving and not in contact with any material or part
of the machine.
ADJUSTING PULLEY ALIGNMENT
The idler pulley and motor pulley have been aligned and
test run at the factory. However, rough handling during
shipment or drive pulley wear may cause the sanding
belt to run high or low at either the motor or idler end of
the machine. The top edge of the sanding belt (A) Fig. 35,
must be parallel to the top of the straight platen (B). If it
is not parallel, adjust as follows:
1. CAUTION: DISCONNECT TOOL FROM POWER
SOURCE.
2. NOTE: If the sanding belt (A) Fig. 35, is running LOW
on the motor pulley, this means the top of the motor is
too far away from the machine. The top of the motor
must be moved toward the machine by loosening the
two top INSIDE nuts, one of which is shown at (C), 1/2
turn and then tighten the two top outside nuts (D).
3. NOTE: If the sanding belt (A) Fig. 35, is running HIGH
on the motor pulley, this means the top of the motor is
too close to the machine. The top of the motor must be
moved away from the machine by loosening the two top
OUTSIDE nuts, one of which is shown at (D), 1/2 turn
and then tighten the two top inside nuts (C).
4. Apply power to the machine. Jog the on/off switch
several times and check to see if the top edge of the
sanding belt (A) Fig. 35, is running parallel to the top of
the straight platen (B). If further adjustment is necessary,
repeat the procedure.
CAUTION: DO NOT BEND THE MOTOR MOUNTING
PLATE (E) FIG. 35, WHEN MAKING THESE ADJUST-
MENTS. If the motor misalignment is excessive, it may
become necessary to move the bottom of the motor by
adjusting the lower motor mounting nuts (F), in or out, in
the same manner.
12
Fig. 34
Fig. 35
D
B
C
A
A
B
C
D
E
F
 Loading...