Do you have a question about the Delta 36-600 and is the answer not in the manual?
Details on electrical circuit requirements and extension cord usage for the tool.
Provides voltage, frequency, and no-load speed for the saw's motor.
Explains the importance of grounding and how to connect the tool properly to prevent electric shock.
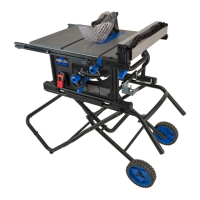
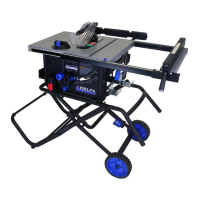
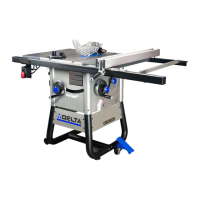
Introduction to the Delta Model 36-600 table saw, detailing its capabilities and included features.
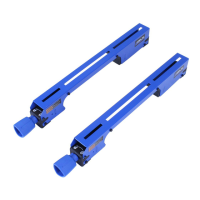
Step-by-step guide to assembling the saw's support stand using provided parts and hardware.
Instructions on how to securely mount the table saw unit onto the assembled stand.
Explains how to operate the main power switch to turn the saw on and off.
Details the procedure for locking the switch to prevent unauthorized operation of the tool.
Describes the reset overload relay button and how to use it if the motor shuts off due to overload.
Instructions on how to adjust the saw blade height using the handwheel and lock knob.
Guide on adjusting the saw blade angle for bevel cuts using the tilting handwheel.
Instructions on performing cross-cuts using the miter gage, including safety precautions.
Guidance on performing rip cuts using the rip fence, with safety advice and techniques.
Step-by-step instructions for safely removing and replacing the saw blade.
Guide on how to inspect and replace the motor brushes for proper tool function.
List of service center locations and contact information for Canada.
This document is an instruction manual for a 10" Table Saw, Model 36-600, manufactured by Delta Machinery. It provides comprehensive guidance on the assembly, operation, and maintenance of the tool, emphasizing safety procedures throughout.
The primary function of this device is to perform various woodworking cuts, specifically ripping and cross-cutting, with precision and efficiency. It is designed for both professional and home shop use, offering features that enhance safety and ease of use. The table saw is capable of making straight cuts along the length of a board (ripping) and across the grain (cross-cutting). It can also be adapted for more specialized operations like moulding and dadoing with the use of appropriate accessories.
The manual begins with a strong emphasis on safety, outlining general woodworking safety rules and specific additional rules for table saws. Users are instructed to read the entire manual before operation to understand the tool's applications, limitations, and hazards. Key safety practices include always wearing eye protection, keeping guards in place, removing adjusting keys and wrenches before starting the tool, and maintaining a clean work area. It also warns against using the tool in dangerous environments, forcing the tool, or operating it under the influence of drugs or alcohol. Children and visitors must be kept away from the work area, and the workshop should be childproofed.
Assembly instructions detail the step-by-step process of setting up the stand, attaching the saw to the stand, and assembling the blade raising and tilting handwheels. The blade raising handwheel allows for precise control over the blade's height, while the tilting handwheel enables bevel cuts at various angles. The manual provides clear instructions on how to assemble the extension wings, which expand the working surface for larger materials.
A critical part of the setup involves assembling the saw blade, ensuring it is correctly oriented with teeth pointing down at the front of the table. The process includes removing the table insert, securing the blade with the arbor nut and flanges, and using the provided wrenches for tightening. After blade assembly, the table insert must be replaced and adjusted to be flush with the table surface.
The guide rails, essential for accurate cuts, are assembled next. The front guide rail and its extension are attached to the saw table and extension wings, with a note to not fully tighten the hardware until final adjustments are made. The rear guide rail is similarly assembled.
The rip fence is a key component for ripping operations, and its assembly and adjustment are detailed. The handle is inserted into the rip fence body, and the fence is then attached to the guide rails. Proper alignment of the rip fence parallel to the miter gage slots is crucial to prevent kickback during ripping. The manual explains how to adjust the fence's position and align the cursor with the guide rail scale for accurate width measurements.
The miter gage, used for cross-cutting, also has specific operation and adjustment instructions. It features adjustable index stops for 90 and 45-degree angles, and its lock handle allows for angle adjustments. A special washer on the miter gage bar prevents it from falling off the table when extended.
The manual describes typical operations, including cross-cutting and ripping. For cross-cutting, the miter gage is used to position and guide the workpiece, with the saw guard always in place. Users are advised to hold the supported piece firmly and never touch cut-off pieces while the saw is running. For ripping, the rip fence guides the workpiece, and a push stick is recommended for narrow stock to maintain safety and control. The manual also provides instructions for constructing a featherboard and a push stick from scrap material, which are important safety accessories.
Specialized operations like moulding and dadoing are covered, requiring specific accessory cutterheads and table inserts. When performing these operations, the standard guard, splitter, and anti-kickback finger assembly must be removed and replaced with auxiliary jigs, fixtures, push sticks, and featherboards. It is explicitly stated that moulding cutterheads and dado heads should never be used in a bevel position.
Maintenance instructions include changing the saw blade, which involves disconnecting the tool from the power source, raising the blade to its maximum height, and using the provided wrenches to remove and install the blade. It specifies using only 10" diameter saw blades rated for 5500 RPM or higher with 5/8" arbor holes.
Brush inspection and replacement are also detailed. Users are instructed to disconnect the tool, remove the table insert and saw blade, and raise the motor to its maximum height and tilt the arbor to 45 degrees to access the brush holders. Brushes should be checked after the first 50 hours of use for a new machine and then every 10 hours until replacement is necessary. If the carbon on the brush is worn to 3/16" or if the spring or shunt wire is damaged, both brushes should be replaced.
Belt replacement is another maintenance task described. This involves disconnecting the tool, raising the saw blade, removing the blade guard, splitter, table insert, and saw blade, and tilting the arbor to 45 degrees. The saw is then turned upside down to access the motor housing, where screws and a cover are removed to replace the belt.
The manual also includes information on fastening the stand to a supporting surface if the tool tends to tip or move during operation, enhancing stability and safety. Overload protection is addressed, with instructions on how to reset the overload relay button if the motor shuts off due to overloading or low voltage.
Overall, the manual provides a thorough guide to safely and effectively use and maintain the Delta 10" Table Saw, Model 36-600.
| Voltage | 120 V |
|---|---|
| No-Load Speed | 5000 rpm |
| Blade Diameter | 10 inches |
| Arbor Size | 5/8 inches |
| Max. Cut Depth at 45 degrees | 2-1/4 in |
| Max Rip to Left of Blade | 12 in |