CANopen Communication Module DVPCOPM-SL
3 Basic Operation
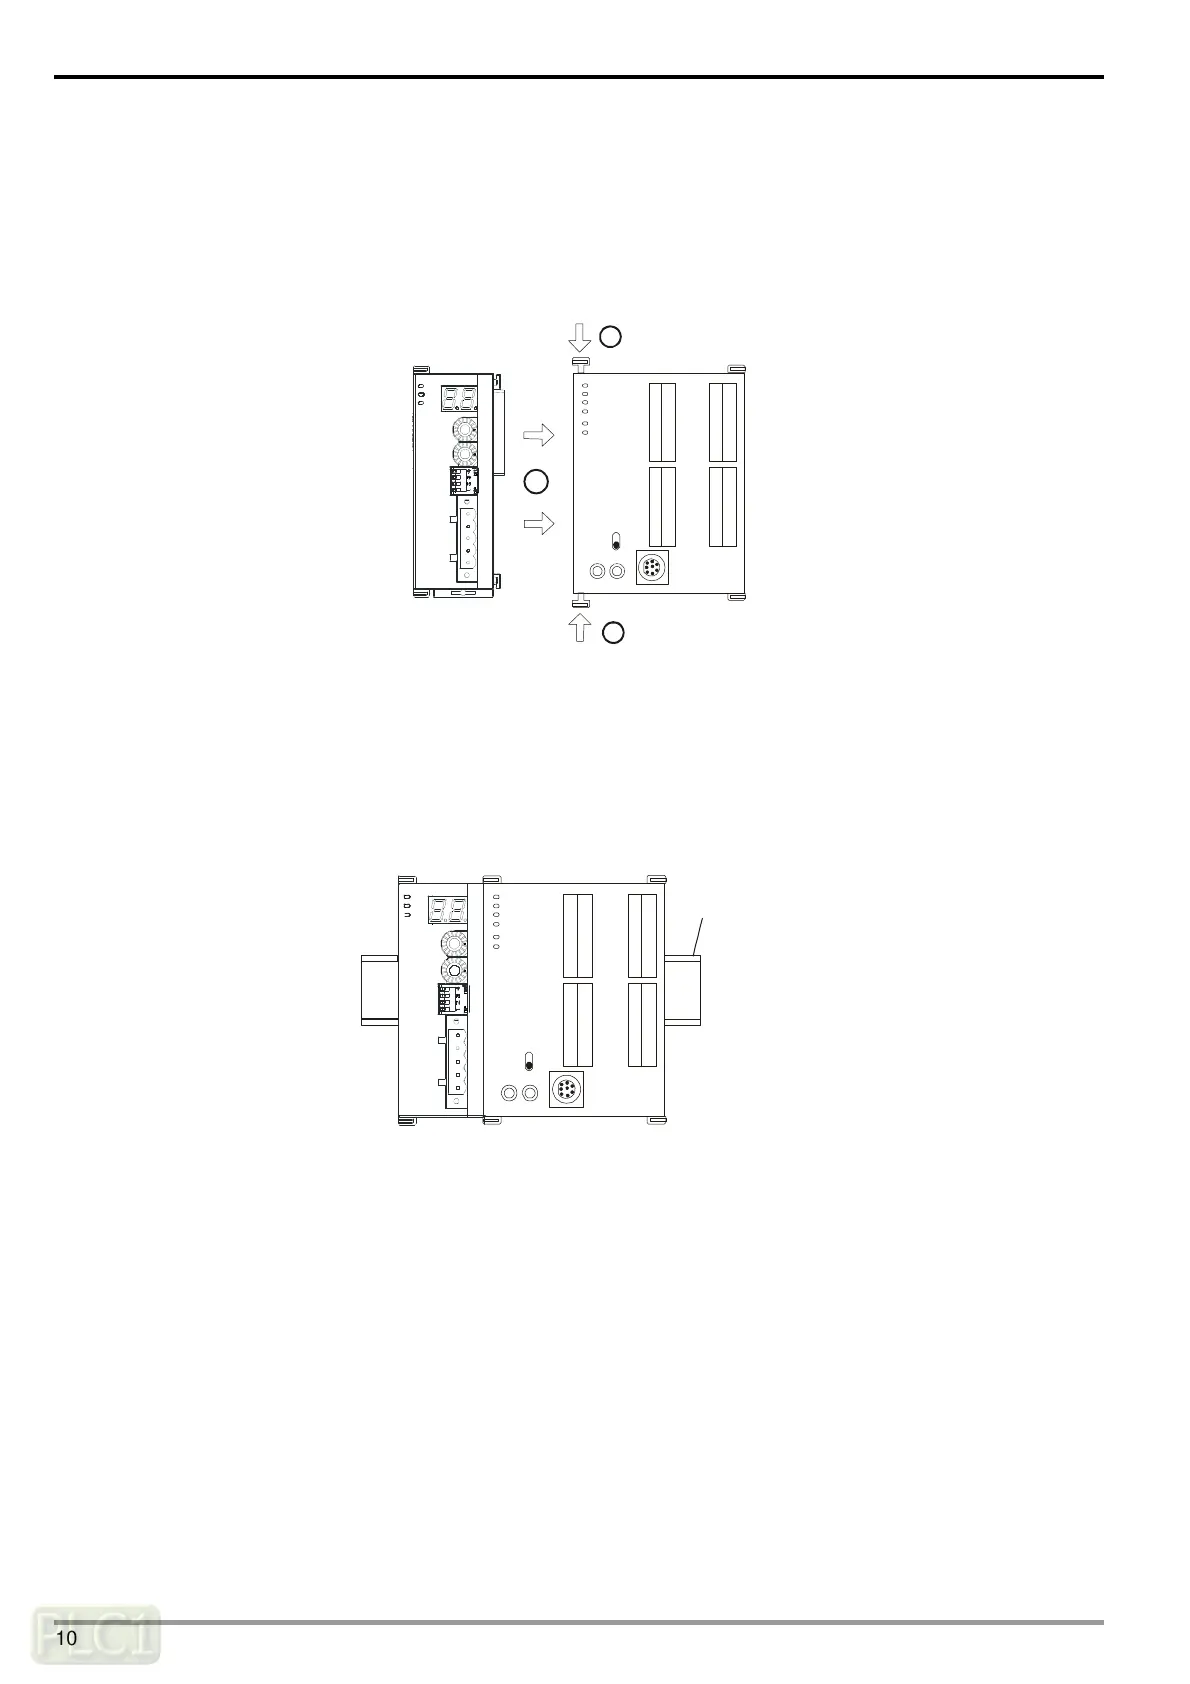
3.1 Connecting DVPCOPM-SL to DVP-SV CPU
Open the fixing clip on top and bottom of DVP-SV. Meet the extension port of DVPCOPM-SL with DVP-SV, as .
Press the fixing clips on top and bottom of DVP-SV and check is the connection is fine, as
.
DVP28SV
RUN
STOP
2
2
11
GND
SHLD
CAN-
NODE ADDRESS
DR 1
IN 0
DR 0
DR 2
x16
0
x16
1
ERR
RUN
POWER
DVPCOPM
CAN+
3.2 Installing DVPCOPM-SL and DVP-SV CPU on DIN Rail
Use 35mm DIN rail.
Open the DIN rail clip on DVP-SV and DVPCOPM-SL. Insert DVP-SV and DVPCOPM-SL onto the DIN rail.
Clip up the DIN rail clips on DVP-SV and DVPCOPM-SL to fix DVP-SV and DVPCOPM-SL on the DIN rail, as
shown below.
35mm DIN rail
DVP28SV
RUN
STOP
GND
SHLD
CAN-
NODE ADDRE SS
DR 1
IN 0
DR 0
DR 2
x16
0
x16
1
ERR
RUN
POWER
DVPCOPM
CAN+
DVP-PLC Operation Manual
10
 Loading...