Do you have a question about the Delta (Model 31-695) and is the answer not in the manual?
Imminent hazard, death or serious injury.
Potentially hazardous situation, death or serious injury.
Potentially hazardous situation, minor or moderate injury.
Potentially hazardous situation, property damage.
Hazards of dust from construction activities (cancer, birth defects).
General safety advice for woodworking machinery.
Emphasizes reading instructions before use to prevent injury.
Warning against modifying or misusing the machine.
Importance of reading the manual for safety.
Requirement for eye protection and other safety gear.
Guidelines on appropriate clothing and footwear.
Avoid wet/damp locations and ensure good lighting.
Importance of maintaining tools for safety and performance.
Inspect for damaged parts before operation.
Maintain a clean workspace to prevent accidents.
Ensure children and visitors are kept away from the workshop.
Ensure switch is off before plugging in; move to OFF during power failure.
Ensure all guards are in place and working.
Remove tools before operation to prevent them being thrown.
Do not force a machine for unintended jobs.
Use only Delta-recommended accessories.
Use correct gauge extension cords for safety and performance.
Use clamps or vises to hold workpieces.
Feed workpiece against rotation direction of abrasive surface.
Avoid forcing workpiece to prevent damage or injury.
Avoid overreaching to prevent loss of balance.
Do not stand on the machine to avoid injury.
Turn off the machine when not in use.
Disconnect power before adjustments or repairs.
Secure workshop against unauthorized use by children.
Stay alert and use common sense, avoid operating when impaired.
Take precautions against dust inhalation from wood.
Ensure machine is fully assembled and installed correctly.
Seek advice if unfamiliar with machine operation.
Adhere to wiring codes for electrical safety.
Clear work area before turning on machine.
Avoid starting machine with workpiece touching abrasive surface.
Secure machine to prevent movement during operation.
Cover power take-off shafts to prevent entanglement.
Use dust collection systems for health and safety.
Clean machine, especially when processing different materials, avoid magnesium.
Prevent workpiece contact with belt before starting.
Avoid awkward positions to prevent slips.
Maintain 1/16" clearance between table and disc.
Firmly support workpiece when sanding with belt.
Avoid kickback by sanding with directional arrows.
Do not sand small/thin workpieces that cannot be controlled.
Properly support long or wide workpieces.
Do not perform layout/assembly while machine is running.
Turn off and disconnect before leaving; lock switch.
Information sources for safe operation of power tools.
Use a separate circuit with appropriate wire gauge and fuse.
Use 3-wire, grounding type extension cords.
Warning against operating in rain or damp locations.
Machine operates on 120V, 60Hz AC.
Machine must be grounded for protection from electric shock.
Proper grounding procedures for cord-connected machines.
Using adapters for grounding on circuits under 150V.
Canadian regulation on temporary adapters.
Ensure the receptacle is properly grounded.
Guidelines for selecting and using extension cords.
Table for minimum gauge extension cord recommendations.
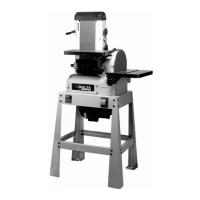
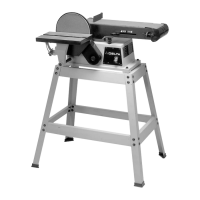
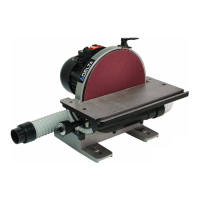
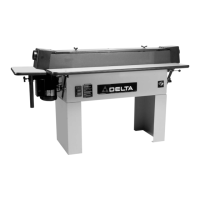
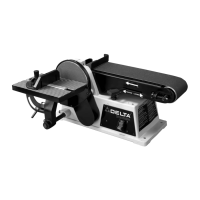
Overview of the Delta Model 31-695 features.
Instructions for unpacking and cleaning the machine.
Note about illustrations being representative.
Contents of the shipping container.
Safety warning before connecting power.
Instructions for assembling the sander stand.
Steps to mount the sander onto the assembled stand.
How to install and adjust the drive belt tension.
Instructions for installing the belt and pulley guard.
Steps to install the sanding disc plate onto the driveshaft.
Note regarding drive shaft extension.
Instructions for cleaning the disc plate.
Applying the sanding disc to the plate.
Attaching the lower cover for the sanding disc.
Note on preventing contact between disc and cover.
Installing the support rod for the table.
Mounting the table assembly onto the support rod.
Warning about table edge clearance to disc.
How to turn the sander on and off.
How to lock the switch in the OFF position.
Procedure to check and adjust belt tracking.
How to change the sanding arm position (horizontal/vertical).
Adjusting the sanding arm stop for horizontal position.
Warning to disconnect power before adjusting the sanding arm stop.
Warning to disconnect power before adjusting the backstop square.
Check belt tension lever position before adjusting backstop.
How to check backstop squareness using a square.
Steps to adjust the backstop if it's not square.
Warning to disconnect power before tilting the table.
How to tilt the table up to 45 degrees.
Repositioning table after tilting to maintain clearance.
Warning to disconnect power before squaring the table.
Using a square to check table alignment with disc.
Steps to adjust table parallelism to the disc.
Adjusting the angle scale pointer.
Warning to disconnect power before adjusting the miter gauge slot.
Checking miter gauge slot parallelism to disc.
Steps to adjust miter gauge slot parallelism.
Information on the optional miter gauge.
Caution to use table assembly only with the belt in vertical position.
Steps to move table assembly to the sanding arm.
Warning about table edge clearance to belt.
Description of the dust spout and connection.
Information on the adjustable dust shield.
How to adjust dust shield for disc sanding.
How to adjust dust shield for belt sanding.
Location for storing the hex wrench.
How to remove the upper sanding drum guard.
Warning to disconnect power before replacing the sanding belt.
Steps to remove guards and backstop.
Steps to remove the support bracket.
Loosening the belt tension lever.
Removing the old sanding belt.
Installing the new sanding belt onto drums.
Tightening the belt tension lever.
Reinstalling guards and backstop.
Connecting electrical power to the sander.
Warning to disconnect power before replacing the sanding disc.
Steps to remove the table assembly.
Steps to remove the lower cover.
Removing the old sanding disc.
Applying the new sanding disc to the plate.
How to surface or edge sand using the sanding belt.
Warning about backstop clearance to belt.
How to sand inside curves using the top sanding drum.
Caution to replace the drum guard after use.
How to sand outside curves on the sanding disc.
Warning to sand on the left side of the disc.
Warning about table edge clearance to disc.
How to end sand narrow workpieces using the disc.
Warning to sand on the left side of the disc.
Warning about table edge clearance to disc.
How to end sand wide workpieces using the belt.
Using miter gauge for accurate belt sanding.
Warning to sand on the left side of the disc.
Instructions for periodic cleaning of the machine.
Safety warning for using compressed air.
Troubleshooting steps if the machine fails to start.
How and when to lubricate machine surfaces.
Method for cleaning and protecting cast iron tables from rust.
Information on obtaining accessories.
Warning about using non-Delta accessories.
Information on parts, service, and warranty assistance.
Details of the two-year limited warranty for new products.
List of service center locations in the US.
List of service center locations in Canada.
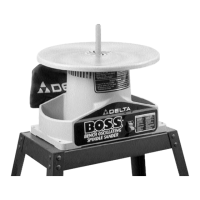
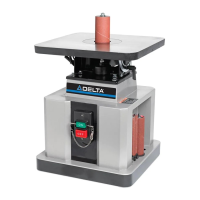
| Type | Oscillating Spindle Sander |
|---|---|
| Motor Power | 1/2 HP |
| Oscillations Per Minute | 58 OPM |
| Speed | 1725 RPM |
| Spindle Speed | 1725 RPM |
| Spindle Stroke | 1 inch |
| Spindle Sizes Included | 1/2", 1-1/2", 2" |