EasyManua.ls Logo

Delta RP70878 User Manual

Delta RP70878
16 pages
To Next Page IconTo Next Page
Page #1 background imageLoading...
Page #1 background image
Model/Modelo/Modèle
RP70878
74547
www.deltatoilet.com
FLUSH VALVE INSTALLATION
INSTALACIÓN DE LA VÁLVULA DE DESCARGA
INSTALLATION DE LA CHASSE D’EAU
You may need / Usted puede necesitar / Articles dont vous pouvez avoir besoin:
Para instalación fácil de su válvula
de descarga Delta
®
usted necesitará:
•LEER TODASlasinstruccionescompletamente
antesdeempezar.
•LEER TODOSlosavisos,cuidados,e
informacióndemantenimiento.
For easy installation of your
Delta
®
flush valve you will need:
•ToREAD ALLtheinstructionscompletely
beforebeginning.
To READ ALLwarnings,care,and
maintenanceinformation.
Pour installer votre chasse d’eau
Delta
®
facilement, vous avez besoin
des articles suivants :
•LIRE TOUTESlesinstructionsavantdedébuter;
•LIRE TOUSlesavertissementsainsiquetoutes
lesinstructionsdenettoyageetd’entretien;
1
8/10/12 Rev.A
1
Work Preparation
Turnoffthewatersupplyanddrainthetankby
flushingthetoilet.Holddownthehandletoallow
watertodraincompletely.Useatowelorsponge
toremoveanyremainingwater.Makesureall
debrishasbeenremovedpriortoinstallingnew
tankfittings.
Préparatifs
Fermezlerobinetd’arrêtetactionnezlachasse
d’eaupourviderleréservoir.Tenezlamanette
abaisséepourpermettreàl’eaudes’écouler
complètement.Enlevezlesrésidusd’eauàl’aide
d’uneservietteoud’uneéponge.Enleveztoutes
lessaletésavantd’installerlesnouveauxraccords
duréservoir.
Preparación para el trabajo
Cierreelsuministrodeaguaydrenedescargando
elaguadeltanque.Mantengapresionadalapalanca
parapermitirqueelaguadrenecompletamente.
Useunatoallaounaesponjaparaeliminar
cualquieraguarestante.Asegúresedequetodos
losresiduossehaneliminadoantesdeinstalarlos
nuevosaccesoriosdeltanque.
ASMEA112.19.5/CSAB45.15
Question and Answer IconNeed help?

Do you have a question about the Delta RP70878 and is the answer not in the manual?

Delta RP70878 Specifications

General IconGeneral
BrandDelta
ModelRP70878
CategoryControl Unit
LanguageEnglish

Summary

Work Preparation

Prepare the Work Area

Turn off water supply, drain tank, and remove debris before installing new fittings.

Tank Removal Process

Disconnect Supply Line and Components

Disconnect water supply line, refill tube, and flapper chain from the flush handle.

Remove Tank Mounting Hardware

Remove nuts and washers from tank mounting bolts under the bowl.

Lift and Place Tank Safely

Lift the tank straight up from the bowl and place it upside down on a soft surface.

Old Flush Valve Removal

Remove Old Tank-to-Bowl Seal

Remove the old tank-to-bowl seal from the flush valve tailpiece and discard.

Mark Tank Bracket Position for Reinstallation

Use a pencil to trace a line around the tank bracket for reference when reinstalling.

Unscrew Spud Nut and Remove Old Valve

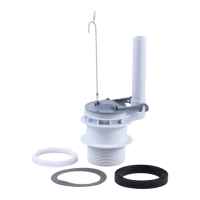
Unscrew the spud nut using a wrench or pliers to remove the old flush valve.

New Flush Valve Installation

Install New Flush Valve Tailpiece and Gasket

Slide gasket onto tailpiece, insert through tank bottom, place gasket and bracket.

Tighten Spud Nut and Align Octagon Seal

Tighten spud nut to specified torque and align the octagon shaped seal correctly.

Tank Installation Steps

Align and Secure Tank Mounting Bolts

Align bolts with holes, place outlet with seal, install washers/nuts, and tighten evenly.

Connect Water Supply and Test Flush Operation

Connect water supply, check for leaks, test flush, and adjust lift chain if needed.

Parts, Care, and Troubleshooting

Flush Valve Assembly Components List

List of parts for the flush valve assembly, including part numbers and descriptions.

Cleaning and Care Precautions

Avoid chlorine-based cleaners to prevent tank fitting damage and leaks.

Troubleshooting Common Flush Valve Issues

Solutions for problems like no flush, poor flush, or continuous fill valve operation.

Limited Warranty Information

Warranty Coverage for Toilet Parts

Details warranty periods for chinaware, mechanical parts, and toilet seats.

Warranty Exclusions and Claim Process

Excludes damage from misuse or cleaners; requires proof of purchase for claims.

Related product manuals