TT-2000 Ticket Eater™ by Deltronic Labs February 2013
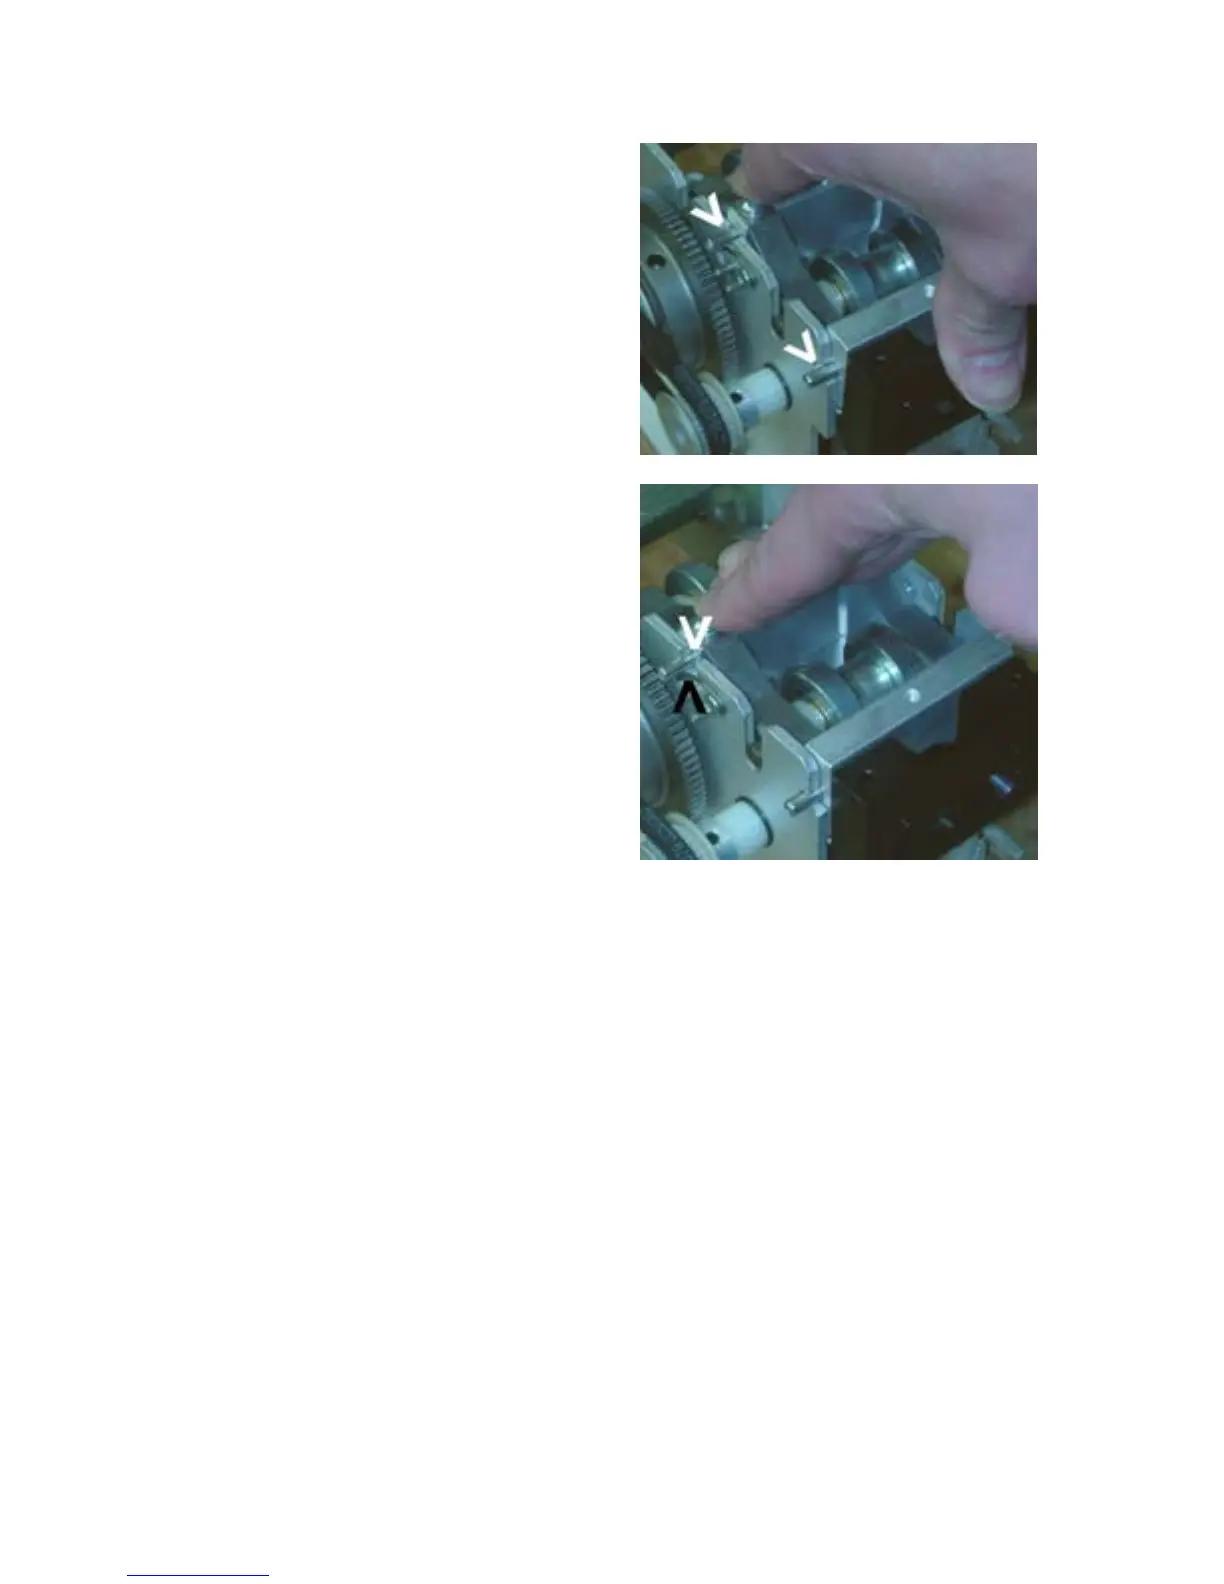
d. Pull the Guide Assembly
slightly towards you to allow
the pins to drop into their
slots.
e. Push the Guide Assembly
towards the cutter and away
from you until it stops, and
then press down firmly on the
Spring Spacer Block (it has
the Phillips head screws) to
load the springs. The springs
(black arrow) should lock the
Rear Pins (white arrow) into
their slots. See the
mechanical drawings.
3. When replacing the Cutter, make sure that it is seated all the way down so that its
gear meshes with the large gear on the Driveshaft.
4. Clean the optical sensors on the sensor board.
a. Carefully unplug the cable from the board.
b. Remove two thumbscrews.
c. Lift the board straight up.
d. Turn the board over. Carefully wipe the sensors with a soft cloth or alcohol
swab.
e. Replace the board, thumbscrews, and cable.
5. Check that the Cutter Blade is tight on its shaft. The shaft has a flat. Tighten the
cutter’s set screw against the flat.
6. Check the Cutter Blade for a build-up of dirt or adhesive from the paper. Clean
with an alcohol swab or solvent.