Rev. F, December 2020
Page 13 Pro-Wedge VM-20 Operator’s Manual
7.3
Set-up Lower Contour Roller Adjustment
Location:
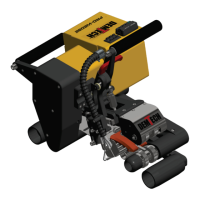
The lower contour rollers (#3 and #4, Figure 7.6) are located below the heating wedge and
are mounted to the lower frame directly in front of the lower nip roller (#2 Figure 7.6). For
the adjustment you will need a 13mm open ended wrench and a 4mm and 6mm allen
wrench.
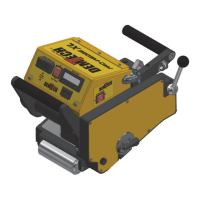
Figure 7.6
With the nip pressure lever in the up position and the wedge in the disengaged
position, insert the adjustment material that you cut earlier from the template into
the Pro-Wedge as shown in Figure 7.6 above:
Make sure the word “Top” is facing up then slide the material above and below the
wedge and between the upper and lower contour rollers as shown above. Insert just
enough in so that about 2 ¾” (70mm) of material is protruding out of the nip rollers