Rev. F, December 2020
Page 17 Pro-Wedge VM-20 Operator’s Manual
8.2
Setting Wedge Temperature
Watlow EZ-Zone Controller (4 button style)
The EZ-Zone temperature controller has a dual display. The current wedge
temperature set point is displayed on the right side of the display. The actual
wedge temperature is displayed on the left side of the display. To adjust the
wedge temperature set point, press the up arrow button to increase the set point or
the down arrow button to decrease the set point. (Refer to the Welding
Speed/Temperature Chart, Appendix A, for recommended wedge
temperature settings).
8.3
Setting Weld Speed
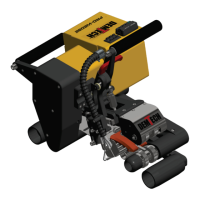
To set weld speed, use “+” and “-“ buttons on speed setting pot (#2, Figure 8.1) located on
top of control box, next to temperature control unit. Keep in mind that the three-digit
number on the speed setting pot does not relate directly to feet or meters per minute. (Refer
to the Speed Setting versus Actual Travel Rate Chart, Appendix B, for setting versus
feet per minute values).
Note on High/Low Gear: Unless otherwise specified, your Pro-Wedge has been factory set in
low gear, which gives the welder a speed range of 0-18 feet per minute (0-5.5 meters/min). You
will use this range for most all in-field geomembrane welding applications and especially ones
that require high torque such as HDPE. The main motor drive sprockets on the Pro-Wedge can
be flipped to change the ratio to high gear, changing the speed range to 0-32 ft/min (0-9.5
meters/min) for high speed seaming of thin materials and non-woven geotextiles. Speed versus
setting values are listed for high and low gear in the speed-setting chart in Appendix B.