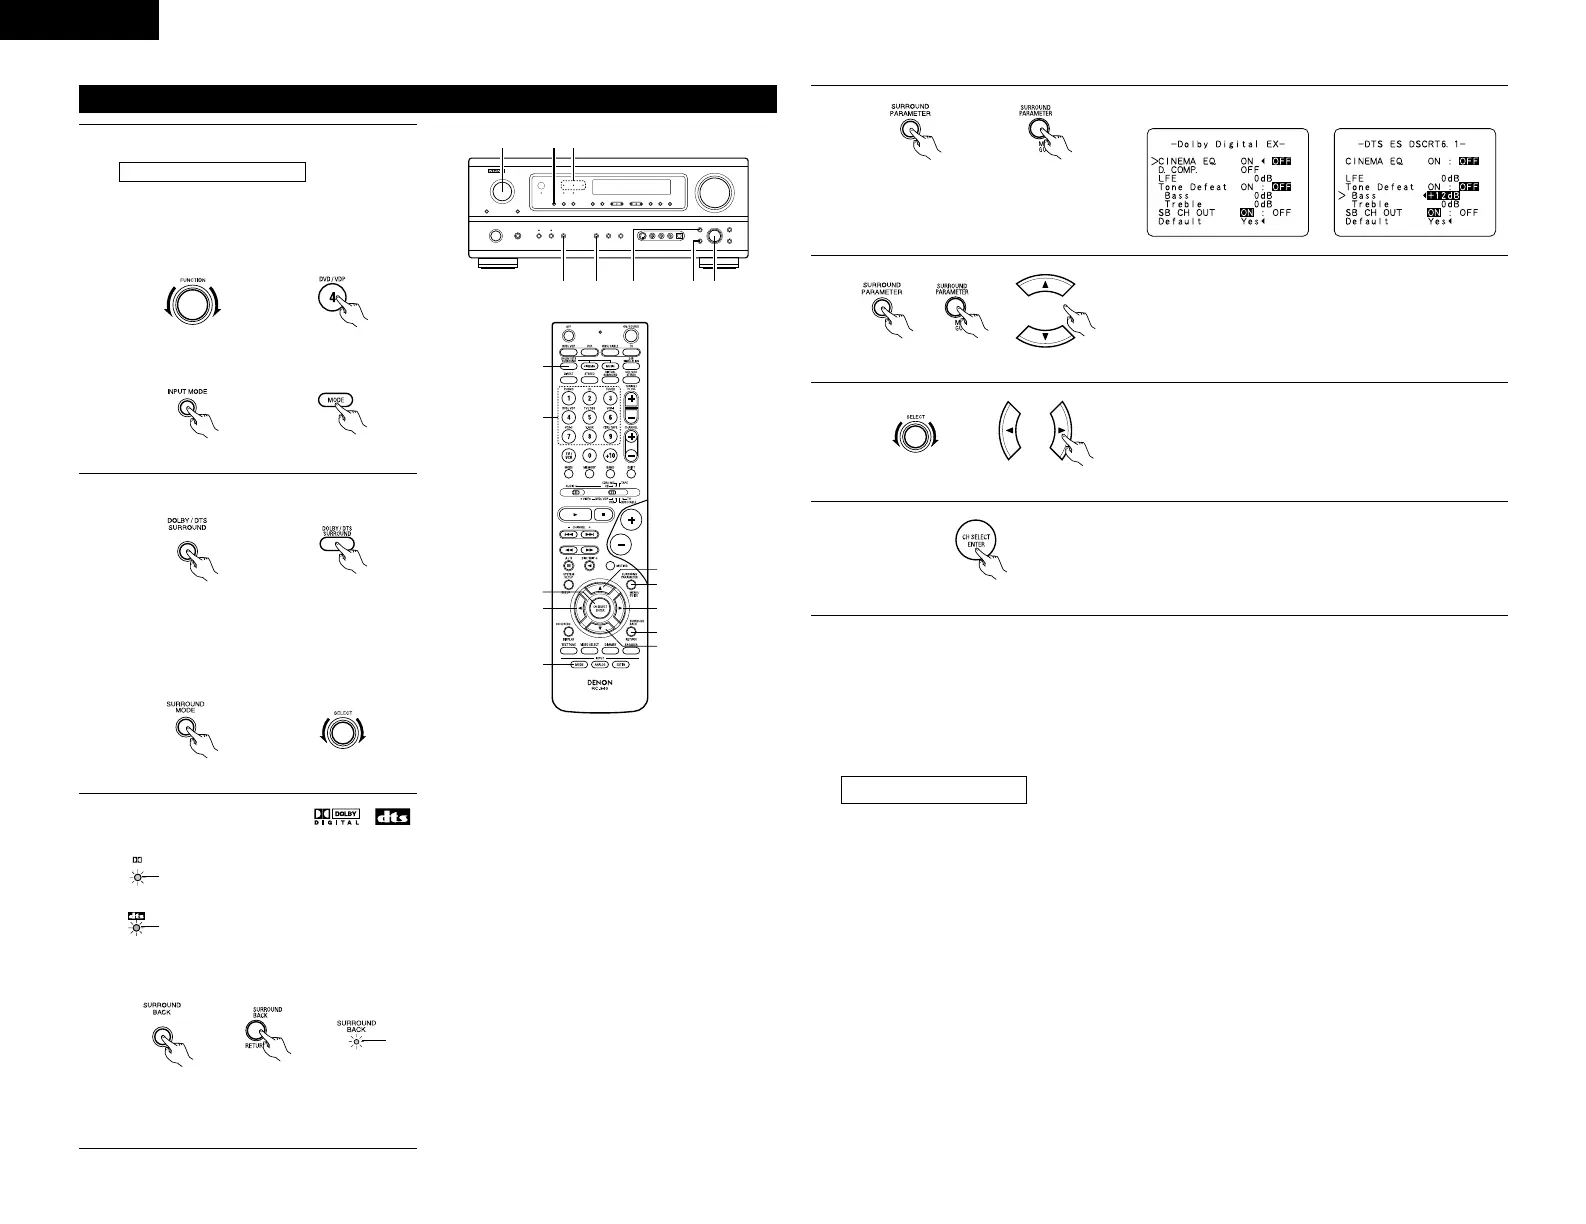
Playback with a digital input
1
Select the input source.
q Select an input source set to digital
(COAXIAL/OPTICAL) (see page 14).
Example: DVD
w Set the input mode to “AUTO” or DTS.
(Main unit) (Remote control unit)
(Main unit) (Remote control unit)
2
Select the Dolby/DTS Surround mode.
(Main unit) (Remote control unit)
3
Play a program source with the ,
mark.
• The DTS indicator lights when
playing DTS sources.
Light
• The Dolby Digital indicator lights
when playing Dolby Digital
sources.
Light
When performing this operation from the main
unit’s panel, press the SURROUND MODE
button, then turn the SELECT knob and select
Dolby Pro Logic
II or DTS NEO:6.
(Main unit) (Remote control unit)
Operate the SURROUND BACK button to
switch Surround Back CH ON/OFF.
(Main unit) (Remote control unit)
Light
• Lights when the SURROUND BACK button is
on.
4
Display the surround parameter menu.
(Main unit) (Remote control unit)
5
(Main unit) (Remote control unit)
Select the various parameters.
6
Adjust the parameter settings.
(Main unit) (Remote control unit)
7
Press the ENTER button to finish surround parameter mode.
(Remote control unit)
2 Dialogue Normalization
The dialogue normalization function is activated automatically when playing Dolby Digital program sources.
Dialogue normalization is a basic function of Dolby Digital which automatically normalizes the dialog level
(standard level) of the signals which are recorded at different levels for different program sources, such as DVD,
DTV and other future formats that will use Dolby Digital.
These contents can be verified with the ON SCREEN button.
The number indicates the normalization level when the currently playing
program is normalized to the standard level.
 Loading...