16
SPECIAL MODE
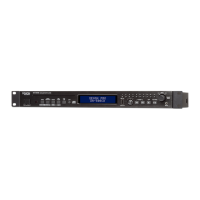
Special mode setting button
No.2, 6, 11, 15 :
d
Hold down buttons A button and B button at the same time and press the "POWER" button to turn on the power.
No.1, 4, 5, 7, 8, 9, 10, 12, 13, 14 :
d
Hold down buttons A button and B button at the same time and connect the power cord to an outlet. Each button continue
to press until the turning on POWER LED.
No.3 : Hold down the Power button for at least 3 seconds while pressing the A button.
No. Mode Button A Button B Contents
1 Initialization for the factory SOURCE
CURSOR
d
d
The setting value to default.
※
Be sure to do the "Owner’s Manual described
Initialization" after the "Factory Initialization".
f
2
Owner’s Manual described
initialization
SOURCE
CURSOR
f
d
The differences between this operation and restoring the
factory default are as follows.
d
• Does not clear the version information such as rewriting
failed log.
• Does not clear the history of protection.
• Network devices are started and initialized.
3 Version check CURSOR
d
- Version Display.
4 Product mode 1 CURSOR
1
-
d
Development/Fuctory use. Not for service.
5 Prodcut mode 2 CURSOR
0
-
d
Development/Fuctory use. Not for service.
6 Protection history SOURCE
CURSOR
0
d
Protection history view and reset.
7 "DPMS" force update
SOURCE
d
CURSOR
1
d
Forced updated by DPMS.
8 "232C" force update
SOURCE
d
CURSOR
0
d
Development/Fuctory use. Not for service.
9 MAC Address rewrite
SOURCE
d
CURSOR
f
d
Development/Fuctory use. Not for service.
10 Access to development server mode CURSOR
f
ENTER Development/Fuctory use. Not for service.
11 USB update SOURCE CURSOR
1
Updated by USB
12 "USB" force update CURSOR
d
ENTER Forced updated by USB
13 920 rewrite CURSOR
1
ENTER Development/Fuctory use. Not for service.
14 Factory rewirte CURSOR
f
- Development/Fuctory use. Not for service.
.
5V/1A
SOURCE
ON/STANDBY
LED
CURSOR f ENTERCURSOR 0
CURSOR d
CURSOR 1SOURCE

 Loading...