EN Installation
03/2020 25 / 84
Go to the start screen and tap this icon.
Tap System > Peripherals / Networks.
Tap this icon.
Give a name to each network.
Type a valid IP address for each network and for each CONNECT.
Tap this icon to validate.
Blue LEDs will be blinking during the change of configuration. They will then remain steady to indicate that the
embedded WI-FI access point is working properly.
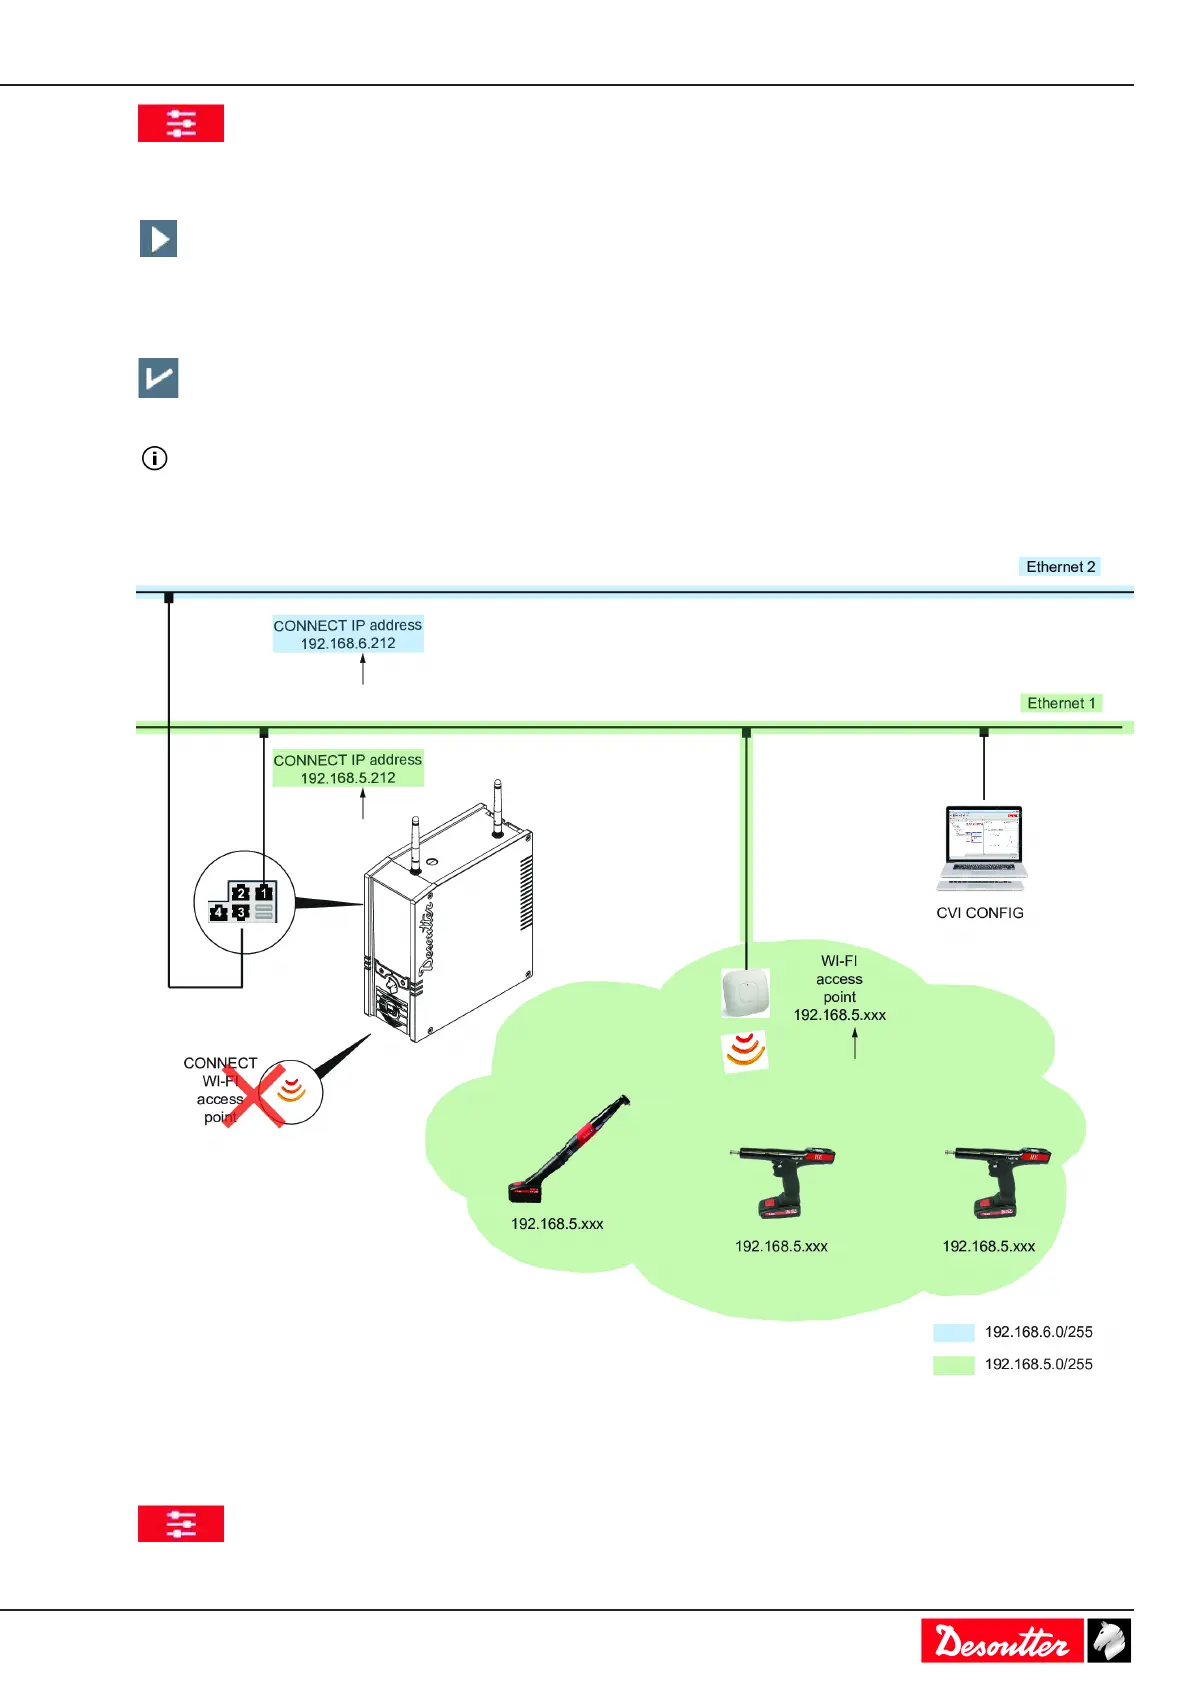
CONNECT-X or CONNECT-W with WI-FI access point unticked
Use Ethernet ports 1 OR 2 to link CONNECT to Ethernet 1.
Use Ethernet ports 3 OR 4 to link CONNECT to Ethernet 2.
Go to CONNECT.
Go to the start screen and tap this icon.