EN - 5
NOTE– A maximum of 50 feet (15 meters) of crush-proof oxygen tubing plus 7 feet (2.1 meters) of cannula plus a bubble humidier is allowed between the concentrator and
the patient.
NOTE– The oxygen supply accessory (patient tubing) shall be equipped with a means that in case of re stops the delivery of
oxygen to the patient. This means of protection should be located as close to the patient as practicable.
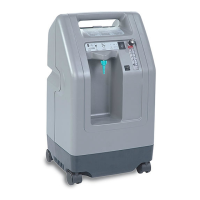
SETTING UP YOUR OXYGEN CONCENTRATOR
1. Position your unit near an electrical outlet in the room where you spend most of your time.
WARNING
Oxygen causes rapid burning. Do not smoke while your oxygen concentrator is operating, or when you are near a person utilizing
oxygen therapy. Keep the oxygen concentrator and cannula at least 2 m (6.5 feet) from hot, sparking objects or naked sources of
ame.
NOTE– Do not connect to an electrical outlet controlled by a wall switch. No other appliances should be plugged into the wall outlet.
2. Position your unit at least 6 inches (16 cm) from walls, draperies, or any other objects that might prevent the proper ow of air in and
out of your oxygen concentrator. The oxygen concentrator should be located so as to avoid pollutants or fumes.
BEFORE OPERATING YOUR OXYGEN CONCENTRATOR
1. Before operating your unit, always check to be sure the air lter (located on the back of your unit) is clean. Proper cleaning of this lter
is discussed in the Caring For Your Concentrator section on page 6.
2. Attach the appropriate oxygen accessories to the oxygen outlet.
Oxygen Tubing Connection:
a. Thread the oxygen outlet connector onto the oxygen outlet.
b. Attach the oxygen tubing directly to the connector (Figure 1).
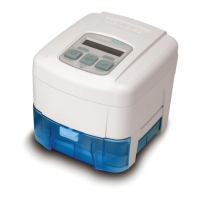
Oxygen Tubing Connection With Humidication:
If your physician has prescribed an oxygen humidier as part of your therapy, follow these steps (If using a prell, go to step b.):
a. Fill the humidier bottle with distilled water. Do not overll.
b. Thread the wing nut located on the top of the humidier bottle to the oxygen outlet so that it is suspended (Figure 2). Make sure it
is securely tightened.
c. Attach the oxygen tubing directly to the humidier bottle outlet tting (Figure 3).
3. Your physician has prescribed either a nasal cannula or face mask. In most cases, they are already attached to the oxygen tubing. If
not, follow the manufacturer’s instructions for attachment.
4. Remove the power cord completely from the line cord strap. Make sure the power switch is in the “Off” position, and insert the plug into
the wall outlet. The unit is double insulated to guard against electric shock.
NOTE– (only 115 volt units) The plug on the DeVilbiss oxygen concentrator has one blade wider than the other. To reduce the risk of electric
shock, this plug is intended to t in a wall outlet only one way. Do not attempt to defeat this safety feature.
WARNING
Improper use of the power cord and plugs can cause a burn, re, or other electric shock hazards. Do not use the unit if the power
cord is damaged.
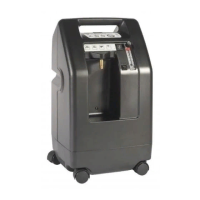
OPERATING YOUR DEVILBISS OXYGEN CONCENTRATOR
WARNING
Oxygen causes rapid burning. Do not smoke while your oxygen concentrator is operating, or when you are near a person utilizing oxygen therapy. Keep the
oxygen concentrator and cannula at least 2 m (6.5 feet) from hot, sparking objects or naked sources of ame.
The DeVilbiss oxygen concentrators manufactured since July 1, 2012 are equipped with a re mitigating outlet tting that
prevents propagation of re into the unit. DeVilbiss oxygen concentrators manufactured prior to July 1, 2012 must be
retrotted by your provider with the re mitigating outlet tting.
In order to prevent a re propagating from the patient through the cannula towards the unit, a means of protection should be
located as close to the patient as practicable. Please contact your provider for this means of protection.
1. Press the power switch to the “On” position. When the unit is turned “On,” all four lights (Power, Service Required, Low Oxygen,
and Normal Oxygen) on the front panel will illuminate briey and audible signal will briey alarm. After a few seconds, only the Power and Normal Oxygen lights will
remain lit.
NOTE– DeVilbiss recommends for optimal service life that the DeVilbiss Oxygen Concentrator to be operated for at least 30 minutes after it is powered on. Shorter periods of
operation may affect the long term reliable operation of the product.
WARNING
Oxygen makes it easier for a re to start and spread. Do not leave the nasal cannula or mask on bed coverings or chair cushions if the oxygen concentrator is
turned on but not in use, the oxygen will make the materials ammable. Turn the oxygen concentrator off when not in use to prevent oxygen enrichment.
NOTE– If the Service Required light illuminates and the audible signal alarms but the unit is not operating, there is no power to the unit. Refer to the Minor Troubleshooting
chart on page 7 and contact your DeVilbiss provider if necessary.
NOTE– If an audible low-frequency vibration sound is detected, the unit is not operating properly. Refer to the Minor Troubleshooting chart on page 7, and contact your
DeVilbiss provider if necessary.
2. Check the ow meter to make sure that the ow meter ball is centered on the line next to the prescribed number of your ow rate.
CAUTION– It is very important to follow your oxygen prescription. Do not increase or decrease the ow of oxygen – consult your physician.
NOTE– Your DeVilbiss provider may have preset the ow meter so that it can not be adjusted.
NOTE– If the ow meter knob is turned clockwise, the ow decreases (and eventually will shut off the oxygen ow). If the knob is turned counterclockwise, the ow increases.
CN-525K3
1
3
2
NO SMOKING