Page 11SB-2-855-B
PARTS REPLACEMENT/MAINTENANCE
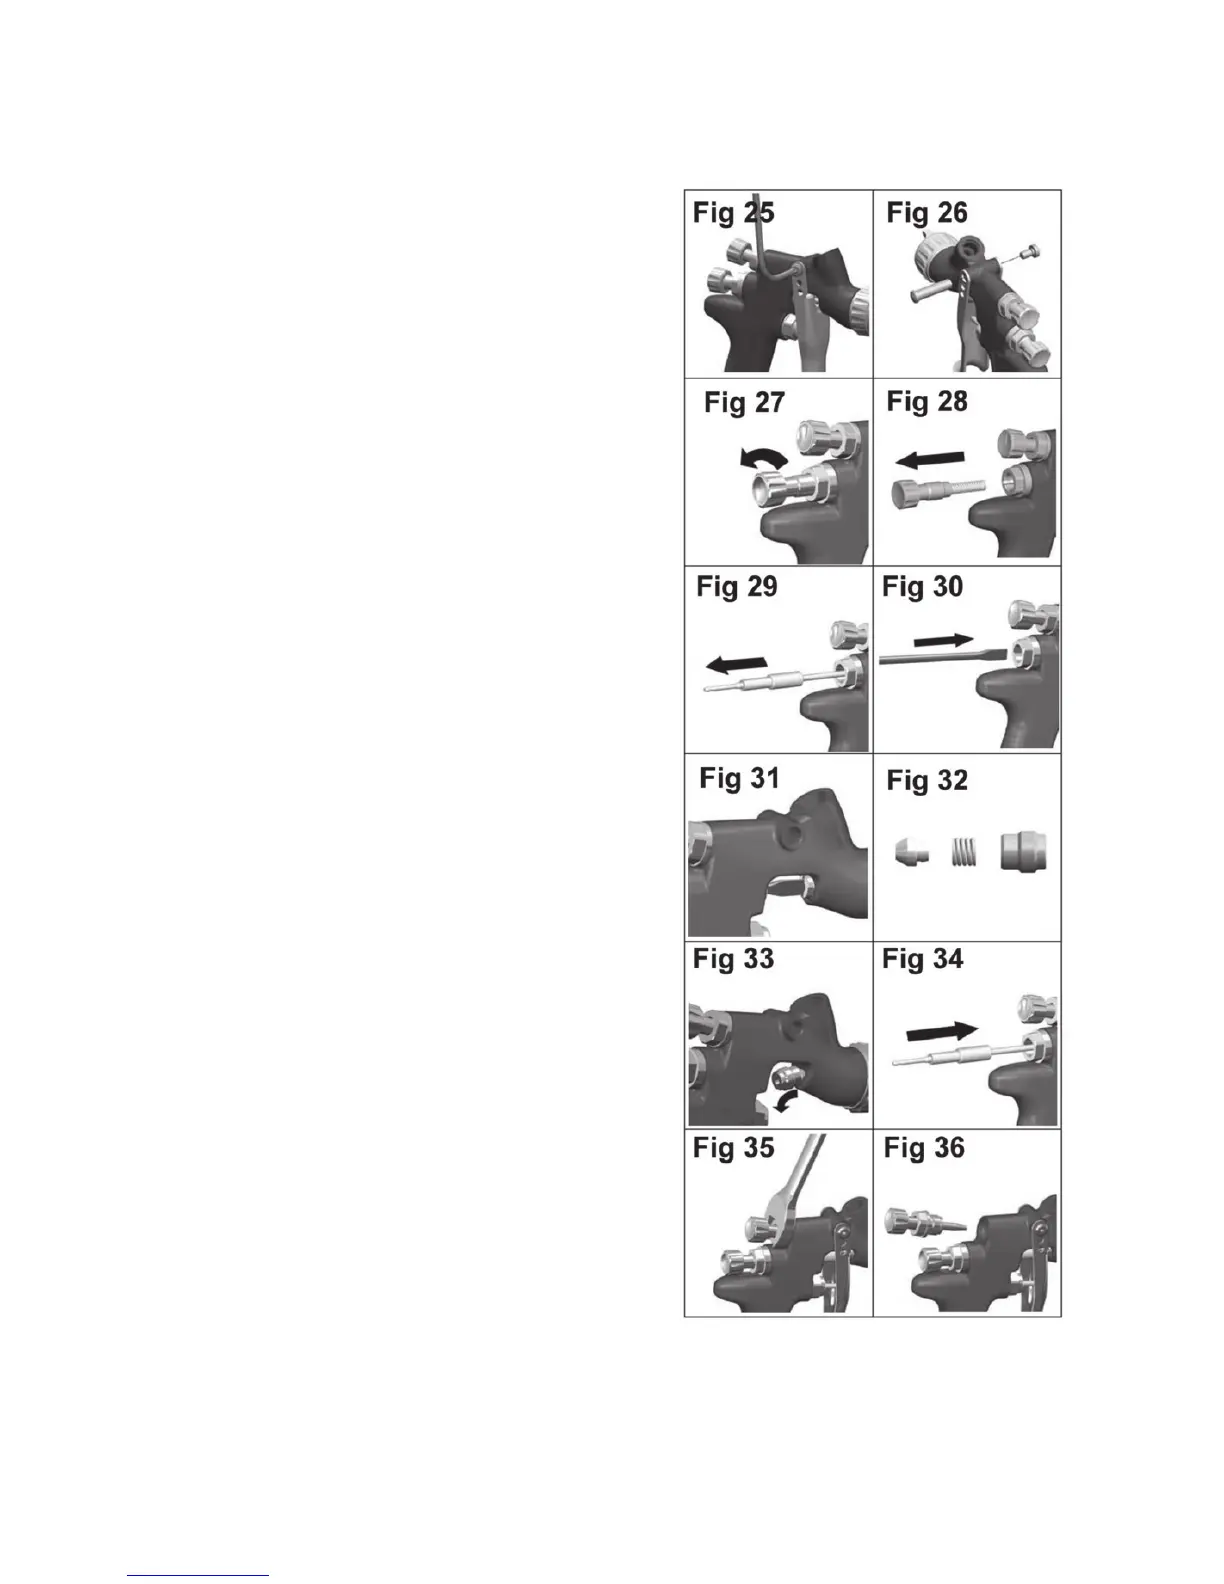
NEEDLE PACKING INSTRUCTIONS
Replacing Needle Packing
13. Remove trigger using a Star (T20) key. (See figs 25
& 26)
14. Remove fluid adjusting knob and needle spring with
spring pad from gun. (See figs 27 & 28)
15. Remove fluid needle from gun body. (See fig 29)
16. Loosen and remove packing nut using a straight
blade screwdriver. (See figs 30 & 31)
17. Discard old packing and packing spring if replacing.
Clean packing if reusing. Also clean packing spring
and nut. (See fig 32)
18. Re-assemble the packing, (See fig 32). Assemble
into gunbody by hand (see fig 33) and then tighten.
(See figs 30 and 31)
19. Insert fluid needle all the way into gun body seating
in fluid nozzle. (See fig 34)
20. Insert needle spring, spring pad, and fluid adjusting
knob. (See figs 28 & 27). Reinstall trigger. (See figs
25 & 26)
21. Trigger gun fully and screw in fluid adjusting knob
until it stops. Back it off 1/2 turn and gun will have
full needle travel.
22. Trigger gun several times to verify correct operation.
SPREADER VALVE ASSEMBLY
REPLACEMENT/MAINTENANCE
The spreader valve assembly can be replaced if
damaged. Remove using a 14 mm wrench (See figs
35 & 36). The internal seal can be replaced and is
included in the PRO Gun Rebuild Kit.