Page 10 SB-2-855-B
PARTS REPLACEMENT/MAINTENANCE
AIR VALVE INSTRUCTIONS
Replacing Air Valve
Reasons to replace air valve:
A) Air leak through the gun.
B) Air valve not operating correctly.
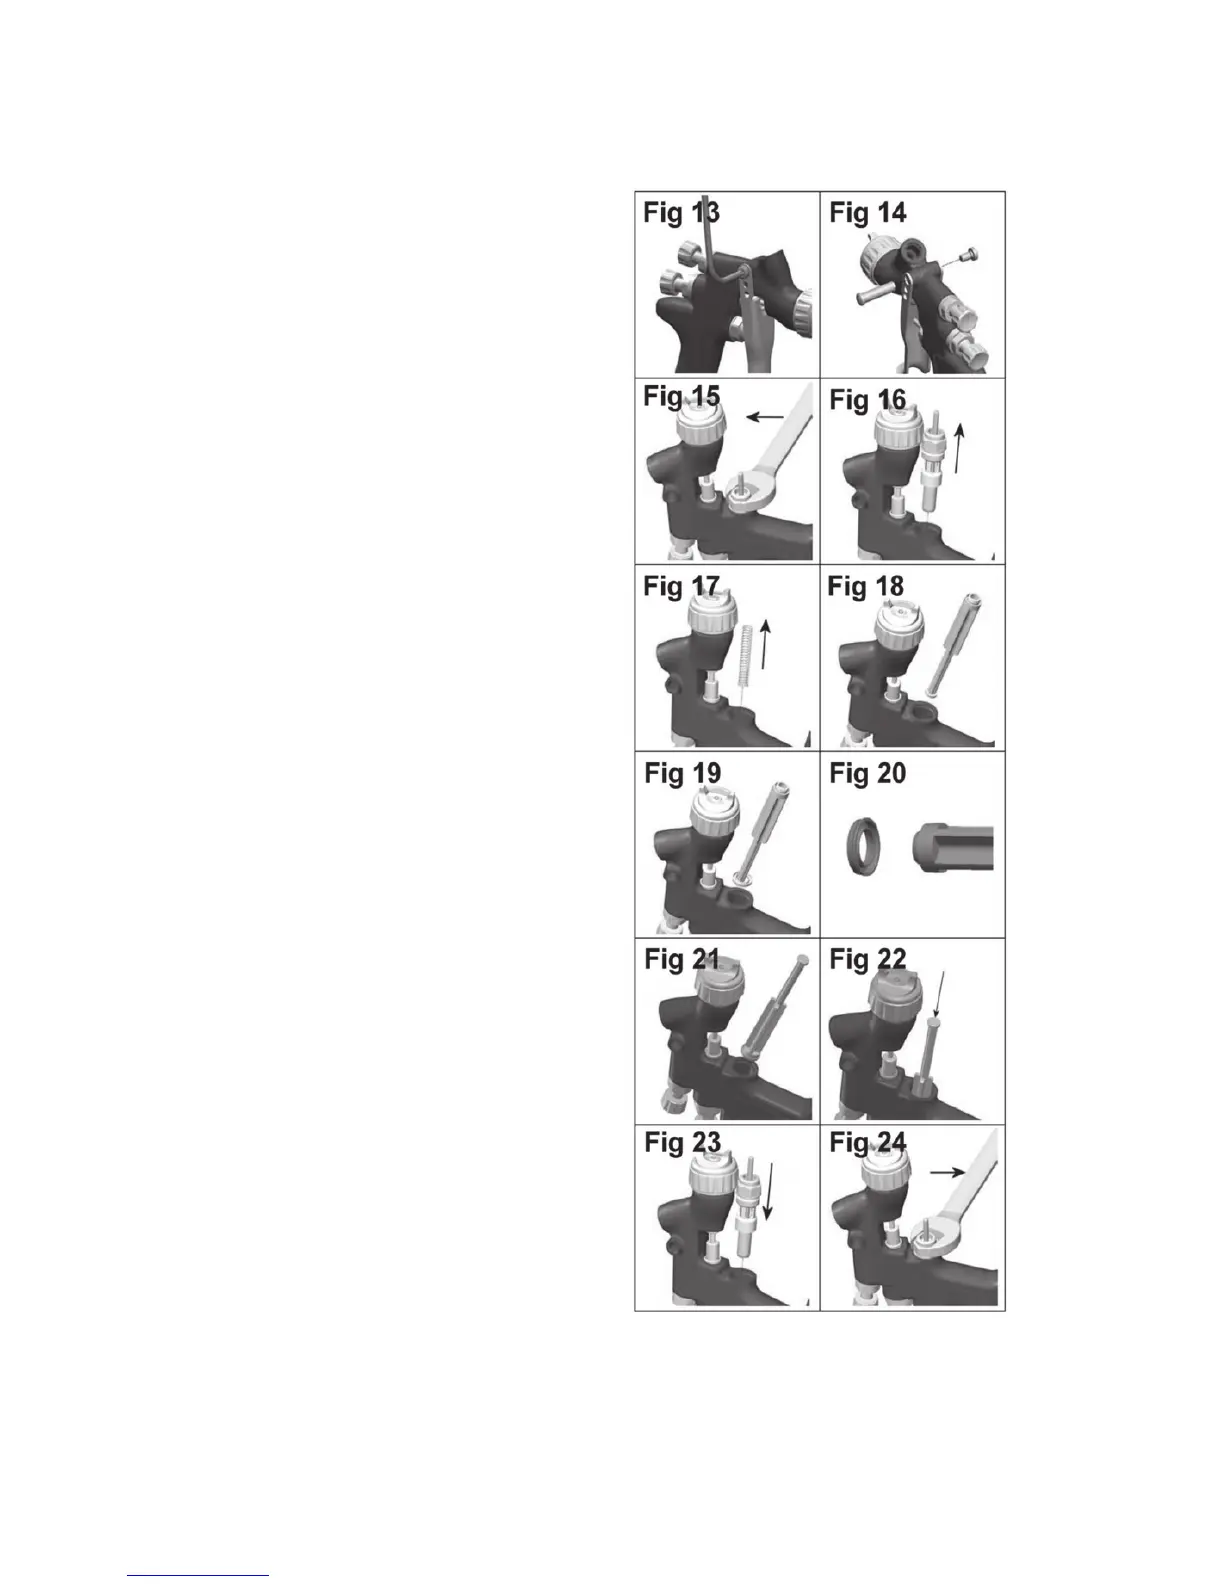
1. Remove trigger using a Star (T20) key. (See figs 13
& 14)
2. Unscrew air valve using a 14 mm wrench. (See fig 15)
3. Remove air valve by gripping the stem. (See fig 16)
4. Remove spring with spring pad. (See fig 17)
5. Hook out rear seal using Service Tool (46). (See figs
18 & 19)
6. Clean air valve bores in gun body with a brush.
7. Place new rear seal onto Service tool (46); grooves
must fit in service tool form. (See fig 20)
8. Push rear seal firmly into hole up to shoulder, using
Service tool. (See figs 21 & 22)
9. Insert new spring, ensuring the end with the plastic
bearing pad goes in first. (See fig 17)
10. Insert air valve assembly into gun and carefully feed
over the spring and through the rear seal. (See fig
23)
11. Tighten air valve assembly using fingers first, then
tighten with a 14 mm wrench. (See fig 24)
12. Replace trigger. (See figs 14 & 13)