11
To operate the machine, follow this procedure:
1 Set any exposed nails with a hammer and punch to avoid encounter
with sanding drum. Connect the machine to an appropriate
gounded and fused circuit (power supply). Press the selector switch
the start (S) position. Once started, allow switch to return to run (R)
position.
CAUTION:
To prevent damage to the surface, make sure the machine is always
moving when the sanding drum is in contact with the floor.
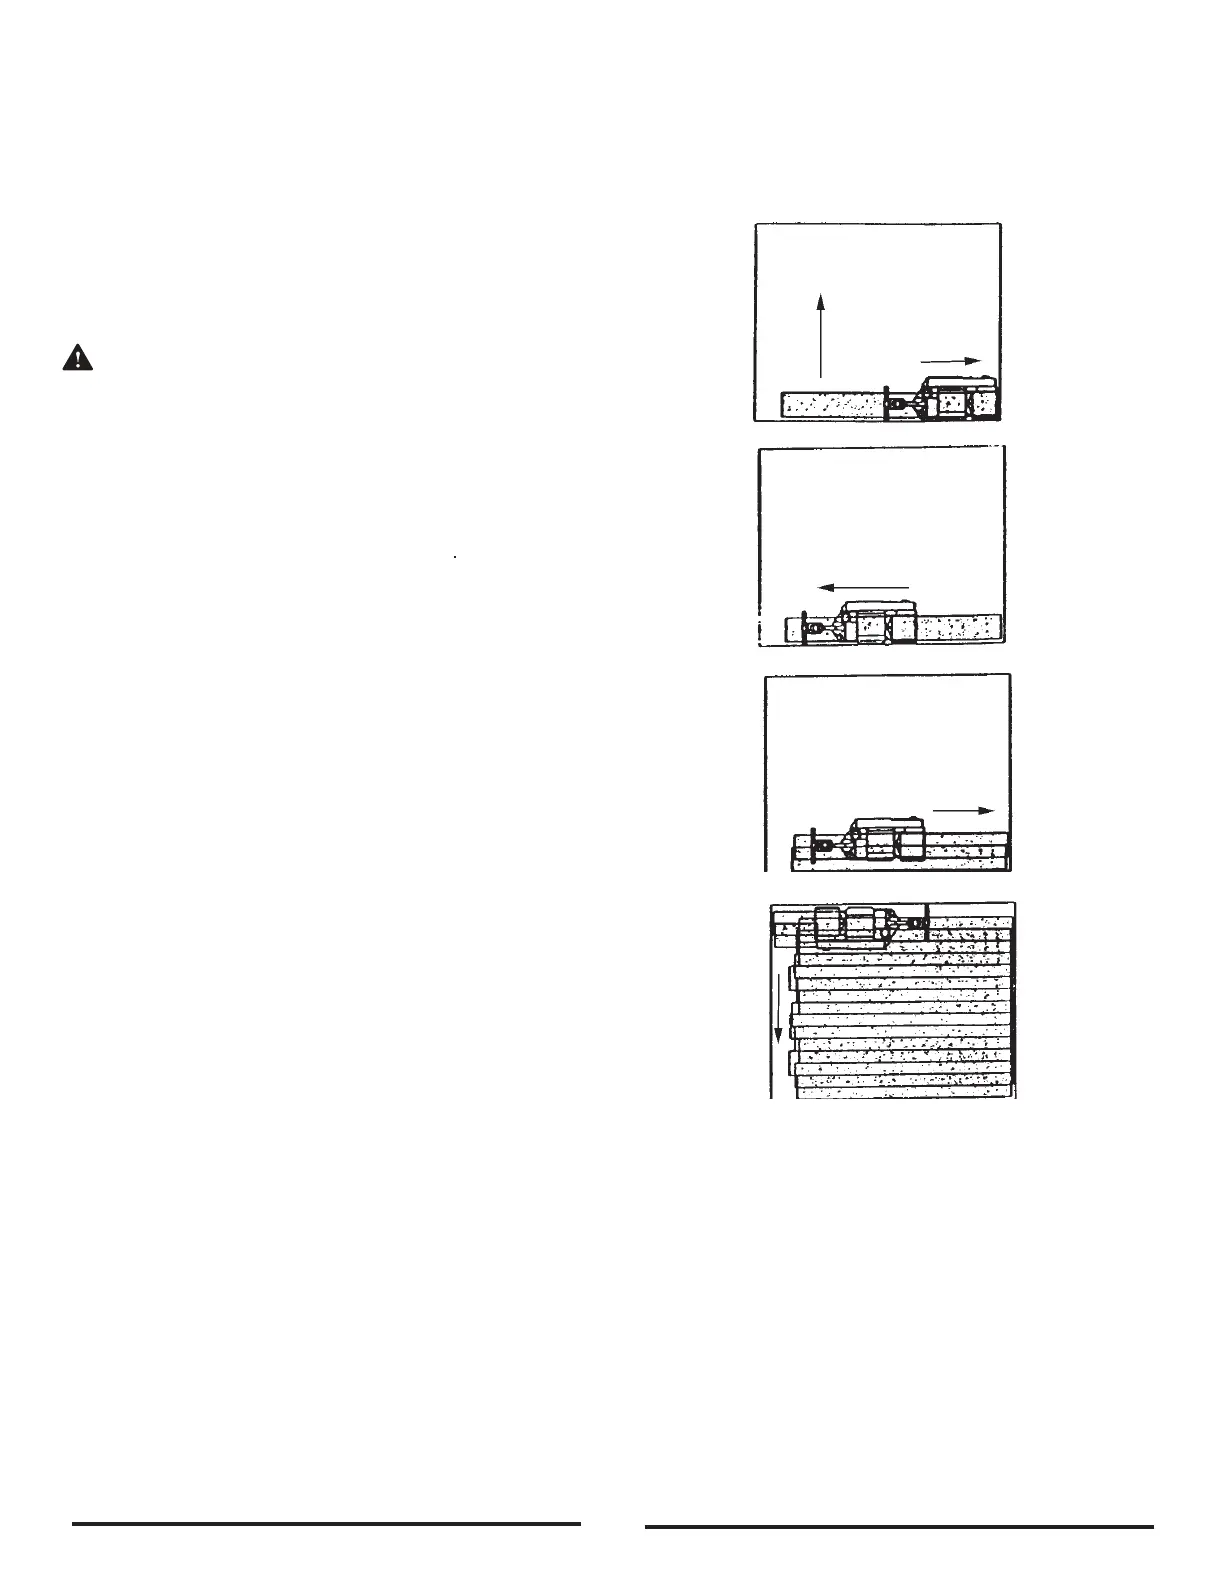
2 Work right to left. For each forward pass, move the ma chine 4" over
the pass you have just nished. Retrace your reverse path without
overlapping. (See Figure 11)
3 Feather-cut in by easing the sanding drum down onto the surface
with the control lever while the sander is in motion.
4 When sanding drum is fully engaged with the surface, release
control lever and adjust your pace for adequate stock removal.
Keep sander in motion while the sanding drum is
engaged with the surface or dwell marks will occur.
5 Move the machine in the direction of the grain in the wood
whenever possible. Sand the surface at a constant pace.
6 Gradually feather-cut out at the termination point (the end of your
pass) by easing the sanding drum up with the control lever. Stagger
the termination points for a better blend when edging.
(See gure 11)
7 When replacing abrasive, emptying contents of dust bag, or
when sanding operation is completed, press selector switch to o
(0) position. Disconnect the machine from the power supply.
8 Empty dust bag whenever it is 1/3 full. Never leave a dust bag
unattended with sanding dust in it. Sanding dust can spontaneously
ignite and cause a re or explosion. Empty dust into a metal
container clear of any combustible material.
Sanding Cuts and Sandpaper
Initial Cut
The purpose of the initial cut is to remove old nish and gross imperfections on the oor surface. A coarse abrasive should be used. If the surface is
severely damaged by deep scratches, pre-existing dwell marks, uneven planks, etc., it may be necessary to sand across or diagonally to the grain to
restore evenness to the surface. If these conditions are not present, the initial cut should be done in the direction of the grain.
If glazing, loading, or burning takes place immediately into an initial cut, select a coarser abrasive. If this should occur during an initial cut, the
abrasive has dulled and must be replaced.
Final Cuts
The purpose of a nishing cut is to remove the scratches produced during the initial cut. Use a ne (60 - 80 grit) grain abrasive.
If the surface remains rough after a nishing cut, it may be necessary to use an even ner grain of abrasive (80 - 100 grit). Care should be taken in
selecting the grit size of the abrasive. A very ne grain will close the pores on a wood oor making admission of a stain dicult.
If glazing or burning should occur immediately into a nishing cut, increase pace. If it should occur during a nishing cut, the abrasive has dulled and
must be replaced.
Figure 11
1
3
2
4
ENGLISH
OPERATING INSTRUCTIONS