11.9
Circle
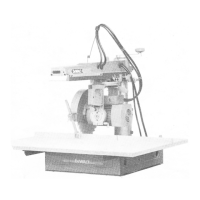
Cutting
(Fig.
38)
Although
a
circular
saw is
normally thought
of as
only able
to
make straight
cuts,
cutting
perfect circles
is
also quite
straightforward
on
your radial
arm saw
using only
the
standard
circular
saw
blade.
Cramp
a
false table
to the
main one,
or
substitute
a
strip
as
thick
as the
table
itself
in
place
of the
fence.
Use a
woodscrew
as a pin and
screw this part
way
into
the
chosen
aid,
and
then
saw the
head off. Make
a
hole
in the
underside
of the
wood, from
which
the
circle
is to be
formed,
and
then
fit to the
pin.
Lower
the
blade just clear
of
the
wood,
and
lock
the
carriage
at a
tangent
to the
proposed
circular
cut.
Hold
the
wood firmly
and
lower
the
arm by
half
a
turn. Then using both hands rotate
the
wood
on the pin in a
clockwise direction against
the
blade.
After
each
revolution
lower
the arm by
half
a
turn
until
all the
waste
is cut
away,
and the
circular piece
is
formed.
Fig.
38
12.
OPERATION
OF THE
MACHINE WITH OPTIONAL ATTACHMENTS
AND
ACCESSORIES
Even
in its
standard form with
the
basic general purpose
sawblade,
the
Powershop
is
already more versatile than
any
other type
of
sawing system.
The
range
of
optional attachments, however,
add a
further
dimension
to
your woodworking potential. They
will
turn
your
Powershop into
a
complete workshop.
You
will
find
the
optional
TCT saw
blades prove
advantageous, particularly when cutting hardwoods
and
man-made
materials.
TCT
blades require less frequent
'sharpening
and
have
a
much longer
life
than ordinary steel
blades.
Note:
Never
use
blades larger than 250mm diameter
—
an
imperial
10"
blade
measures 254mm diameter
and is
therefore
too
large.
Before
mounting
or
changing
any
attachments
or
accessories,
disconnect your Powershop from
the
mains
power supply.
12.1
Shaping/
Moulding
Adding
that
professional
finish
to
your work with
a
clean
decorative
edge
is
quick
and
easy with
the
optional
DeWalt Shaping Head
attachment
(Fig.
39).
It can
also
be
used
for
cutting
round grooves
and for
drawer,
and
tongue
and
groove joints.
The
range
of
cutter profiles available
is
illustrated
in the
list
at the
back
of
this booklet.
The
DeWalt Shaping/Moulding Head
is
mounted
on the
motor arbor
as
follows:
(i)
Remove
the saw
blade guard, arbor
nut,
blade
flanges
and saw
blade.
(ii) Mount
the
special back flange(s) (supplied with
the
Shaping Head) onto
the
motor arbor.
(iii)
Now put the
Shaping Head
on the
motor
shaft
with
the
recessed centre facing outwards
and
then lock
it
into position with
the
special clamping
nut,
using
the
special
box
spanner (Fig. 40).
(iv)
Fit the
required pair
of
shaping knives
in the
Head
or
Block
carefully setting them
so
they both protrude
to
the
same extent beyond
the
outside edge
of the
Block
itself.
Fig.
39
Fig.
40
19