INTRODUCTION
'
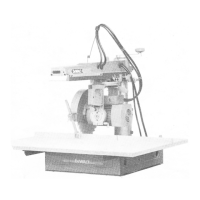
Your
DeWalt Radial
Arm Saw is a
precision woodworking
machine
and
before leaving
the
factory
the
machine
was set and
adjusted
to
operate accurately.
Inevitably,
however, during transportation
and
handling, some
of
these settings
will
have
been
disturbed
and it
will
be
necessary
for you to
check
and
readjust
the
machine before
you are
able
to
obtain
the
precise
woodworking
results
for
which this Radial
Arm Saw was
designed.
This
is not a
difficult
process
but we
recommend
you
to
follow these instructions carefully
and
in
fhe
sequence given before
you
attempt
to
start working with your machine.
In
addition
to the
setting-up instructions,
the
following pages also include
a
short
guide
to the
safe operation
of
this versatile
machine. Again,
follow
these instructions carefully, until
you
have learnt
the
fundamentals. After
that,
your
own
ingenuity
and
imagination will determine
how
much versatility
you can
extract from your DeWalt Powershop.
DeWalt products
are
covered
by a
manufacturer's guarantee.
If,
during
the
guarantee period
of 6
months from purchase date,
a
DeWalt
product becomes defective
due to
faulty materials
or
workmanship. Black
&
Decker
guarantee
to
repair
it
free-of-
charge, provided that:
1.
The
product
has not
been misused.
2.
Repairs
have
not
been attempted
by
persons other than
our own
Service
Staff
or the
staff
of
authorised repairers.
3.
Proof
of
purchase date
is
produced.
For
the
address
of
your nearest DeWalt Service
&
Repair Centre, telephone Black
&
Decker
on
Slough(0753) 74277.
CONTENTS
THE
CONTROLS
INTRODUCTION
SAFETY
—
IMPORTANT DO'S
AND
DON'TS
5.
6.
7.
8.
Page
No.
.
... 2
3
4
.
... 5
6
1.
UNPACKING
&
ASSEMBLY:
2.
ADJUSTING TABLE
TOP
PARALLEL WITH
ARM
3.
ASSEMBLY
OF
WORKTABLE ONTO SUPPORT
BRACKETS
4.
CHECKS
&
ADJUSTMENTS
TO
ENSURE ACCURACY
4.1
Checking
the
Crosscut Travel
is
90
C
to
the
Fence
8
4.2
Checking
the Saw
Blade
is
Parallel
to the
Arm
Tracks
9
4.3
Checking
the
Blade
is
Perpendicular
to
Table
10
4.4
Adjusting
Roller
Head Bearing
to Arm
Tracks
10
4.5
Adjusting Base
to
Column
11
THE
SAWBLADE
GUARD
... 12
5.1
Mounting
the
Blade Guard
12
5.2
Adjusting
the
Blade Guard
12
5.3
Removing
the
Blade Guard
5.4
Removing
the
Sawblade
MAKING
A
TRIAL
CUT
6.1
Wiring
up to the
Mains
...
6.2
Making
the Cut
SCALE ADJUSTMENTS
7.1
Rtp
Scale
7.2
Bevel Scale
7.3
Mitre Scale
CLAMP
HANDLE
ADJUSTMENTS
12
12
13
13
14
14
14
15
9.
HINTS
ON
GENERAL CARE
OF
YOUR POWERSHOP1
5
Page
No.
10. THE
VARIOUS OPERATING
ADJUSTMENTS
OF
BASIC
MACHINE
101
Arm
Rotation
16
11
10.2
Blade Height
10.3
Yoke Assembly Rotation
10.4
Blade
Tilting
MAKING
THE
BASIC
CUTS
16
16
16
16
11.1
CrossCut
11.2
Mitre
Cut 17
11.3
Bevel
Cut 17
11.4
Ripping
17
11.5
Bevel Ripping ...'
18
11.6
Compound Mitre
18
11.7
Coving/Hollowing
18
11.8
Dishing
18
11.9
Circle
Cutting
'
19
12.
OPERATION
OF THE
MACHINE
WITH
OPTIONAL
ATTACHMENTS
AND
ACCESSORIES
12.1
12.2
12.3
12.4
12.5
12.6
12.7
12.8
12.9
12.10
12.11
Shaping/Moulding
19
Rebating
20
Ploughing/Grooving
21
Disc Sanding
21
Drum Sanding
22
Sabre
Sawing
' 22
Routing
Drilling/Boring
Special Mitre Fences
Automatic Safety Return
Legstands
... ...
LIST
OF
ATTACHMENTS
&
ACCESSORIES
23
24
24
24
24
26