RPM4™ OPERATION AND MAINTENANCE MANUAL
© 2004-2007 DH Instruments, a Fluke Company Page 8
2.2 SITE REQUIREMENTS
Install RPM4 on a flat, stable surface at a convenient height. The front feet can be extended so that the
unit can be inclined for easier viewing. The RPM4 can also be mounted in a standard 19 in. rack mount
using the optional rack mount kit.
2.3 SETUP
2.3.1 PREPARING FOR OPERATION
To prepare RPM4 for check out and operation:
Remove the plastic caps from the RPM4 rear panel pressure connections.
Remove the protective plastic sheet from the front panel display.
Familiarize yourself briefly with the front and rear panels (see Section 2.3.2).
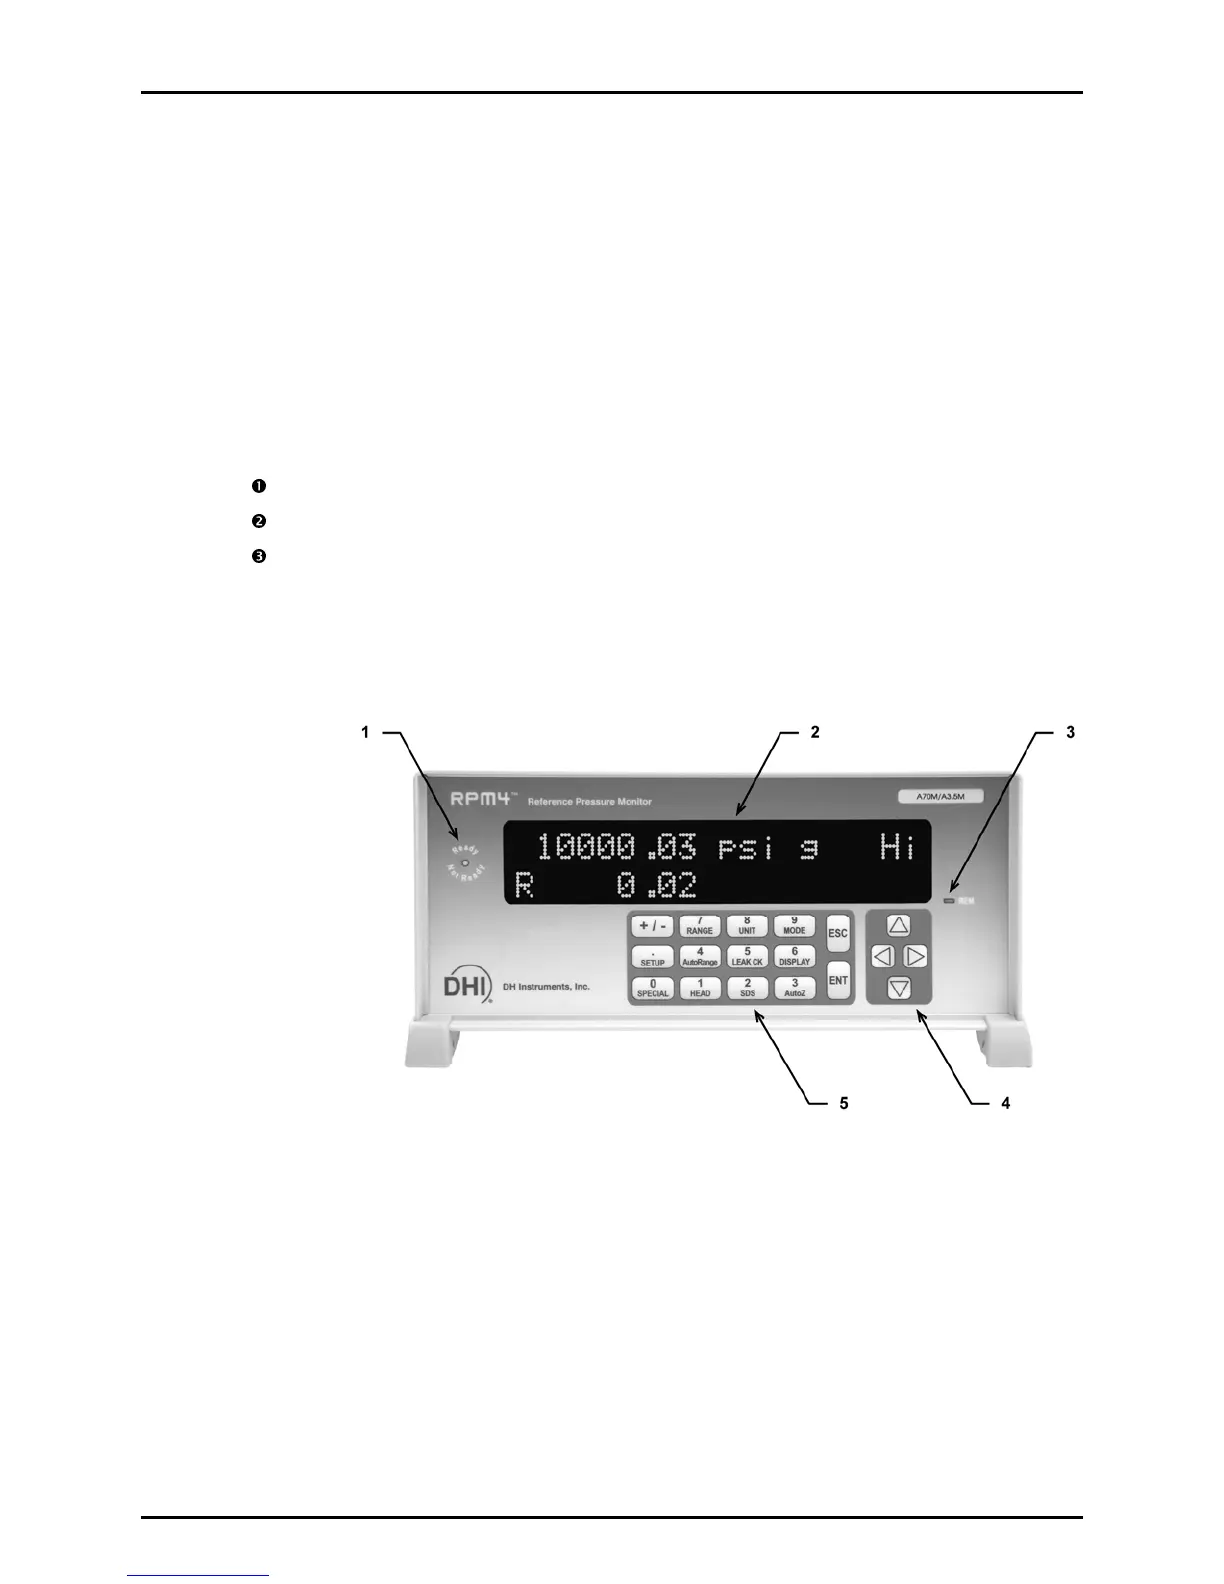
2.3.2 FRONT AND REAR PANELS
2.3.2.1 FRONT PANEL
1. Ready/Not Ready Indicator
2. Display
3. Remote Activity Indicator
4. Cursor Control Keys
5. Multi-Function Keypad
Figure 1. Front Panel
 Loading...