• 11 •
ENGINE STARTING NOTES
During the starting sequence listed
above, the charger is set to one of
four states:
• Wait for ready – The charger
charges the battery for 2 minutes
before the Wait for Cranking state.
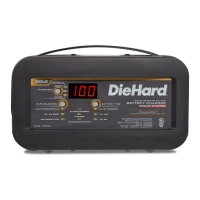
While waiting for ready, the digital
display shows On and the engine
can be cranked. For severely dis-
charged batteries, it is not recom-
mended to crank during this time.
• •Wait for cranking – The charger
waits until the engine is actually
being cranked before delivering
the amps for engine start. While
waiting for cranking, the digital
display shows rdy.
• Cranking – When cranking
is detected, the charger will
automatically deliver up to its
maximum output as required by the
starting system for up to 7 seconds.
• Cool Down – After repeated
cranking during a 3-minute ready
period, the charger enters a
mandatory 3 minute (180 second)
cool-down state. Cranking will not
be detected during this time and
therefore no high output amps for
engine start. The digital display
indicates the remaining cool-
down time in seconds. It starts at
180 and counts down to 0. After
3 minutes, the digital display
will change from displaying the
countdown to displaying rdy, and
the charger will be back in the
Wait for Cranking state described
above. After 2 hours of Engine
Starting, the unit will automatically
exit from the charging mode, just
as if the Rate Selection button had
been pressed; the Charging LED
will not be lit.
POWER-UP AUTO-START
This charger is equipped with an
auto-start feature after application
of power. If the Rate Selection
button is not pressed within 30
seconds, the unit will search for a
battery. If the unit detects a battery
that is properly connected, the unit
will set the rate to Boost (its LED
will light), battery type will be set to
AGM, it will automatically start the
charge process, and the Charging
(yellow/orange) LED will light.
FAN OPERATION
The fan will operate as needed
and it is normal for the fan to
sometimes operate continuously.
Keep the area near the charger
clear of obstructions to allow the
fan to operate efciently.
TESTER AND CHARGER
When rst turned on, the unit
operates only as a tester, not as a
charger. Selecting a charge rate or
waiting 30 seconds (see Power-Up
Auto-Start above) activates the
battery charger and deactivates the
tester. Pressing the Rate Selection
button when charging (indicated
by the Charging LED lit) will stop
charging and activate the tester.
USING THE BATTERY VOLTAGE
TESTER
1. With the charger unplugged
from the AC outlet, connect
the charger to the battery,
following the instructions given
in previous sections.
2. Plug the charger AC power
cord into the AC outlet.
3. Press the Battery Type
button until the correct type is
indicated.
4. Read the voltage on the digital
display. Keep in mind that
this reading is only a battery
voltage reading; a false surface
charge may mislead you.