SmartSource Elite Series - Installation & Operations Guide
January 2017 8227 4907-003 Page 23 of 32
With the inkjet cartridge removed and the front cover opened, clean the track walls using a soft cloth
moistened with water.
The inkjet cartridge has a ‘priming’ function, in which it prints into an empty track to test that the cartridge
is working correctly. To catch ‘priming’ ink, a felt pad is built into the track wall opposite the endorser.
This felt pad is large enough to absorb all of the ‘priming ink’ that will be used in the normal lifetime of the
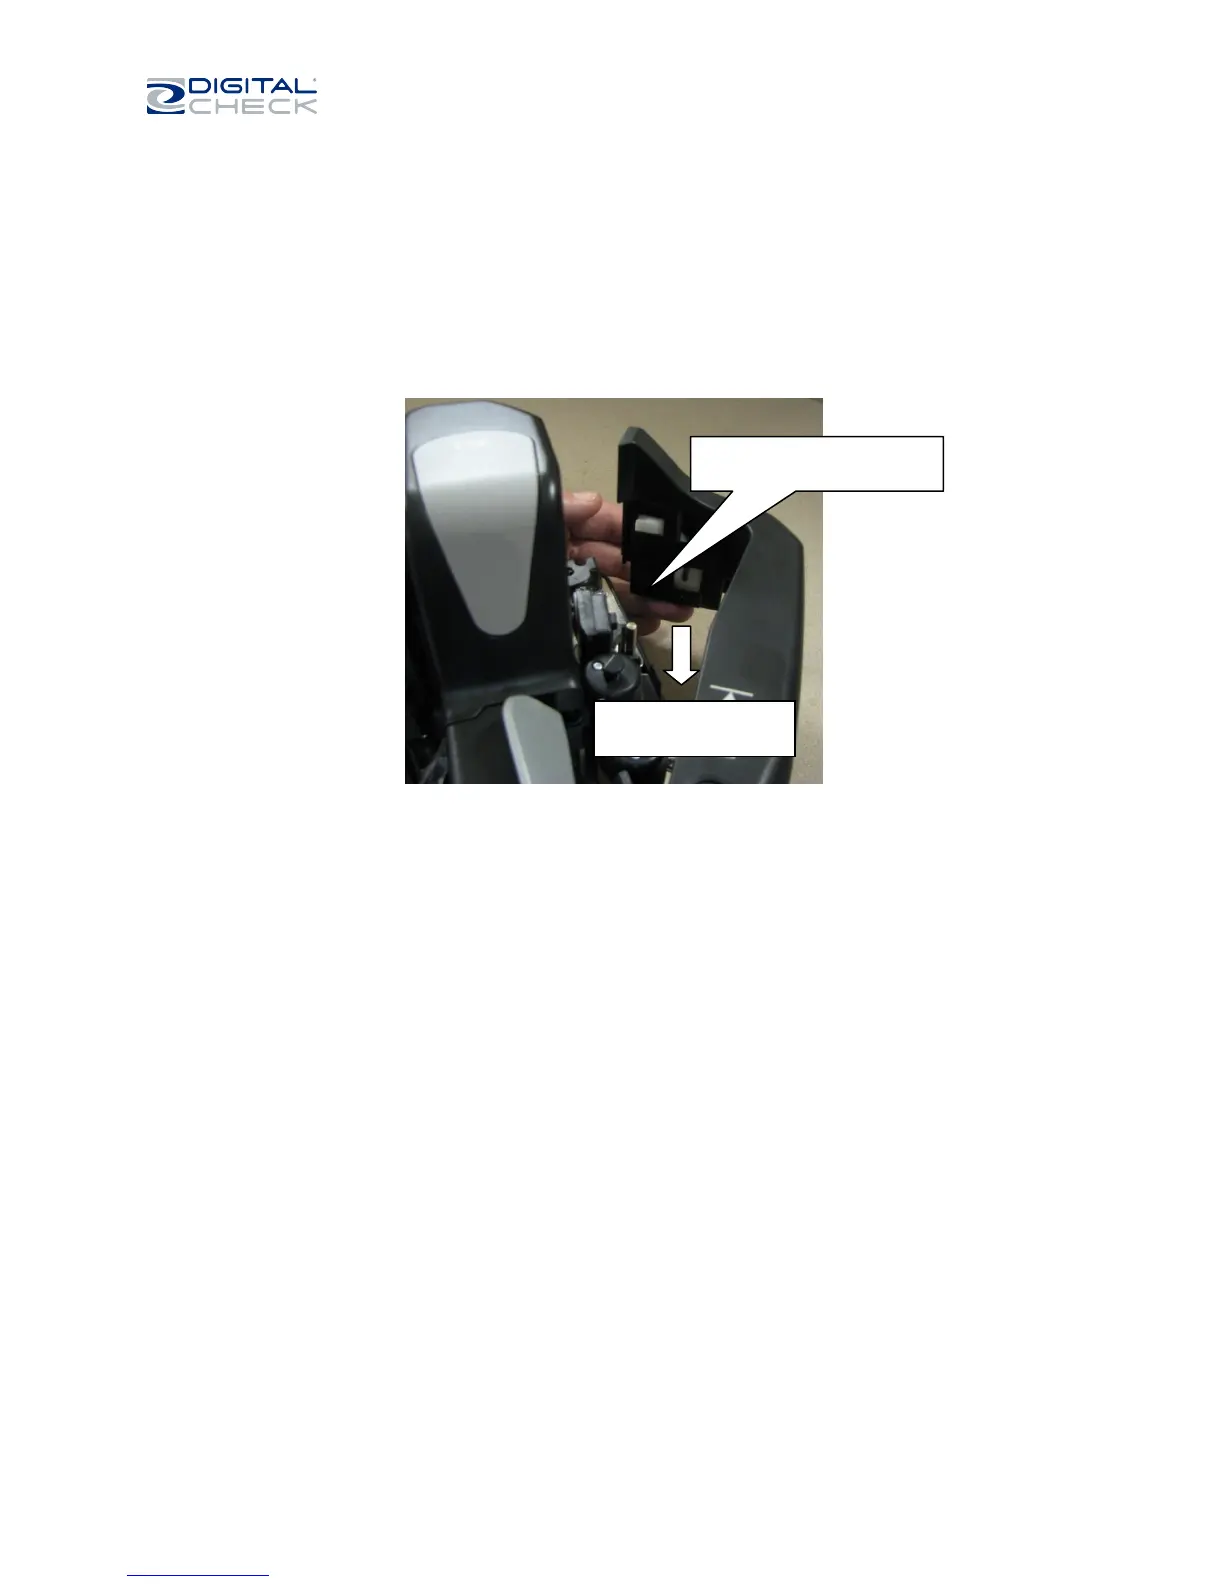
machine. However, if it does become saturated or dirty, it can be replaced. Open the front cover and snap
out the felt assembly downwards, as shown.
The replacement felt pad assembly slides in upwards and ‘snaps’ into place.
Replacement felt assemblies are available from the Digital Check Store, www.digitalcheck.com, part
number 8227 4203.
Felt pad assembly
snaps out downwards
Push down on ribbed surface
to unlatch felt assembly
 Loading...