SYSTEM 3000 to 3505 CONVERSION MANUAL
DIGITIZE, INC. 700254-0001 REV B 02/04 A-1
Specifications Subject to Change Without Notice
APPENDIX A
PCB REWORK
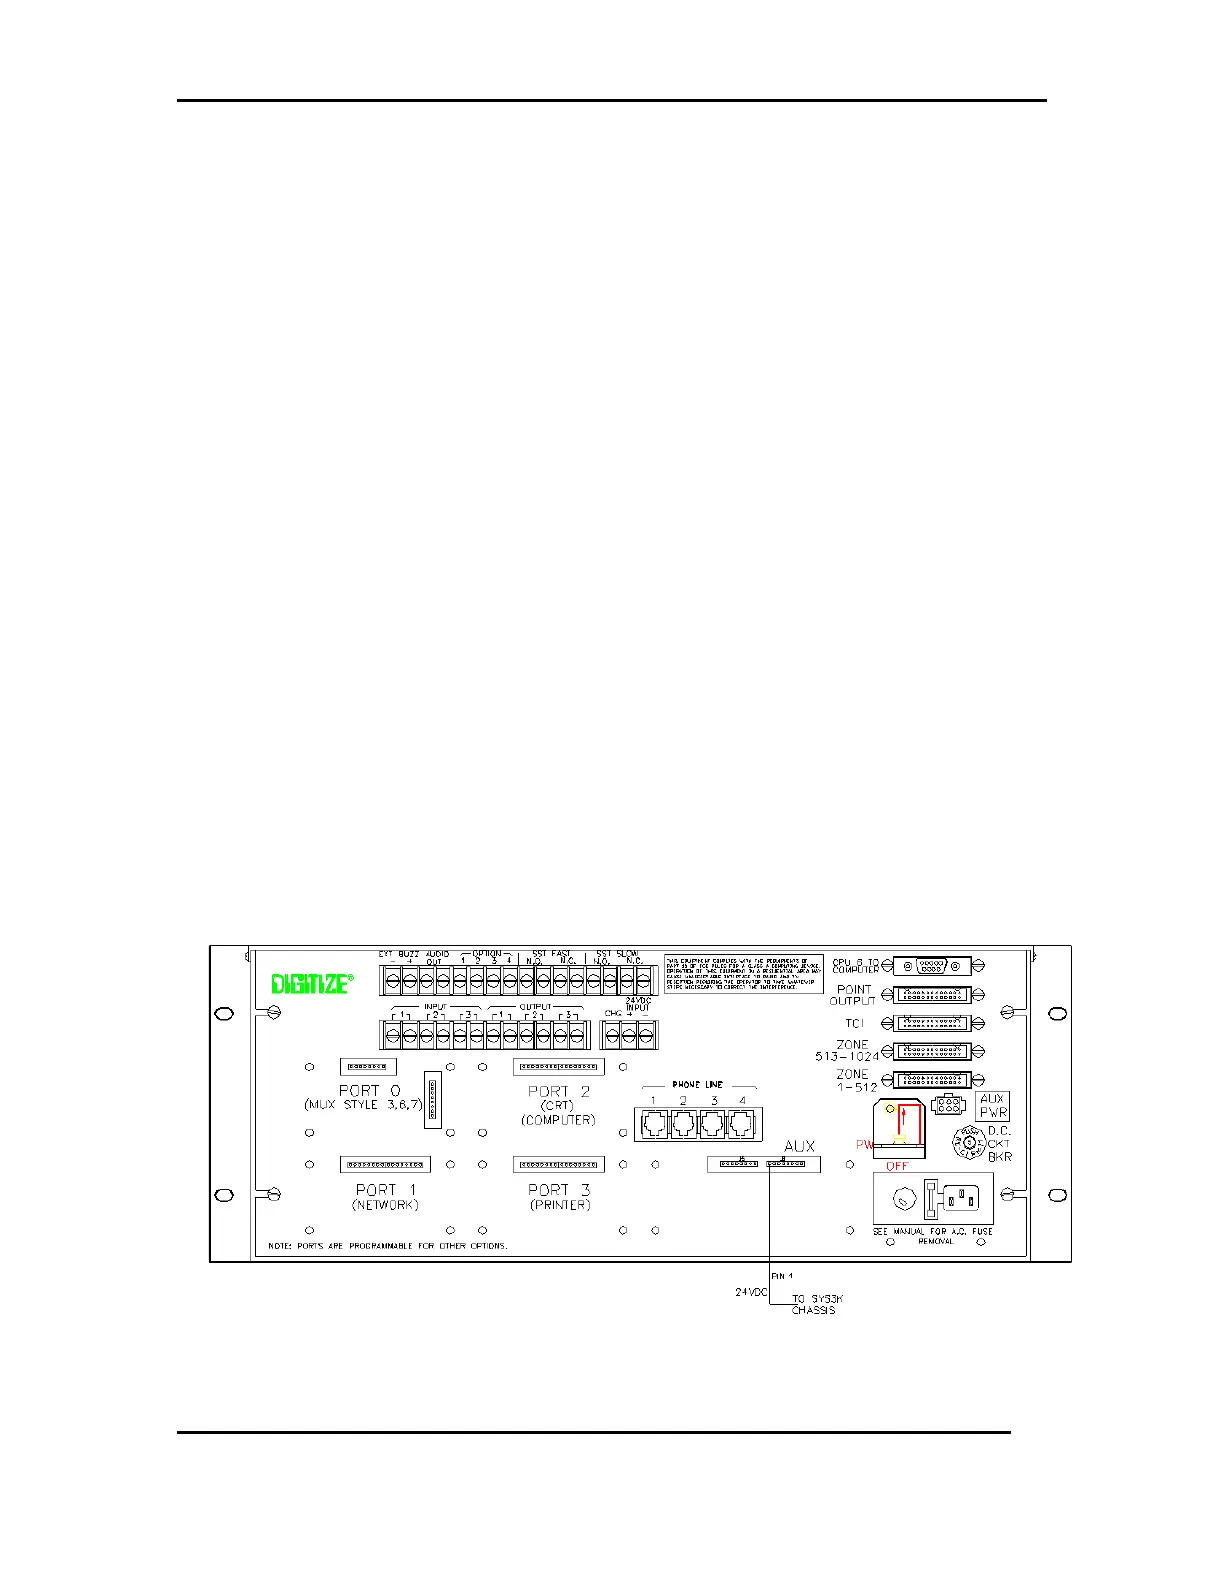
Before installation, turn on power to SYSTEM 3000. Check for 24 VDC at Pin 1 J6 Aux
Port to chassis of rear panel to determine if you need to update (rework) the PCB. See
Figure 1. If 24 VDC is not present, continue with the steps below. If the 24 VDC is
present, continue with the T-Bar installation and disregard these instructions.
To Remove Rear Panel Assembly
1. Remove the four screws from the four corners of the rear panel.
2. Lift Rear Panel Assembly straight up and out.
3. Remove all cables and connected wires.
To Remove Card Cage Assembly
1. Remove the four screws from the four corners of the rear panel.
2. Lift Rear Panel Assembly straight up and out.
3. Remove all PCBs from card cage (IO, Z-Cont, Printer/Keyboard, etc.)
4. Stand SYSTEM 3000 on its side to access the four screws on the bottom of the
SYSTEM 3000. Remove the four screws and remove card cage.
Figure 1 - Rear Panel Connections
 Loading...