The heater must be securely • xed to a wall. Screws with suitable wall • xings for solid walls
are provided. If other wall types are encountered it is the installer who must choose the most
suitable • xing.
SUGGESTED•FIXINGS
SOLID BRICK/BLOCK: No. 10 size high temperature resistant plastic inserts, 8mm drill bit. Drill
hole 15mm deeper than plastic insert length.
PLASTERBOARD - If possible locate studding and use No. 10 woodscrews directly into the
wood, otherwise M5 rawlplug intersets are suitable.
NOTE: FOR OTHER WALL TYPES (eg. timber frame and hollow concrete) SEEK SPECIALIST
ADVICE.
If the ! oor is carpeted then the carpet should be slit and underlay cut away to allow the feet
to rest • rmly on the ! oor. Carpet gripper must be locally removed so that the feet may rest in
a level position.
This appliance is heavy. The ! oor must be checked to ensure that it is capable of bearing the
weight of the unit, up to 165kg.
This•Heater•is•rated•IPX4
DO•NOT•UNDER•ANY•CIRCUMSTANCES•ATTEMPT•TO•MOVE•OR•REPOSITION•
THIS• HEATER• WITHOUT• SEEKING• EXPERT• ADVICE.• THE• HEATER• SHOULD•
NEVER•BE•FREED•FROM•THE•WALL•WITH•ENERGY•CELLS•INSIDE.
USE• CAUTION• WHEN• INSTALLING• THIS• PRODUCT,• UNPAINTED• METALWORK•
CAN•HAVE•SHARP•EDGES.
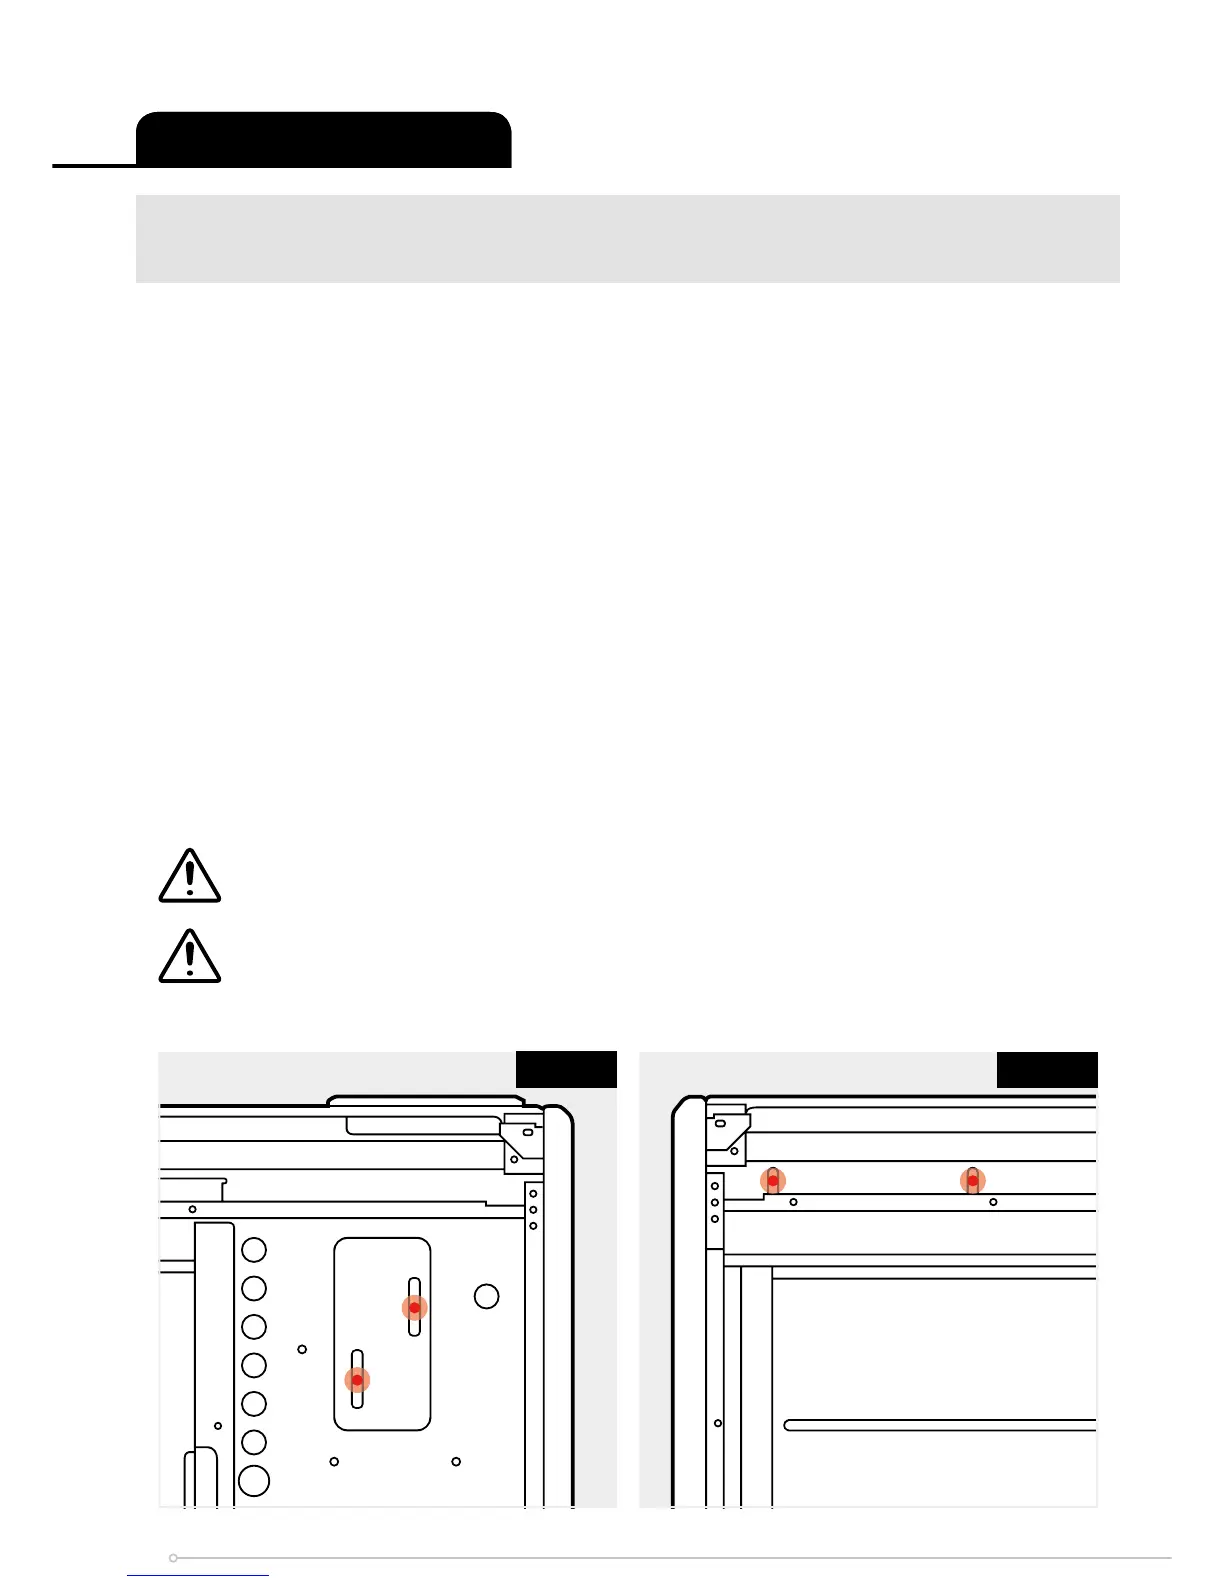
Installing•the•Heater
IMPORTANT••Head of wall • xing screw must be ! anged pan head type and have a diameter
no less than 11mm. No countersunk headed screws to be used for wall • xing.
Fig.•5
Fig.•4
8