Universal-XR 1/17 UXR01212015_REV1.4mm
Installation and Operating Instructions
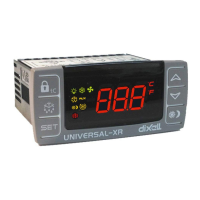
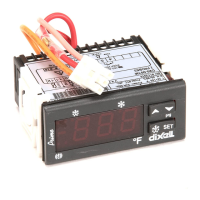
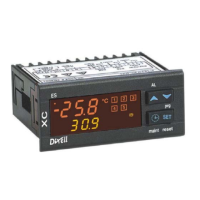
UNIVERSAL–XR60CX
1. GENERAL DESCRIPTION
Model Universal-XR is a 71x29 mm format microprocessor based controller, suitable for applications on high, medium or
low temperature refrigeration units. It is provided with three relay outputs to control compressor, defrost - which can be both
electrical or hot gas - and evaporator fans. It can work with PTC or NTC probes. Where defrost is being terminated by time,
it can operate with just one thermostat probe. Where defrost is being terminated by temperature, it has an input for an
evaporator probe(s).
The Universal-XR is equipped with a flashing visual alarm and buzzer.
Each instrument is fully configurable through special parameters that can be easily programmed through the keypad.
2. QUICK START UP PROCEDURE – Up and running in 5 easy steps
This Quick Start Up section is designed to get you up and running with the minimum of fuss. Just follow these 5 simple steps.
Install the new Universal-XR per the installation instructions included with the controller.
Turn on power,
THEN WITHIN 1 MINUTE COMPLETE STEPS 3, 4 AND 5.
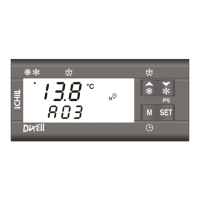
Press the “SET” and “DOWN” key for 3 seconds and the controller will automatically recognise and
adjust itself to the type of probes connected. (The display briefly shows tPd followed by ntC or PtC).
Press the “AUX/tC” key for 3 seconds and the setting of parameter tC is displayed. Use the UP or
DOWN keys to adjust to required setting then confirm by pressing SET (see table 1 below).
Press SET for 3 seconds until the °C or °F icon starts to flash, then adjust the SET POINT using the UP
or DOWN keys, then press SET again to confirm.
• Notes:
1. All probes must be of the same type, either PTC or NTC.
2. Probes must be at between --58 to 140°F for auto recognition to work;
3. If 1 minute expires before you have completed quick set up, either cycle the power OFF then ON to start the set up again or
enter Pr2 as per the instructions and adjust your parameter settings manually (see Section 9).