OBU Manual
Version 3.0 August 27, 2020 17
up for the correct direction of the holder.
firmly press where the adhesive pads are located.
Figure 9: Mounting the holder on the windshield
4.3 Assemble the OBU to the holder
Place the OBU in front of the holder and click it into the holder.
Check the right position of the OBU.
You cannot move the OBU in the holder. Check this carefully.
Figure 10: Assembling the OBU to the holder
4.4 Permanent installation
Installation in an ADR vehicle is permitted only for fixed installation and must be performed by
authorized staff. If you wish to install the
device into an ADR vehicle contact your Customer
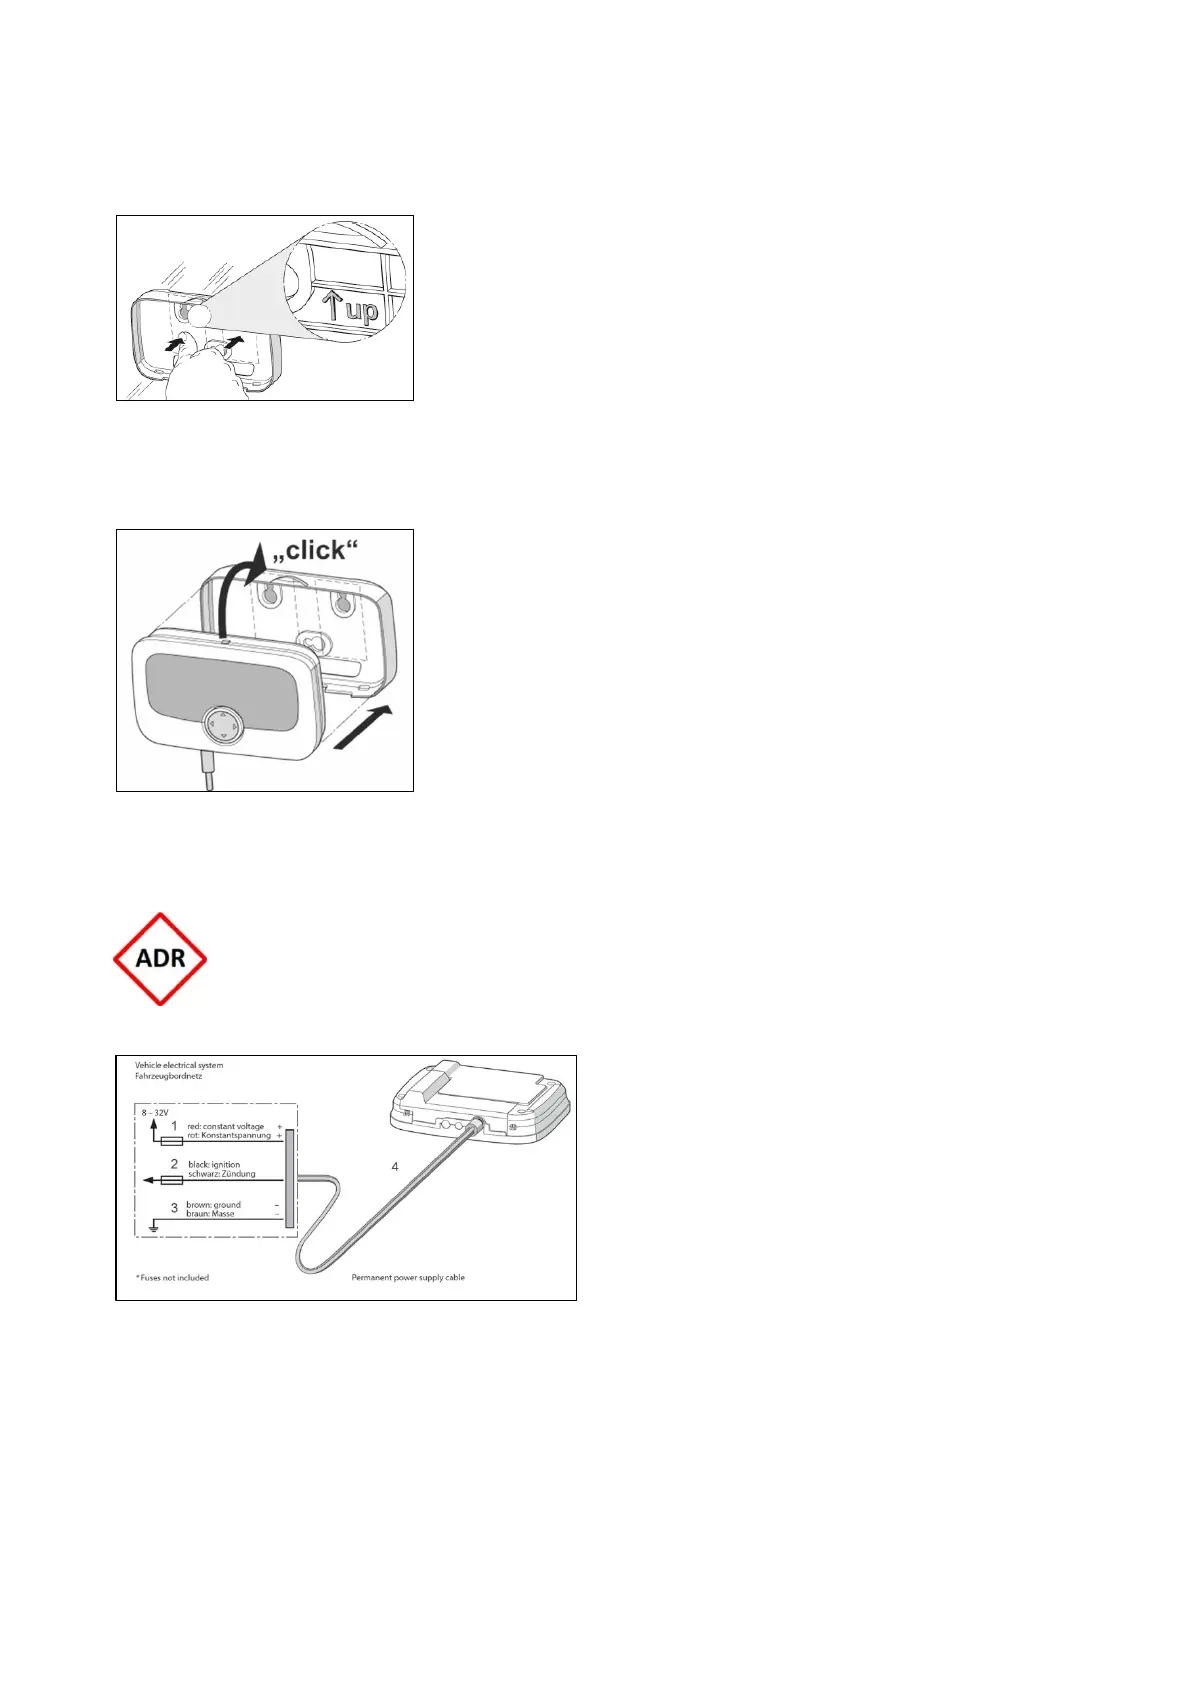
The fix installation of the OBU must be relied to the provided circuit diagram. Use the respective fuses.
Vehicle electrical system:
Red: constant voltage (+)
Black: ignition Brown: ground (-)
Permanent Power supply cable
Figure 11: Circuit diagram for fix installation
For any further information needed, please, contact your Customer Service.