29
Einbau der Toilette
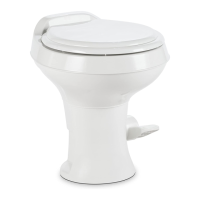
4.4 Water connection
The water supply is connected via a magnet
valve (1), which is fitted in the toilet housing.
Fit the fresh water supply pipe to the connec-
tion nozzle (2) with a spring clamp.
Then check the leak tightness.
Fig. 25
1
2
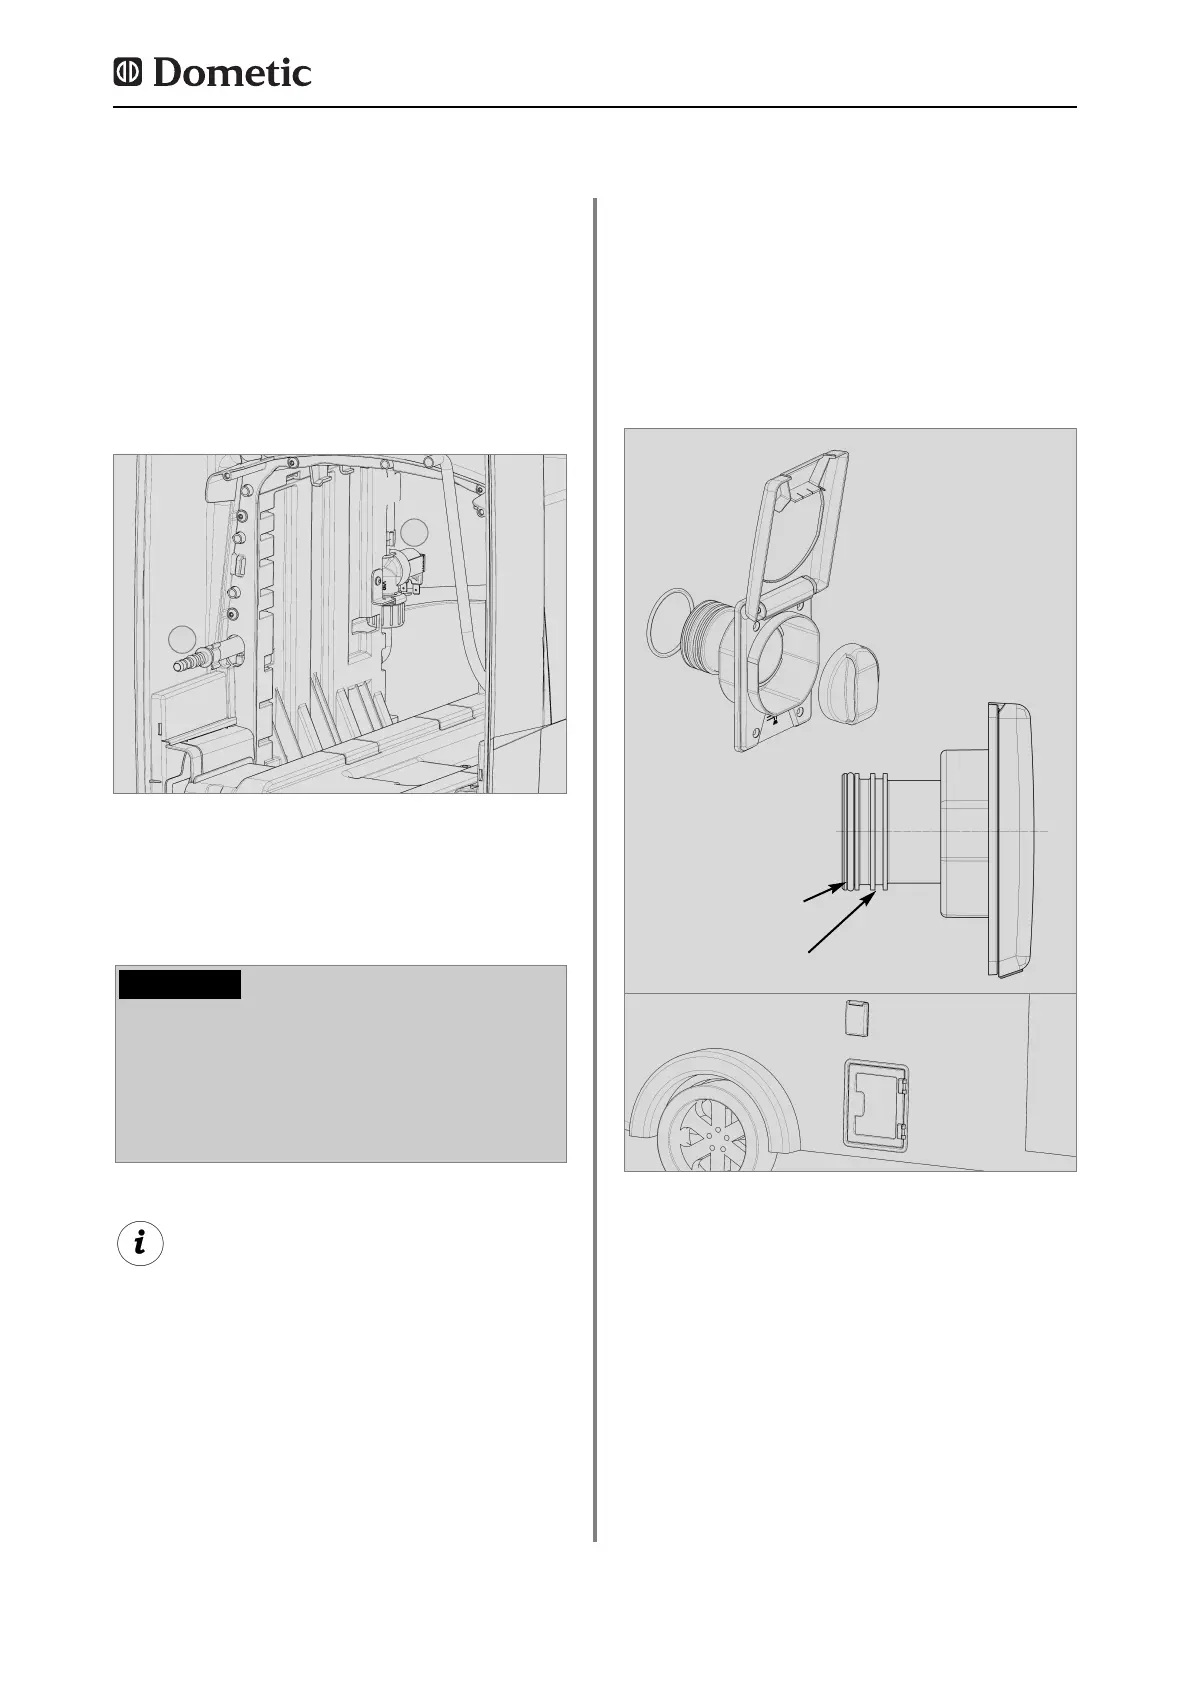
4.5 Flap installation
Apply the flap when using CTW 4xxx models
with an integrated water tank. To install the
flap, use the template (1), Item 5.3.1, in order
to make the aperture in the wall.
Fig. 26
position of O-rings with wall
thickness of 30mm -50mm
position of O-rings with wall
thickness of 20,5mm -30mm
Apply sealing compound between the exterior
wall of the vehicle and the flap (butyl rubber).
Then fit the flap on the tank and fasten the flap
with screws. Lubricate the O-ring in order to
prevent stiffness when connecting the filling
nozzle with the top of the tank. The flap is
screwed on with four counter sunk bolts (not
enclosed).
The water is connected for all CT4xxx models
as described above.
Exception: CTW 4xxx models with integra-
ted water tank.
The operating pressure range (waterpres-
sure) of the magnet valve (1) must not
exceed 6 bar.
The magnet valve will be damaged by
excessive pressure.
CAUTION!
 Loading...