78
Dometic
®
MANUAL
Refrigerators
THIS SECTION APPLIES TO ICE MAKERS WITH A COMPRESSOR
1H. ICE MAKER OPERATION
The refrigerator has to be connected to 120 volts AC
before the ice maker can operate. The water valve
supplying the refrigerator must be turned on and the
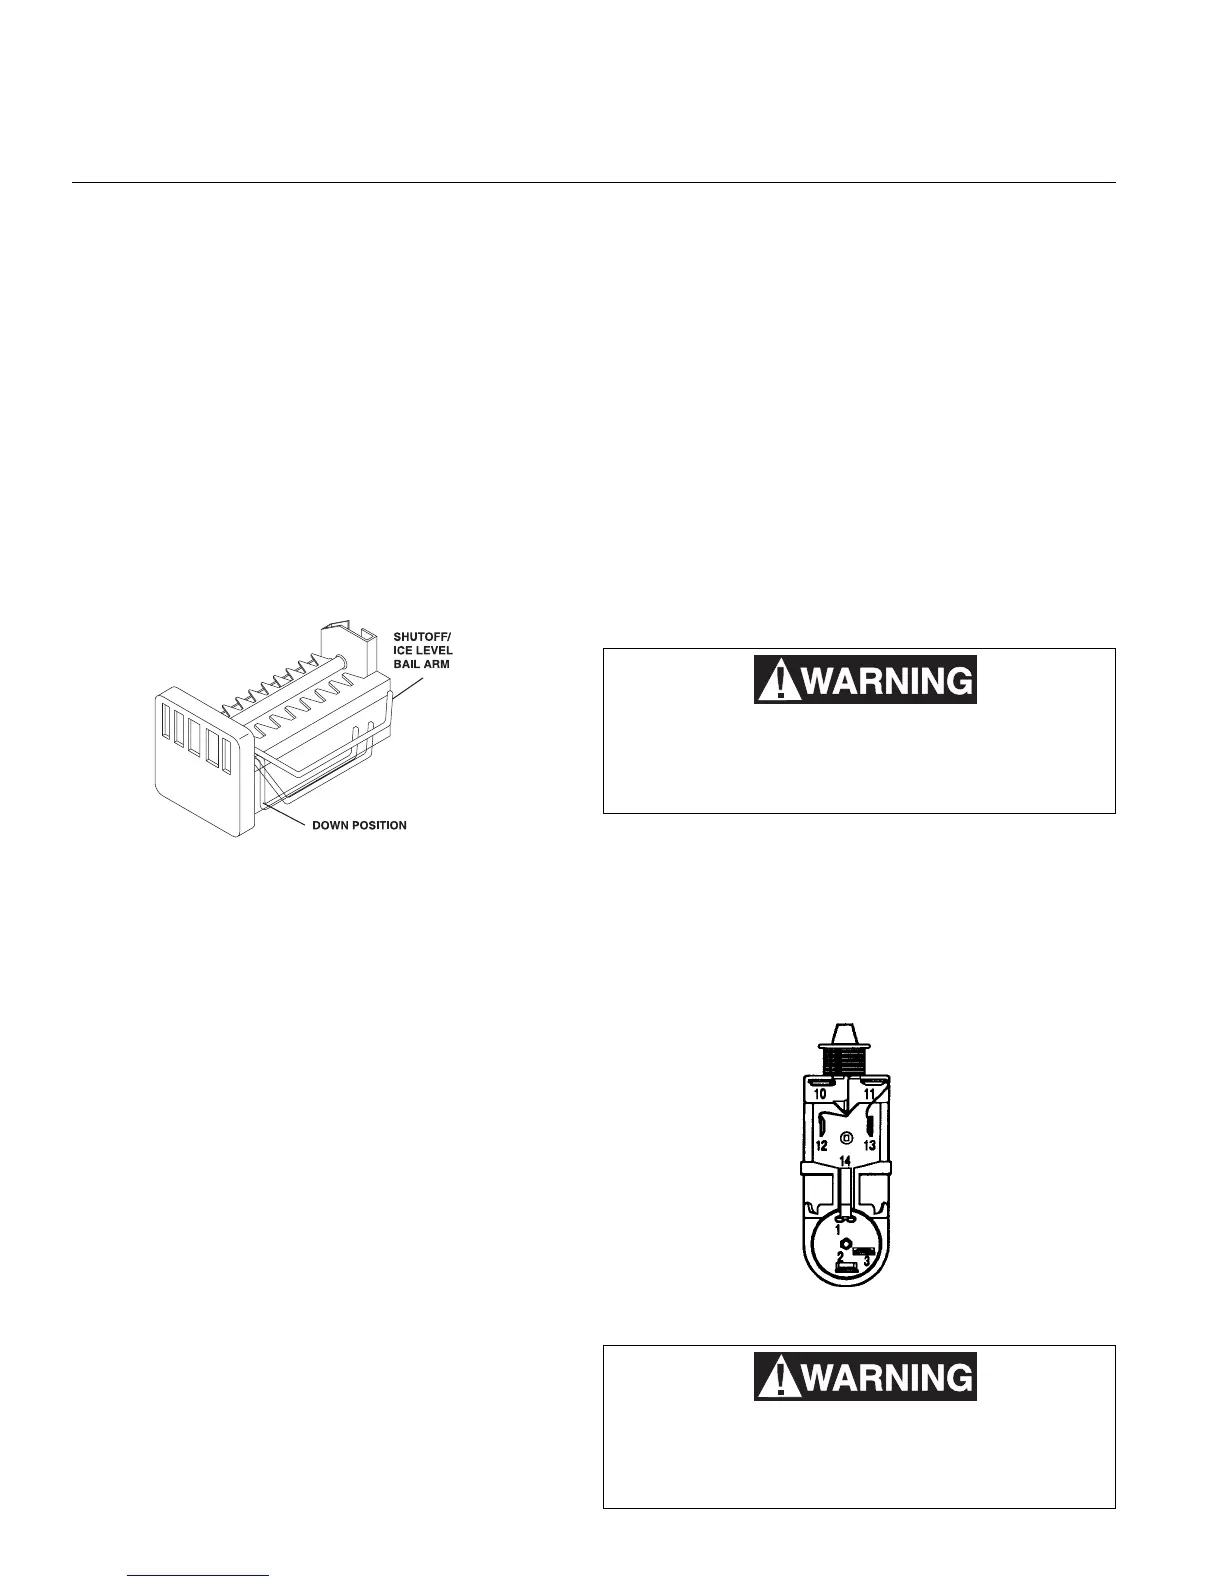
shutoff ice level bail arm in fully down position.
Turn on the ice maker switch, starting the compressor.
The compressor operation lowers the temperature in the
ice maker compartment. When the ice maker thermostat
senses the preset temperature for ejection of the ice
cubes, the fingers will start to rotate dumping any ice
cubes and filling the mold with water.
When the storage container is full of ice, the ice level
bail arm can not return to the down position. This will
stop further production of ice until the container is
emptied and the bail arm is returned to the start position.
The compressor will still function and keep the ice maker
compartment at the proper temperature for storage of
ice.
To prevent water from splashing out of the ice maker
while traveling, raise the ice maker bail arm to the "UP"
position about 1-1/2 hours before departing. This will
allow any water in the mold to freeze.
NOTE: IF THE ICE MAKER WAS CLEANED AND
DRAINED, NO ICE CUBES WILL BE DUMPED INTO
THE STORAGE CONTAINER DURING THE FIRST
CYCLE.
The first few cycles may have small cubes due to air
trapped in the water lines. The first container of ice
cubes should be dumped if the water system has
been winterized or not used for several weeks.
2H. ICE MAKER COMPONENTS
SWITCH, ON/OFF
This switch is located on the lower front panel inside the
freezer door. To check for continuity, unplug the appli-
ance, and disconnect the wires to the switch. With the
switch in the "ON" position, you should have continuity
between terminals 1 and 2.
With the switch in the "OFF" position you should have
no continuity between the terminals.
Any other results indicate a defective switch and it must
be replaced.
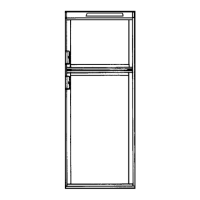
START DEVICE AND OVERLOAD
The start device and overload are two separate compo-
nents, but they work together in starting and allowing the
compressor circuit to be completed.
THIS IS AN ENERGIZED CIRCUIT. ELECTRICAL
SHOCK CAN OCCUR. BEFORE CHECKING THESE
COMPONENTS, BE SURE THERE IS NO POWER TO
THE APPLIANCE.
To test the starting device, remove the wires from the
terminals. Check for continuity between terminals 10 and
12, and between terminals 11 and 13.
To test the overload, check for continuity between
terminals 1 and 3. If you do not get continuity in any of
these checks, either the starting device or the overload
is defective and both must be replaced.
COMPRESSOR
THIS IS AN ENERGIZED CIRCUIT. ELECTRICAL
SHOCK CAN OCCUR. BEFORE CHECKING THESE
COMPONENTS, BE SURE THERE IS NO POWER TO
THE APPLIANCE.
SECTION H.