G643 (E) Service Manual Chapter 3. Engine Mechanical System 70
IMPORTANT: Marking them from the front to the
rear, with the engine in an upright position and
viewed from the front:
• The right bank is numbered 1-3-5.
• The left bank is numbered 2-4-6.
3. Check the connecting rod and cap for identify-
cation marks.
IMPORTANT: Mark the parts if required. Marking
them from the front to the rear, with the engine
in an upright position and viewed from the front:
• The right bank is numbered 1-3-5.
• The left bank is numbered 2-4-6.
Store the connecting rod, bearings and cap together
as mating parts, so they may be reassembled in the
same position from which they were removed.
4. Connecting rod cap.
5. Connecting rod and piston.
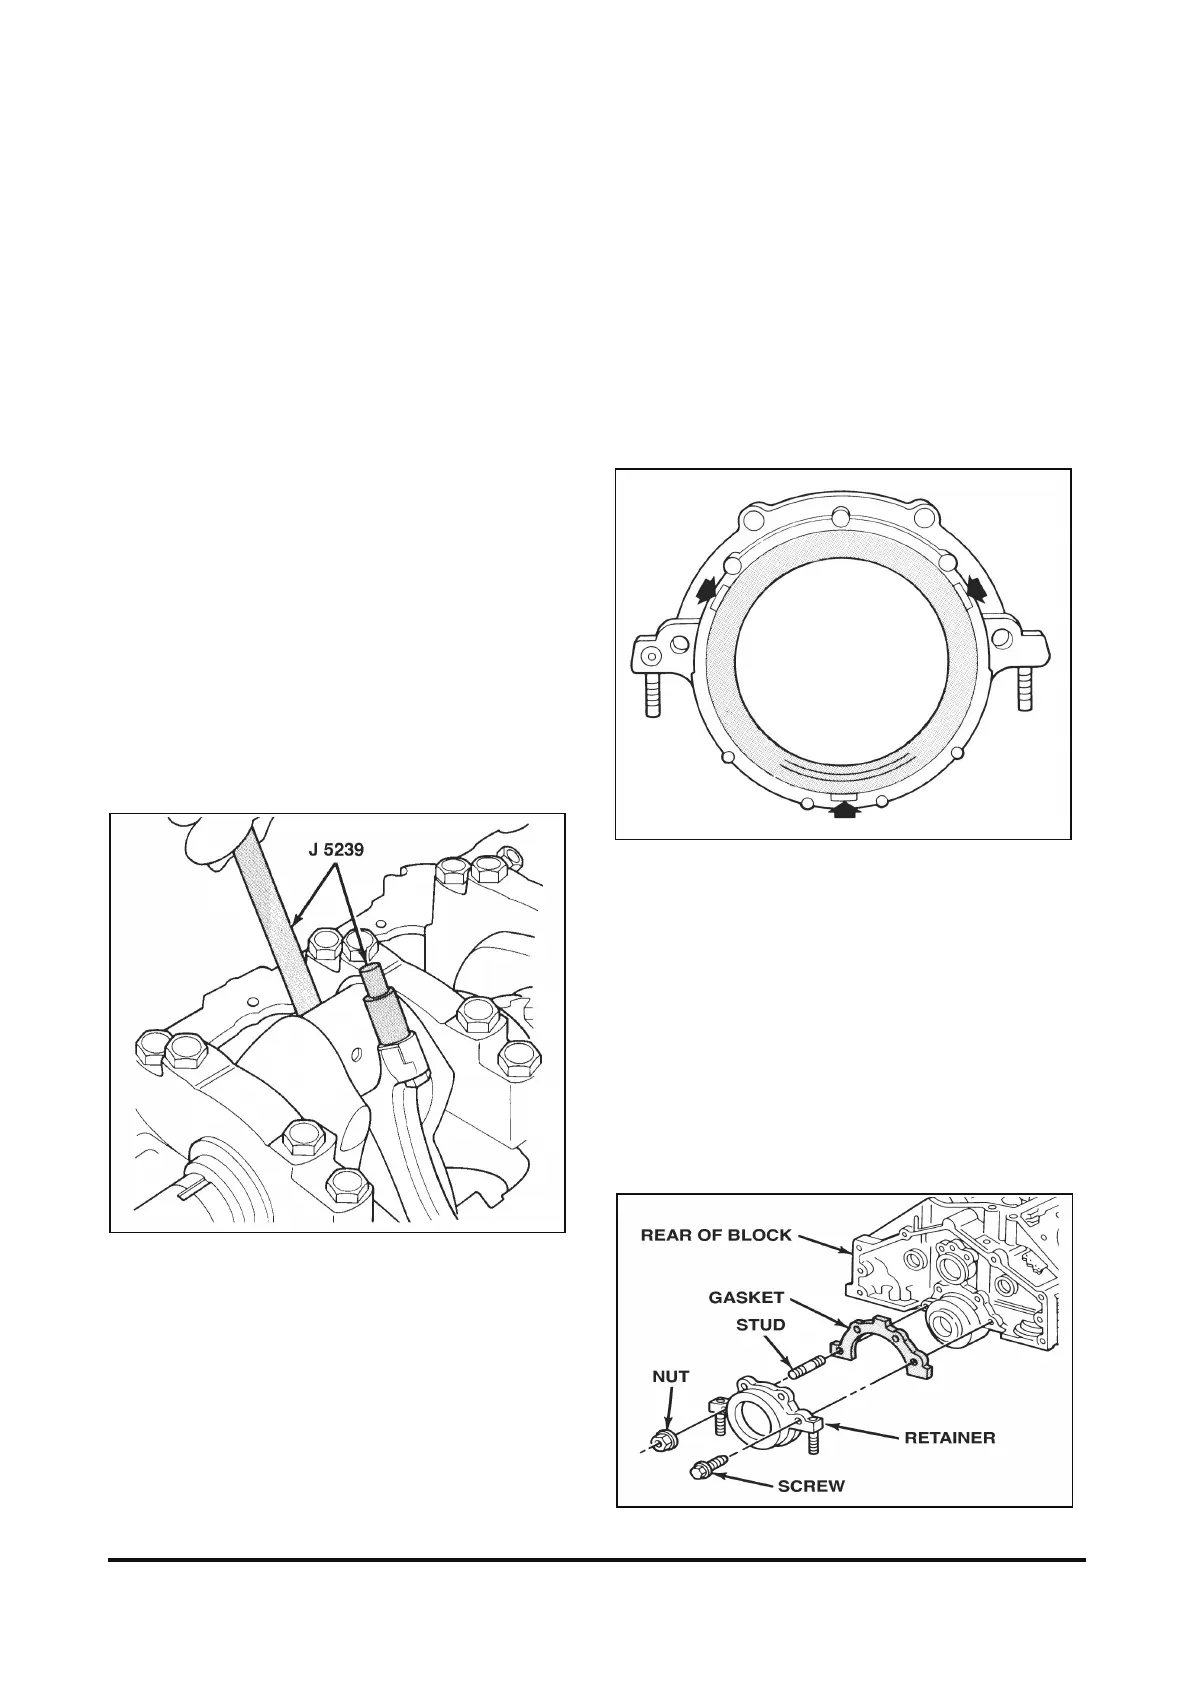
Figure 12-19 Removing Piston and Connecting Rod
IMPORTANT: Attach J 5239 to the connecting
rod bolts (figure 12-19). Use the long guide rod
of J 5239 to push the connecting rod and piston
out of the bore through the top of the engine.
6. Connecting rod bearings.
Crankshaft Rear Oil Seal Removal
Figure 12-20
Remove or Disconnect
NOTICE: Take care when removing the rear crank-
shaft oil seal so as not to damage the crankshaft
sealing surface.
1. Crankshaft rear oil seal. Insert a screwdriver into
the notches provided in the seal retainer and pry
the seal out.
Figure 12-20 Seal Removal Notches
Crankshaft Rear Oil Seal Housing
Removal
Figure 12-21
Remove or Disconnect
1. Bolts and nuts.
2. Oil seal housing.
3. Gasket.
Figure 12-21 Removing Crankshaft Rear Oil Seal Housing