28 29
UNIVERSAL COUNTERFEIT DETECTOR DORS 1300 UNIVERSAL COUNTERFEIT DETECTOR DORS 1300
30
WHITE LAMP REPLACING PROCEDURE
WARNING! BEFORE REPLACING A LAMP, MAKE SURE THE
POWER PLUG HAS BEEN DISCONNECTED FROM THE POWER
SOCKET!
ATTENTION! TO AVOID CONTAMINATION OF A GLASS BULB, USE
COTTON GLOVES DURING LAMP REPLACEMENT.
1. Place the display body in a transportation position.
2. Place the device on the working table covered by soft cloth
(as shown on Fig. 8).
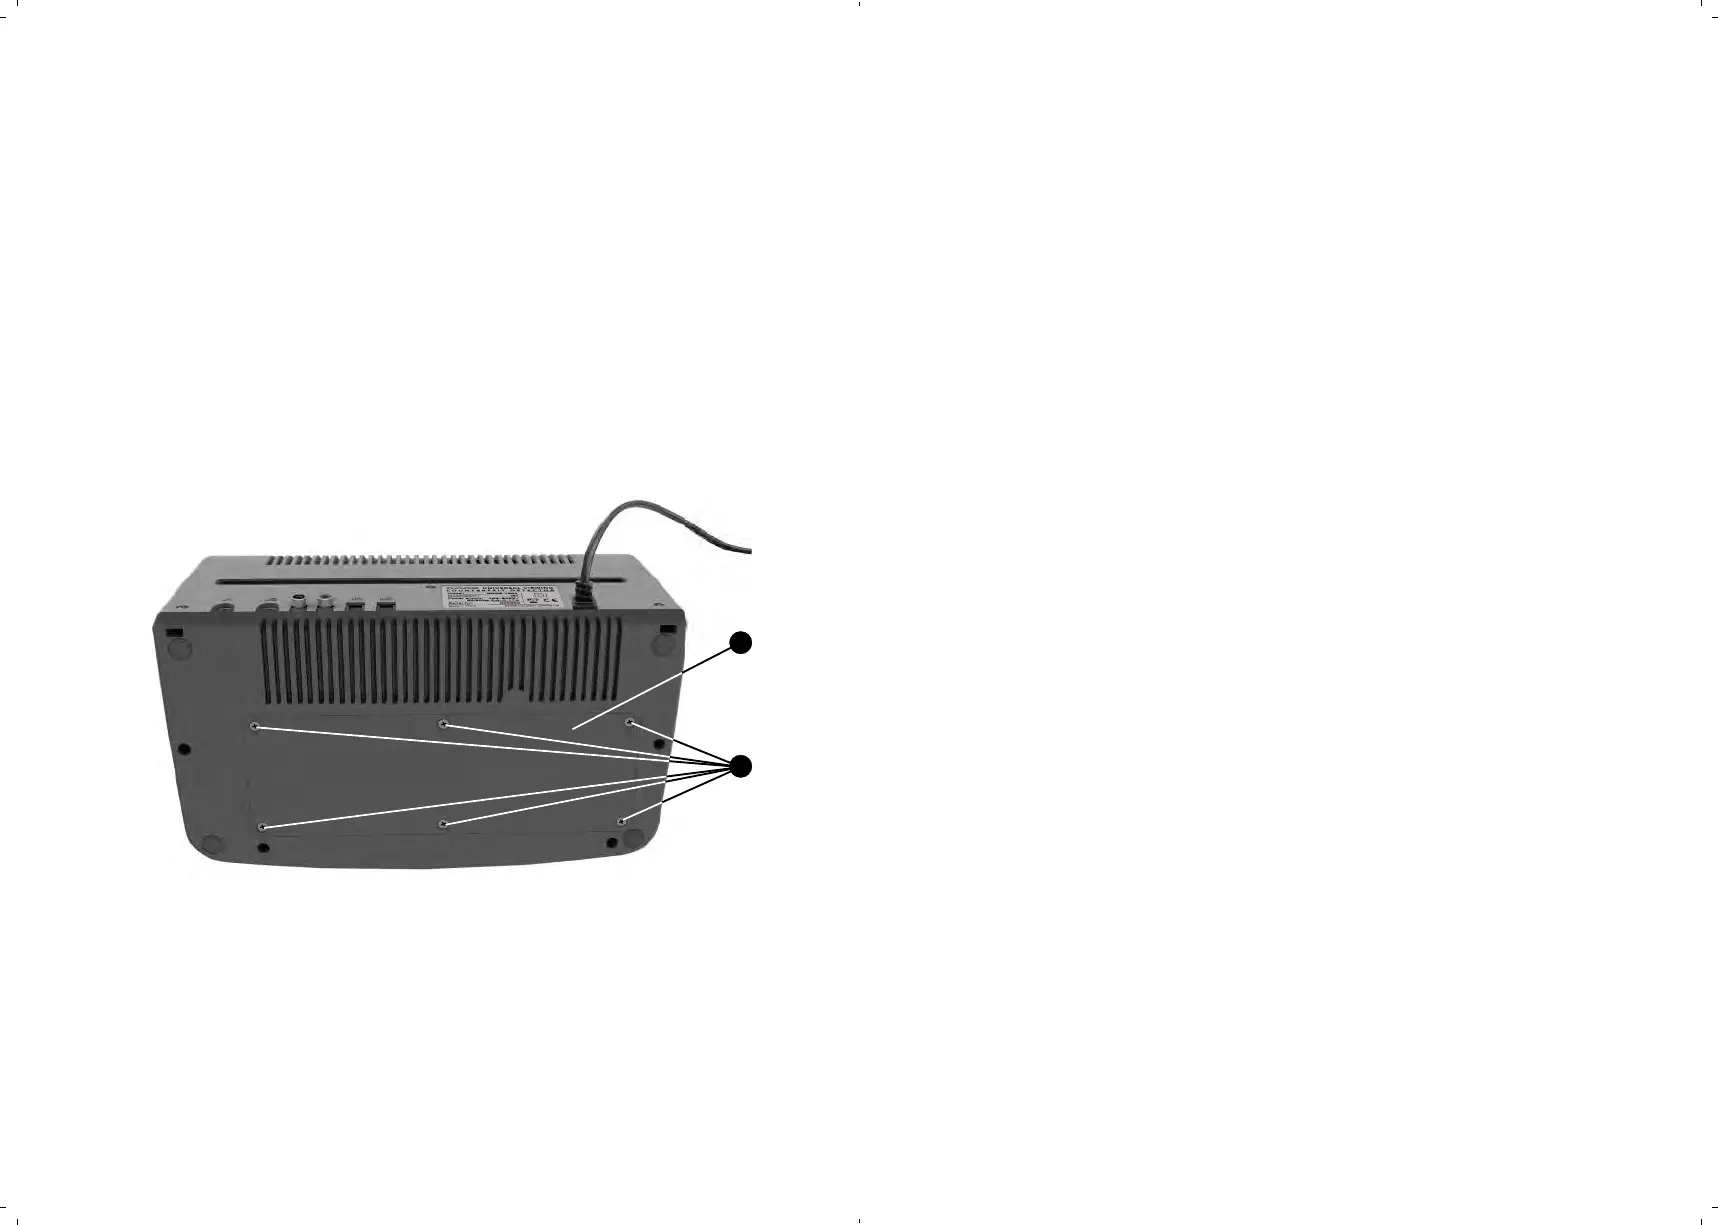
3. On the device bottom surface unscrew 6 screws
fixing the hatch cov-
er for getting access to the lamps for the viewing table illumination
(see.Fig. 10). Remove the hatch cover.
The hatch cover of the lamps for the viewing table illumination
The fixing screws of the hatch cover of the lamps for the viewing table
illumination
Fig. 8. The hatch of the lamps for the viewing table illumination
UNIVERSAL COUNTERFEIT DETECTOR DORS 1300
30
31
4. Find the failed lamp to be replaced by its number.
5. Without any excessive strength, turn the failed lamp around its axis for a
quarter of a turn. Doing it, hold the lamp with two fingers of both hands.
6. Remove failed lamp from its holders.
7. Take a new lamp from the package and inspect it: the glass bulb shall be
devoid of scratches and chipping, the lamp cap shall not be damaged,
and the glass bulb surface shall be not contaminated.
ATTENTION! DO NOT INSTALL INTO THE DEVICE A LAMP HAV-
ING MECHANICAL DAMAGES AND BULB CONTAMINATION!
8. Insert the lamp into the holders up to the stop. Holding the lamp with two
fingers of both hands, turn it around its axis by a quarter of a turn. Make
sure the lamp is fixed in the holders.
9. Install the hatch cover
on its place, and screw in the screws
up to
the stop.
10. Install the device in a working position and make a trial turning on of UV-
radiation; make sure the failure is recovered.
11. Pack the failed lamp and hand it over to a specialized disposal service.