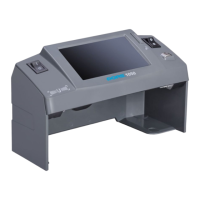
The DORS 1300 is a universal counterfeit detector designed for visual detection of the authenticity of banknotes, securities, excise stamps, and other documents with protective marks.
Function Description
The device is equipped with:
- An ultra-violet (UV) source consisting of three 6W fluorescent lamps.
- A top infrared (IR) source emitting at 850 nm and 940 nm wavelengths.
- A top white oblique source for examining optical variable inks (OVI).
- A viewing table with combined illumination: transmitted IR light and white light.
- A 7" color TFT LCD display.
- Two video cameras transmitting images of documents on the viewing table to the LCD screen at 1:1 scale or with 10-fold magnification.
- Connectors for the DORS 1020 video magnifier and the DORS 15 detector of magnetic and IR marks.
- An additional video input and a video output.
The DORS 1300 allows for:
- Verification of the absence of general visible luminescence in UV light on a document.
- Verification of IR marks in reflected and transmitted light, and IR blink marks in two-wavelength mode (940/850 nm).
- Verification of luminescence of specific areas (marks, security threads, and fibers) in UV light.
- Verification of watermarks and security threads.
- Examination of document surfaces with protection elements in white oblique reflected light to verify relief of printed elements, tilting effects, and marks made with variable color inks.
- Verification of micro perforations.
- Verification of security elements printed with optical variable ink (OVI).
- Advanced verification under 10-fold magnification in two bands (white/IR) using the built-in 10x camera, or in three bands (white/IR/UV) using the DORS 1020 video magnifier. This allows checking the coincidence of thin multicolored lines, readability of microtext, and currency design at specific points.
- Verification of magnetic marks using the DORS 15 detector.
The device features an on-screen menu system for control and specific buttons for frequently used functions. The UV marks can be examined directly on the document surface on the viewing table. IR marks and IR blink marks are viewed on the 7" LCD, with a 10-fold zoom mode available for detailed inspection of mark lines. The additional video input allows displaying images from external sources (e.g., CCTV camera), and the video output can transmit images to an external display or computer.
Important Technical Specifications
- Supply voltage: 100–240 VAC, 50/60 Hz
- Current consumption: 0.4 – 0.17 A
- Weight: 2.3 kg
- Overall dimensions (Width x Depth x Height):
- Display in transportation position: 300 x 170 x 210 mm
- Display lifted by angle 90°: 300 x 170 x 324 mm
- Display lifted by angle 120°: 300 x 203 x 314 mm
- Size of screen active zone: 154 x 86.6 mm
- Size of viewing table window: 180 x 109 mm
- Total power of UV-radiation source: 18 W
- Peak wavelength of UV-radiation: 365 nm
- Operating range of IR-radiation: 800 – 1,000 nm
- Two wavelengths at IR blink marks verifying: 850/940 nm
- Video signal standard at connectors IN, OUT: ITU R BT.470-7, peak-to-peak 1 V
- Color coding standard: PAL
- Linear magnification on display:
- Built-in cameras: 1x / 10x
- DORS 1020: 22x
- Operating temperature: +5 to +40°C
Usage Features
- Installation: The device must be installed on an even, horizontal surface, avoiding direct sunlight or artificial illumination. UV lamps should not be visible to the operator. If the device has been in cold conditions, it should be kept at room temperature for at least two hours before switching on.
- Display Adjustment: The display body can be turned around horizontal and vertical axes for optimal viewing.
- External Devices: DORS 15 and DORS 1020 should be connected to the rear panel jacks (V1/V2 for DORS 1020, M1/M2 for DORS 15) before connecting the device to the mains.
- Power On: Press the power switch. A red indicator will turn on. After 7-10 seconds for initialization and self-testing, the device will be ready. The default mode upon first switch-on is IR marks inspection in reflected light.
- TV Key: Switches between built-in camera modes (1x and 10x zoom) and external video inputs (V1, V2, IN). A long press switches to external video sources.
- DL Key: Controls top oblique white light and combined illumination of the viewing table by white light and transmitted IR light. It also enables variable color ink inspection.
- IR Key: Switches between IR mode and IR Blink mode (periodical switching between 850 nm and 940 nm for IR blink marks).
- UV Key: Switches UV lamps on/off, enabling combined UV+IR illumination.
- Menu Control: The on-screen menu is accessed by pressing the SET key. Navigation is done using arrow keys (Up, Down, Left, Right), and SET confirms selections.
- Brightness and Contrast: Adjustable via the on-screen menu.
- Auto Off Timer: Configurable (Disable, 3, 10, 30, 60 minutes) to put the device into standby mode after inactivity, reducing power consumption.
- Language Settings: Menu and information messages can be set to English, Russian, Ukrainian, or Chinese. These settings are stored in non-volatile memory.
- Magnetic Verification (with DORS 15): The DORS 15 connects to M1 or M2. Place the banknote on a special mat. Press any key on DORS 15 to switch it on. A short press of the SELECT key on DORS 15 selects magnetic verification mode (green LED). Move the sensor over the banknote; a sound signal and glowing indicator inform about sensor triggering. Sensitivity can be adjusted (red for highest, yellow for middle, green for lowest) by pressing the VOLUME key on DORS 15.
- Size Control: Use the control scale on the viewing table to check banknote dimensions and accuracy of separate marks.
Maintenance Features
- Cleaning: Clean the device surface with water-based neutral detergents (e.g., for dishwashing) or isopropyl alcohol-based cleaning compositions. Use a soft tissue; avoid brushes, sprayers, or aerosols. Always disconnect the power plug before cleaning.
- Lamp Replacement: Fluorescent lamps are consumables and not covered by warranty. The device has a diagnostic system that informs the user about lamp failure. A failed lamp can be used for no more than 8 working hours.
- UV Lamps: Use DORS TL 6W/08 F6T5/BLB.
- White Lamps (viewing table): Use DORS TL 6W/08 F6T5/DL.
- Procedure:
- Disconnect the power plug.
- Place the display body in transportation position.
- Place the device on a soft cloth.
- For UV lamps, remove the protection covers. For white lamps, unscrew 6 screws on the bottom surface to remove the hatch cover.
- Turn the failed lamp a quarter turn with two fingers and remove it from its holders.
- Inspect the new lamp for damage or contamination. Use cotton gloves to avoid contaminating the glass bulb.
- Insert the new lamp into the holders, turn it a quarter turn to fix it.
- Reinstall protection covers or hatch cover.
- Test the device.
- Pack failed lamps and hand them over to a specialized disposal service.
- Disposal: Before disposal, remove all five fluorescent lamps following the replacement procedures. The removed lamps must be handed over to a specialized disposal service. The device without its lamps can be disposed of as domestic waste.
- Transportation and Storage: Transport in standard packaging by sea, railway, air, or motor. Conditions: temperature -30 to +50°C, relative humidity up to 95% (non-condensing), atmospheric pressure 84 to 107 kPa. Store in a heated warehouse at +10 to +25°C, relative air humidity not exceeding 80%.
- Warranty: The manufacturer guarantees a 12-month operation from the date of sale, provided the user observes all service manual requirements. Warranty does not cover fluorescent lamp failure or damage from improper use, falls, or excessive physical strength.