While holding down the media in the aligned position, lift the lever back to its up position.
This will lock the media in place.
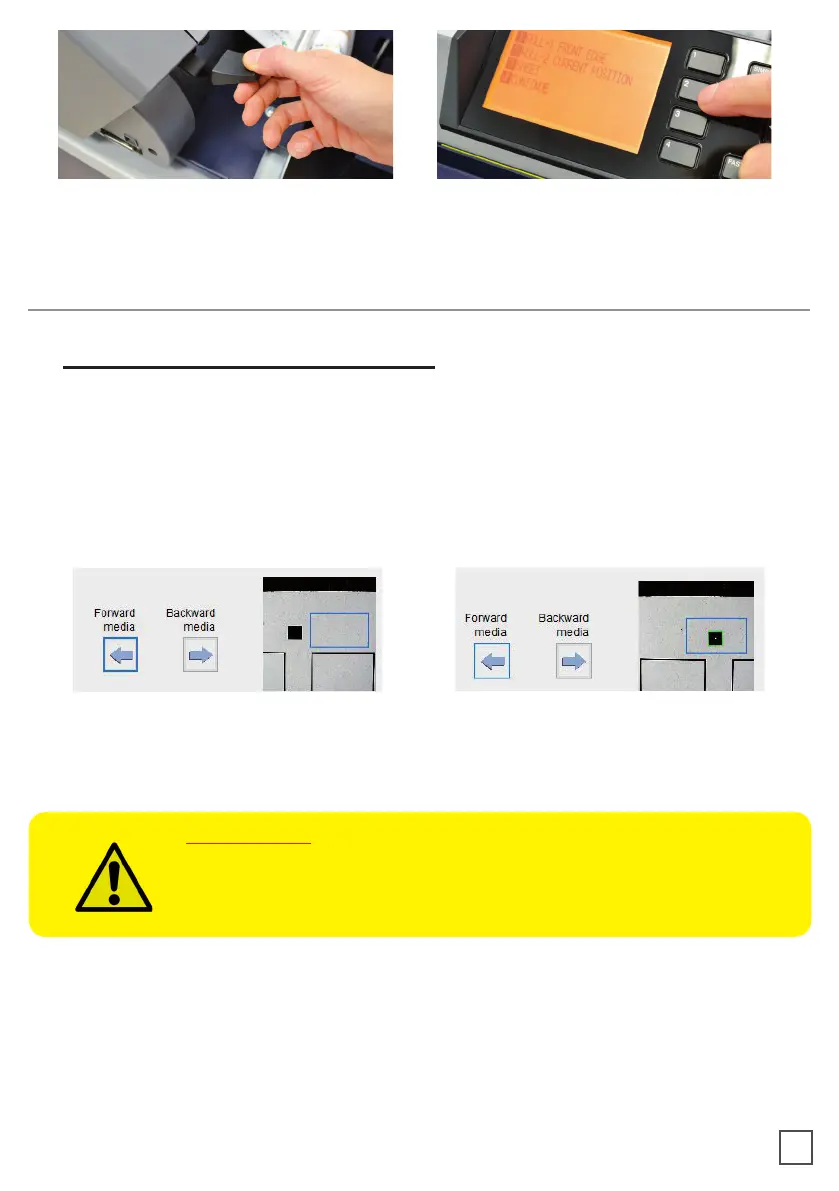
Press button 2 as requested on plotter’s display.
>> How to run the black-mark mode
User Interface at page 16 might be helpful.
1. Open Scorpio Cutting Manager.
2. Press “OPEN PDF” or “OPEN LAST JOB
3. Look at the camera preview, hold down “BACKWARD MEDIA” or “FORWARD MEDIA”
arrows to move the web until the black-mark goes in the center position of the blue
rectangle area.
4. Measure the distance in (MM) between the top of one black-mark to top of the next
black-mark, key in this value in the “DISTANCE BETWEEN BLACKMARKS” box section.
HOW TO RUN THE CUT TEST AND START A JOB
IMPORTANT:
Working with SCR22 or SCR35 models, please open “ADVANCED
BUTTON”, click on Settings and uncheck Media/Lamination Sensor
option, then save and close the pop up.
6. Press “CUT TEST” to check for cut depth. If the liner has been cut, decrease the cutter
pressure value in the cut force box. If label doesn’t detach, increase the cutter pressure
value in the cut force box.
7. Make sure label is aligned with the cut.
doesn’t match label.
10