Maintenance
Instructions for use | Panorama Nova Use Instructions for NIOSH-approved full facepieces
97
5.2.2 Cleaning and disinfecting procedure
1. Remove any accessories from the facepiece and clean them separately.
2. Prepare a cleaning solution consisting of water and a cleaning agent.
3. Clean all parts using a soft cloth with cleaning solution.
4. Thoroughly rinse all parts under running water.
5. Prepare a disinfecting solution consisting of water and a disinfecting agent.
Place all parts that need to be disinfected into the disinfectant bath.
6. Thoroughly rinse all parts under running water.
7. Dry all parts in the air or in a drying cabinet (max. temperature:
140 °F/60 °C). Do not expose to direct sunlight. Do not shake the facepiece
in order to remove water.
8. Mount the accessories if necessary.
5.2.3 Alternative cleaning and disinfecting procedure
1. Remove any accessories from the facepiece and clean them separately.
2. Prepare a solution consisting of water and combined cleaning and
disinfecting agent.
3. Immerse the facepiece in the solution. Make sure that all parts are wetted.
4. Thoroughly rinse all parts under running water.
5. Dry all parts in the air or in a drying cabinet (max. temperature:
140 °F/60 °C). Do not expose to direct sunlight. Do not shake the facepiece
in order to remove water.
6. Mount the accessories if necessary.
5.3 Tests and inspections
Inspect the facepiece in accordance with the inspection and maintenance
intervals.
5.3.1 Visual inspection of the speech diaphragm
● The speech diaphragm and the O-ring must be clean and undamaged; if
not, clean or replace (see "Replacing the speech diaphragm or O-
ring", page 99).
5.3.2 Visual inspection of the inhalation valve
● The inhalation valve is visible through the visor in the equipment connector.
Blow into the equipment connector to check whether both wings of the valve
disk move freely. Replace the valve disk, if necessary (see "Replacing the
inhalation valve disk", page 99).
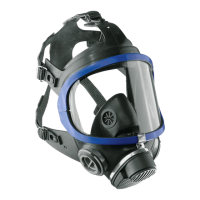
5.3.3 Visual inspection of the exhalation valve
1. Pull off the exhalation valve cover from the equipment connector.
2. Press one arm inwards and remove the spring holder.
3. Remove the valve disk from the guide.
4. The valve disk and the valve seat must be clean and undamaged. Clean or
replace if necessary.
5. Moisten the valve disk with water and refit. The valve disk must slide into the
guide under its dead weight.
6. Fit the spring holder and make sure that both arms engage at the sides. It is
marked with "L" = left and "R" = right and fits at an angle.
5.4 Leak tests
Perform the leak test with suitable test equipment, e.g. from the Testor or
Quaestor series.
For information on suitable cleaning agents and disinfectants and their
specifications, see document 9100081 at
www.draeger.com/IFU.
55117
00621277.eps
L R