Section 1 - Mounting Screen
Regardless of mounting method used, the following points apply:
1.
Screen should be lifted into position only by the end mounting brackets. Keep case level by lifting end plates simultaneously to prevent surface damage. Draper
provides eyebolts to use in hoisting the screen. Using both mounting holes in the mounting brackets makes for a much more stable installation. Never attempt to
lift screen along its length.
2.
Entire weight of unit MUST BE supported by end plates during installation. Anchoring intermediate case support brackets is only needed to reduce visible case
deflection when unit mounts into a ceiling pocket or ceiling tile opening. For installations that are not recessed, case deflection is usually not noticeable.
3.
Screen should be positively and securely supported so that vibration or abusive pulling will not weaken installation.
4.
Installer must ensure that fasteners used are of adequate strength and suitable for mounting surface. Installer must also insure that structure is of adequate
strength. Supporting hardware
(chains, cables, rods, etc.)
must be essentially vertical.
5.
Entire bottom of case must be readily accessible after installation is complete.
6.
Front, back and top of case must be straight — not forced to warp or bow. Use threaded rod and support brackets to keep large cases from warping. DO NOT use
support brackets to support weight of screen.
7.
Do not use case to support adjacent sections of ceiling.
8.
If optional ceiling flange trim kits are attached, use hardware provided.
9.
If case is painted, slots on bottom of case should be shielded to protect viewing surface from paint splatters or overspray.
10.
After case is mounted, and before operating screen, remove shipping spacers from inside case.
First, remove closure panel
(see Page 5)
. Find the hexagonal spacers on the motor end — one in
front of roller and one behind
(Fig. 1)
. Remove these spacers with a wrench, taking care not to
damage fabric or loosen wiring
(see caution note below)
. Replace closure panel.
CAUTION: Screen ships with motor wiring mounted to case. Be careful not to pull wiring loose
from case while removing spacers — if wiring is loose, it could be damaged during screen
operation. If wiring does come loose, re-mount as it was.
11.
Do not seal unit in ceiling until electrical connections have been made and screen has been
operated successfully.
CAUTION: Do not remove roller assembly from case unless necessary for repairs. If roller
assembly is removed, be sure motor is fully re-seated in the bracket, and re-secure it carefully
with motor retaining spring and screw
(Fig. 3)
.
Figure 1
(roller and fabric removed for clarity)
Figure 3
Figure 2
Shipping Shipping
SpacersSpacers
Please note: Maximum torque for
tightening screw is 5 lb-inches.
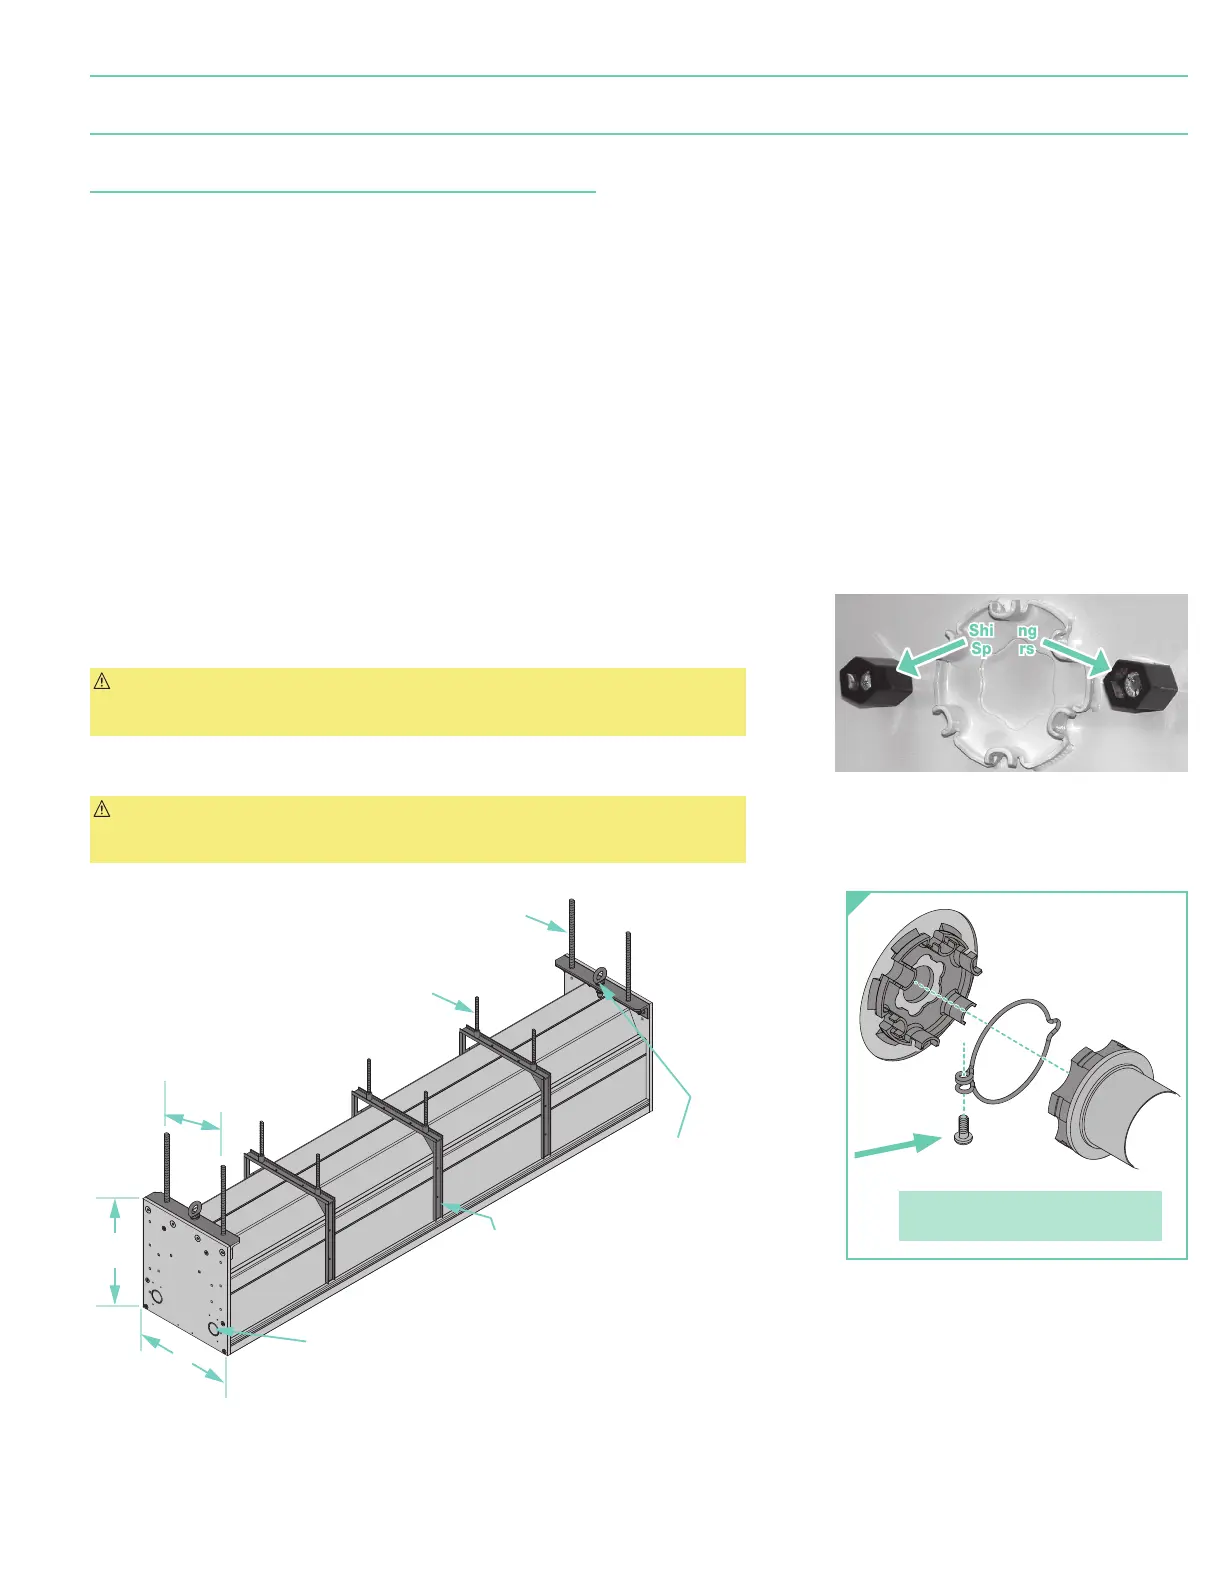
Eyebolts for hoisting screen
(DO NOT lift by center of case.
To ensure a safe installation, the
entire weight of the unit MUST BE
supported by the end-plates).
Case support brackets.
NOT for use in supporting
weight of case.
Knockouts for electrical connections
(two per end) with plastic plugs
"-16
(10mm)
threaded rod
(use for adjusting
deflection in extremely
long units) by others.
(for suspending screen)
by others.
8"
(203mm)
12"
(305mm)
13"
page 3 of 7
Paragon E & V