7
6. UNPACKING AND INSTALLING
6.1 UNPACKING
Once a suitable installation position has been identified, unpack the pump and prepare for installation. It is important to
inspect the pump to ensure that there has been no damage during transportation. The packaging material used does not
require any special disposal procedures. You should refer to you regional requirements.
6.2 INSTALLING THE CONNECTOR BASEPLATE *
The pump and the base plate are purchased separately. To install the base plate following the following steps:
Connect the multi pin connector from the base plate until security locking (fig.1).
Fit the base plate into position as shown in figure 2 and use the 4 screws to lock into position (fig.2)
* Note: 110/230V versions have two multi pin connectors inside
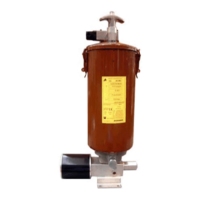
6.3 INSTALLING THE PUMP
On the bottom of the box there is a mounting hole template as shown in the diagram on the right. This can be used to
drill the fixing holes. The fixing holes should be Ø9mm (Ø0.35 inch). Use 3 screws to fix the pump into place.
Assembly the pump so that the filling point and the control panel are accessible by the user.
Allow 100mm (4 inches) perimeter distance around the pump for easy access.
Ideally, install the pump at a height that is easily and comfortably accessible by the
user to facilitate maintenance and refilling.
Do not install the pump where it may be submerged by liquids of in excessively
aggressive environment.
Do not install the pump in hazardous areas where there may be flammable or
explosive materials.
Do not install near strong heat sources or electrical areas that may cause electrical
interference with the control system.
Ensure that tubing and wiring is appropriately secured and protected.
6.4 INSTALLING PUMP ELEMENTS
Bravo pump is supplied with a single pumping element with by-pass (2,8 cm³/min) installed in Port 1.
The additional pump elements can be installed in any of the additional pump port (2 or 3). It is also possible to move Pump
Element 1 to another port if necessary, for example to simplify piping arrangements on the lubrication system. To install a
new pump element:
Unscrew and remove the plastic plug with the O Ring that is installed on the standard product.
Insert and screw the pump element until it is fixed in position.
Use 20Nm torque to secure the element.