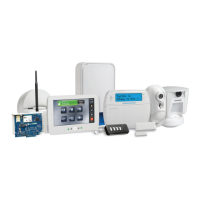
Section 2: Installation
2.2 Alarm Controller Installation
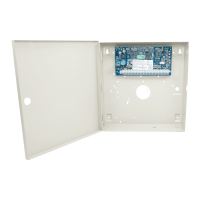
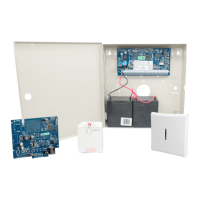
Begin the installation by mounting the alarm controller in the metal enclosure using the stand-offs provided. Optional mod-
ules, such as the HSM2108 and HSM2208, can also be mounted in the enclosure.
Install hardware in the sequence indicated on the following pages.
2.2.1 Mounting the Enclosure
Locate the panel in a dry area, preferably near an unswitched AC power source and the incoming telephone line. Complete
all wiring before applying AC or connecting the battery.
2.3 Wiring
All wiring entry points on the enclosure are designated by arrows. All circuits are classified UL power limited except for the
battery leads. Minimum 1/4” (6.4mm) separation must be maintained at all points between power limited and non-power lim-
ited wiring and connections.
2.3.1 Terminal Descriptions
The following terminals are available on the PowerSeries Neo alarm controller.
Terminal Description
BAT+, BAT- Battery terminals. Use to provide backup power and additional current when system demands exceed the power output of the
transformer, such as when the system is in alarm.
Do not connect the battery until all other wiring is complete.
AC Power terminals.
Connect the battery before connecting the AC. Do not connect the battery or transformer until all other wiring is complete.
AUX+, AUX- Auxiliary terminals. Use to power modules, detectors, relays, LEDs, etc. (700mA MAX). Connect the positive side of device to
AUX+, the negative side to AUX-.
BELL+, BELL- Bell/Siren power (700mA MAX). Connect the positive side of any alarm warning device to BELL+, the negative side to BELL-.
RED, BLK,
YEL, GRN
Corbus terminals. Use to provide communication between the alarm controller and connected modules. Each module has four
Corbus terminals that must be connected to the Corbus.
PGM1 to
PGM4
Programmable output terminals. Use to activate devices such as LEDs.
(PGM1, PGM3, and PGM4: 50mA PGM2: 300mA or can be configured as an input)
Z1 to Z8
COM
Zone input terminals. Ideally, each zone should have one detection device; however, multiple detection devices can be wired to
the same zone.
EGND Earth ground connection.
TIP, RING, T-
1, R-1
Telephone line terminals.
PCLINK_1 DLS/SA
PCLINK_2 DLS/SA, Alternate Communicator
- 12 -