Section 4: Configuration
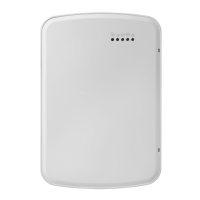
l Power up sequence – flashes rapidly until the end of the power-up sequence.
l Firmware indication – flashes during the firmware upgrade process. If the firmware upgrade fails, the LED flashes rap-
idly.
l Trouble indication – Flashes when troubles are present. Troubles are indicated according to the following priority:
1 flash - no keypads enrolled
2 flashes - module supervision trouble
3 flashes - bus low voltage
4 flashes - low battery trouble
5 flashes - AC trouble
6 flashes - AUX trouble
7 flashes - bell trouble
8 flashes - TLM trouble
How to Enter Data
Conventions Used In This Manual
Brackets [] indicate numbers or symbols that must be entered on the keypad.
e.g., [*][8][Installer Code][804] requires the following key entries:
[*][8][5555][804]
[*] initiates a special command.
[5555] is the default installer code. The default installer code should be changed during initial programming of the system.
[804] indicates the particular programming section being accessed.
Entering Letters Manually (System Labels)
1. In Installer Programming, enter the section requiring text input.
2. Use the arrow keys [<][>] to move the cursor to a blank space or existing character.
3. Press the number key corresponding to the appropriate letter. Each number button accesses three letters and a number.
The first press of the number key displays the first letter. The second press displays the second letter, etc.
1
A, B, C, 1
2
D, E, F, 2
3
G, H, I, 3
4
J, K, L, 4
5
M, N, O, 5
6
P, Q, R, 6
7
S, T, U, 7
8
V, W, X, 8
9
Y, Z, 9,0
0
Space
4. To select lower case letters press [*]. The Select Options list opens. Scroll to “lower case” and press [*] again to select.
5. When the required letter or number is displayed use the arrow keys [<][>] to scroll to the next letter.
6. When finished, press the [*] key, use the [<][>] keys to scroll to “Save” then press [*].
7. Continue from step 2 until all labels are programmed.
For information on entering hexadecimal data, see "Programming Hex and Decimal Data" on page 65.
- 30 -