P R O G R A M D E S C R I P T I O N S
26
○○○○○○○○○○○○○○○○○○○○○○○○○○○○○○○○
○○○○○○○○○○○○○○○○○○○○○○○○○○○○○○○○
Clock Adjust ...................................................... Section [700]
5.29 Timebase
If the Timebase is Internal Crystal option is enabled, in cases of
unstable AC power input, the internal crystal can be used to keep
the most accurate timbase. If the Timebase is AC line option is
enabled, the timebase is the AC power input. If the 50 or 60Hz AC
power input is very stable it can be used as the timebase.
○○○○○○○○○○○○○○○○○○○○○○○○○○○○○○○○
○○○○○○○○○○○○○○○○○○○○○○○○○○○○○○○○
Timebase Internal Crystal/AC line ............. Section [701]: [2]
5.30 Resetting Factory Defaults
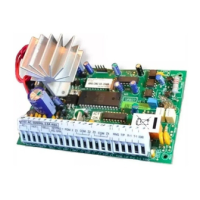
On occasion, it may be necessary to default the main control panel
or one of the connected modules: the LINKS2X50 Radio interface,
the PC5132 wireless receiver, and the PC5400 Printer module.
To default the main control panel (hardware), perform the
following:
1. Remove AC and battery from the panel.
2. Remove all wires from the Zone 1 and PGM1 terminals.
3. With a piece of wire short the Zone 1 terminal to the PGM1
terminal.
4. Apply AC power to the main panel.
5. When Zone Light 1 is lit on the keypad the default is
complete.
6. Remove AC power from the control
7. Reconnect all original wiring and power up the control.
AC power must be used to power the panel. The
panel will not default if only the battery is used.
To default the main control panel software and other modules,
perform the following:
1. Enter the Installer’s Programming mode.
2. Enter the appropriate programming section [XXX].
3. Enter the Installer’s Code.
4. Re-enter the appropriate programming section [XXX].
The panel will take a few seconds to perform the default. When
the keypad is again operational the default is complete.
If using Identified Wireless Keys (PC5132 v3.0 or
later only), when the main panel is defaulted, all
wireless key access codes must be re-pro-
grammed. Refer to your PC5132 v3.0 Installation
Manual for more information.
○○○○○○○○○○○○○○○○○○○○○○○○○○○○○○○○
Restore LINKS2X50 to Default Programming... Section [993]
Restore PC5132 to Default Programming ........ Section [996]
Restore PC5400 to Default Programming ........ Section [997]
○○○○○○○○○○○○○○○○○○○○○○○○○○○○○○○○
Restore Panel to Default Programming ............ Section [999]
5.31 Installer’s Lockout
If Installer’s Lockout is selected, a hardware default cannot be
performed. If a software default is performed, all programming
will restore to factory default.
If Installer’s Lockout Disable is selected, the panel will restore
all programming to factory defaults when a hardware or software
default is performed on the main control panel.
To enable or disable Installer’s Lockout, perform the
following:
1. Enter the Installer’s Programming mode.
2. Enter the appropriate programming section: [990] or [991].
3. Enter the Installer’s Code.
4. Re-enter the appropriate programming section: [990] or
[991].
○○○○○○○○○○○○○○○○○○○○○○○○○○○○○○○○
Installer Lockout Enable ................................... Section [990]
○○○○○○○○○○○○○○○○○○○○○○○○○○○○○○○○
Installer Lockout Disable .................................. Section [991]
5.32 Walk Test (Installer)
The Installer Walk Test can be used to test the alarm state of
each zone of the panel. The walk test cannot be used to test
zone type [24].
Before beginning the walk test, ensure the following conditions
are met:
1. The panel is disarmed
2. The Keypad Blanking option is disabled (section [016]: [3])
3. The Fire Bell is Continuous option is disabled (section [014]:
[8])
4. The Transmission Delay is disabled, if Transmission Delay
is not required (section [370])
Fire Troubles are not supported in Walk Test.
To perform a Walk Test, do the following:
Step 1 - Enter Installer Programming
Step 2 - Enter Section [901]
When any zone is violated the panel will activate the Bell Output
for two seconds, log the event to the Event Buffer and
communicate the alarm to central station. Each zone should be
tested several times during the test. Check the event buffer to
ensure that all zones and FAP keys are functioning properly.
To stop the test, you must do the following:
Step 1 - Enter Installer Programming
Step 2 - Enter Section [901]
Check the Event Buffer after the Walk Test is complete, to
ensure that the Audible/Silent 24-hr PGM alarms have been
restored.
\ The Alarm Memory is cleared upon entering Walk
Test mode. When the Walk Test is complete, the
Alarm Memory light will remain lit, but there will
be no alarms in memory. The light will turn off the
next time the panel is armed.

 Loading...