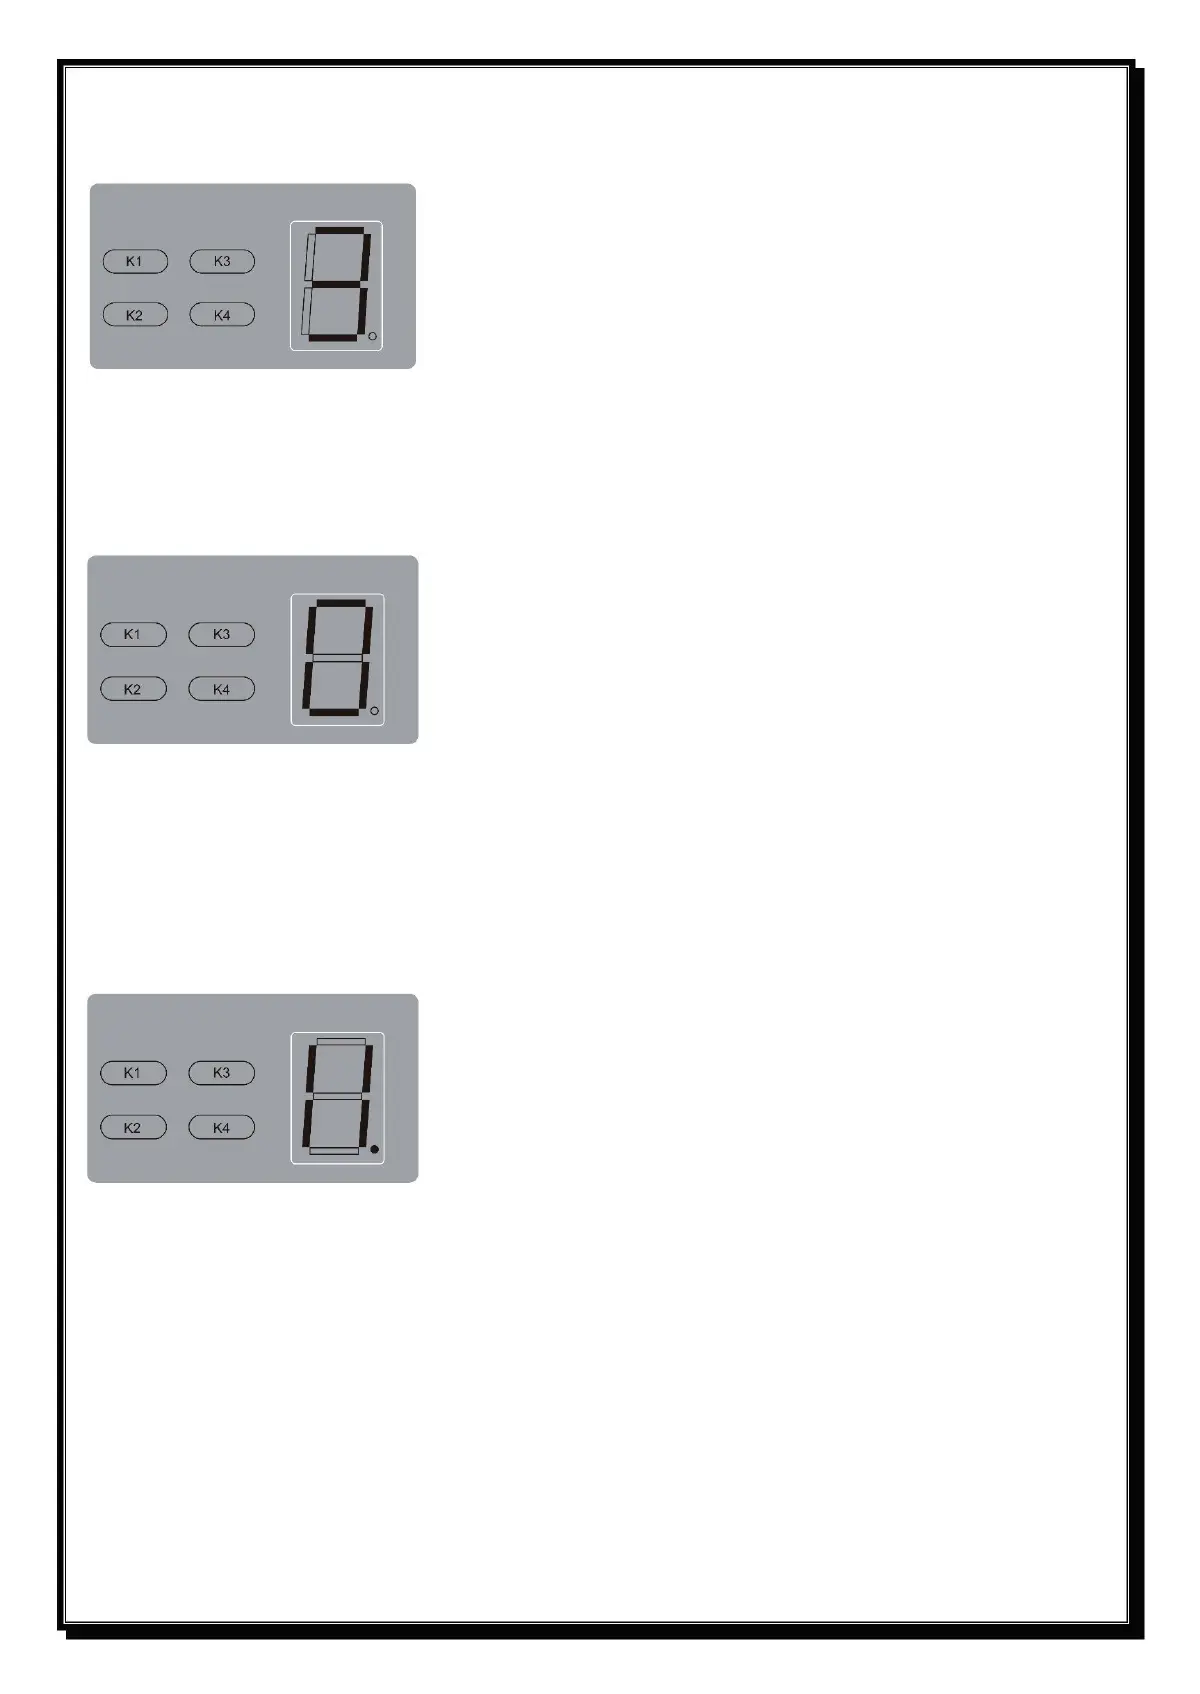
3. Safety reverse force adjustment
Press and hold ‘K1’ until the LED displays ‘3’. It’s under force adjustment
mode. LED will show the current force level, 1 to 9.
Press the ‘K3’ button to increase the force level and the ‘K4’ button to
decrease the force level, then press the ‘K1’ button to confirm.
The maximum force level is 9, the minimum is 1. Please make sure the
photo beams is connected and can work properly before you choose
levels 4~9.
Press and hold the ‘K3’ button, the LED will display the current setting, 1
to 9 (the factory default setting is ‘0’). Press the ‘K3’ button once, and the
auto-close time will increase by 1 minute, the maximum time is 9 minutes
Press the ‘K4’ button once, and the auto-close time will decrease by 1
minute. The auto-close function will be turned off when LED displays 0.
Press the ‘K1’ button to confirm. When the auto-close function is
activated, the fully opened door will auto-close after the set time.
Press and hold the ‘K4’ button until the LED displays ‘II’. Press the ‘K3’
Button once, the LED will display ‘H’, photo beam function is activated.
Press the ‘K4’ button the LED will display ‘II’ to cancel this function. Press
‘K1’ to confirm. Make sure that the connected photo beams is controlled
by switching value, and wiring as Fig. 16
Notice: If the photo beam function is activated, while the photo beam is
not connected, the door will not close.
Connecting a push button to this terminal (Fig. 17), you can use the
switch inside the garage to control the opening/stopping/closing of the
door when maintaining or the transmitter is lost.