8
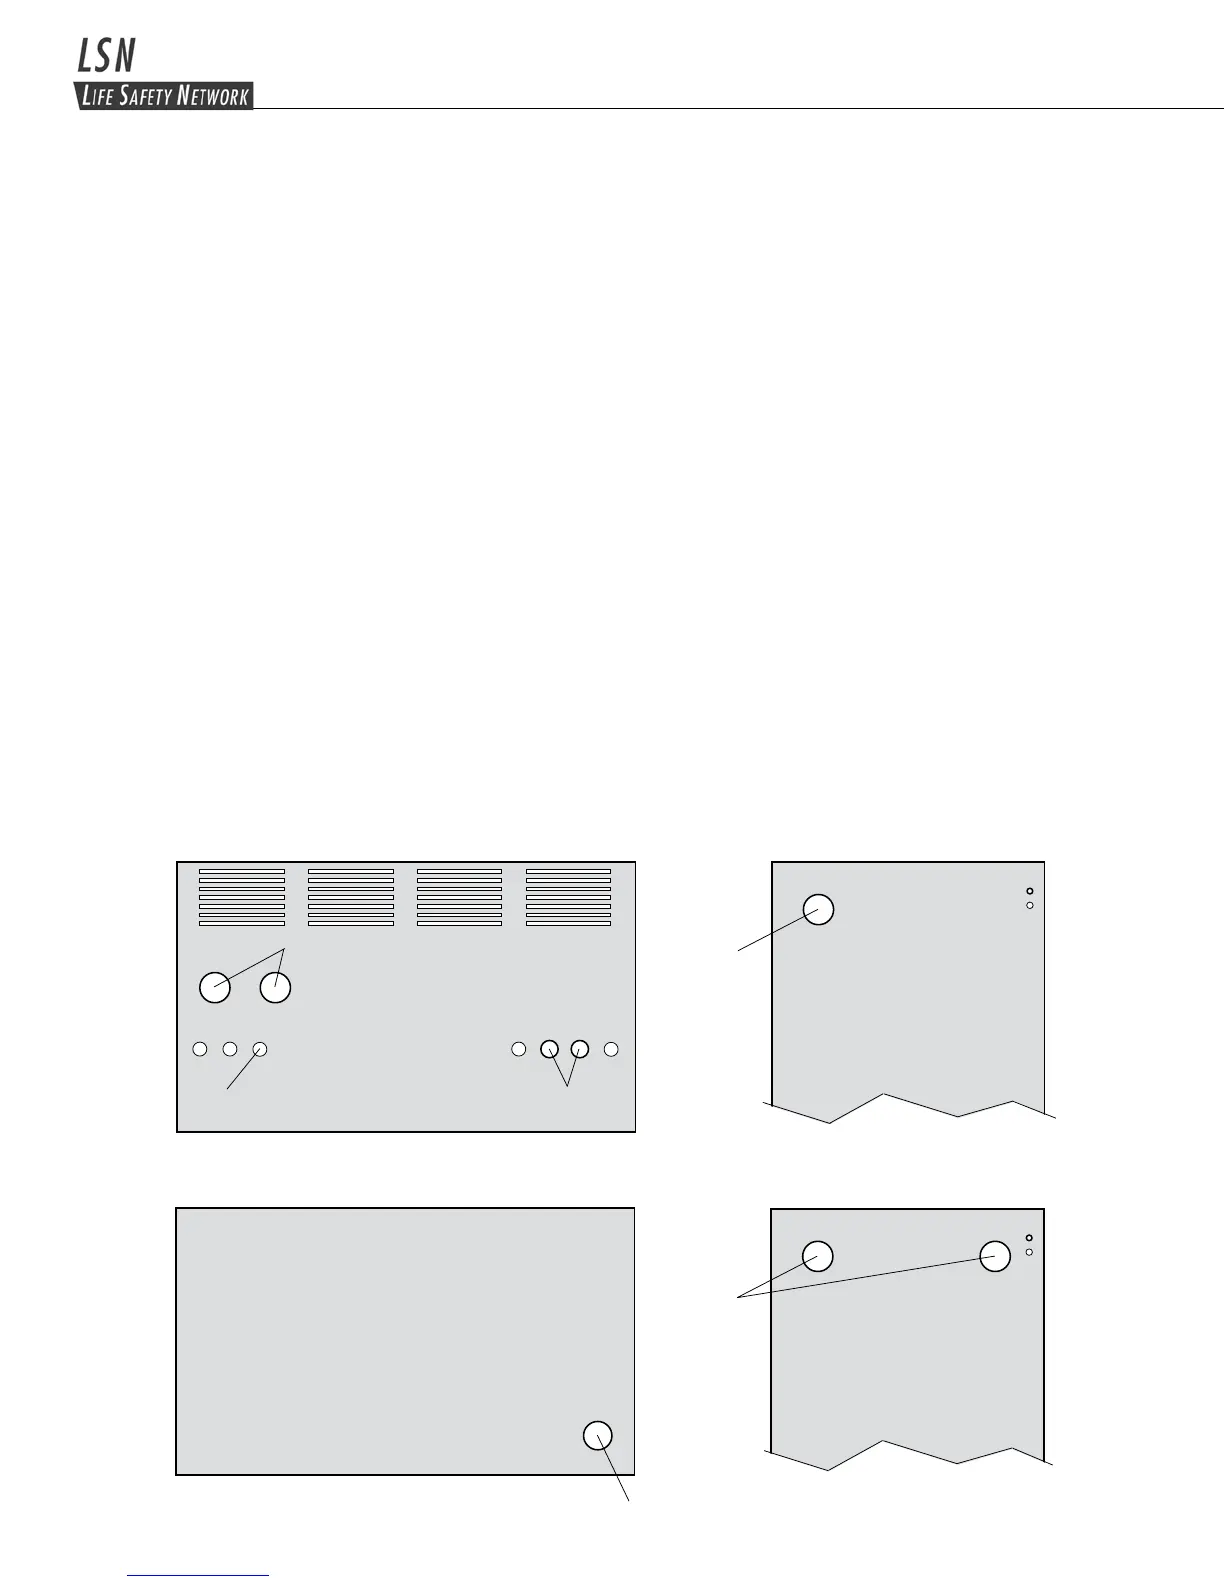
Fig. 1 Fig. 2
Fig. 3 Fig. 4
104.3 Cabinet Installation
Basedonthedesiredcabinetcongurationfortheapplication,removetheappropriateknockoutsintheelectronics
and battery cabinets. See Figures 1, 2, 3, or 4 for the knockout locations.
Follow the generalsequencebelowtoinstallthecabinets.
CAUTION: Batteries and LSN Electronics cabinets are very heavy. Check to assure that the oor in
the
installation area is capable of safely bearing the load.
1. Locateallmountinghardwareandchase/closenipplesintheaccessoryboxlocatedinsidethebatterycabinet.
2. Arrangethelowercabinet(s)intheirpermanentlocation.Ifmorethanonecabinetistobelocatedonthelower
level(CongurationBorC),fastenthemtogetherusingthesupplied5/16-18x3/4"bolts.Locatethethree
mounting holes in the rear of the battery cabinet and use three bolts per cabinet to secure together. Install the
supplied chase nipple and plastic bushing in the knockouts to connect the lower cabinets together.
3. Securethesuppliedwallmountingbracketstotheelectronicscabinet(CongurationsAandB),ortothe
outermostsidesoftheuppercabinets(CongurationC).Usethreesupplied5/16-18x3/4"boltsperwallbracket.
Note: Only two wall mounting brackets are supplied with the system, normally intended to secure the upper
cabinets to the wall. Consult the factory if additional brackets are needed to secure the lower cabinets to the wall.
4. Placetheuppercabinetsinpositionandsecurethemtogetherusingthesupplied5/16-18x3/4"bolts.Locatethe
three mounting holes in the rear of the battery cabinet and use three bolts per cabinet to secure together.
5. Securetheuppercabinetstothelowercabinetsusingthesupplied5/16-18x11/2"bolts.Installfromtheoorof
the upper cabinets into the top of the lower cabinets. Install the supplied close nipple and plastic bushing in the
knockouts to connect the upper cabinets to the lower cabinets.
6. Securethewallmountingbracketstothewallusinganacceptablewallanchoringtechnique.
BATTERY SIDE
1.951 Diam.
Knockout
Typ. Both Sides
BATTERY SIDE
1.951 Diam.
Knockouts
Typ. Both Sides
1.951 Diam.
Knockout
BATTERY TOP
BATTERY BASE
INVERTER BASE
INVERTER TOP
1.125 Diam.
Knockout
Typ. (2)
1.951 Diam.
Knockout
Typ. (2)
0.875 Diam.
Knockout
Typ. (5)
INVERTER SIDE