Duke Manufacturing Co.
2305 N. Broadway • St. Louis, Missouri
800-735-3853 • 314-231-1130 • Fax 314-231-5074
www.dukemfg.com
12 of 22
“XX” Controller
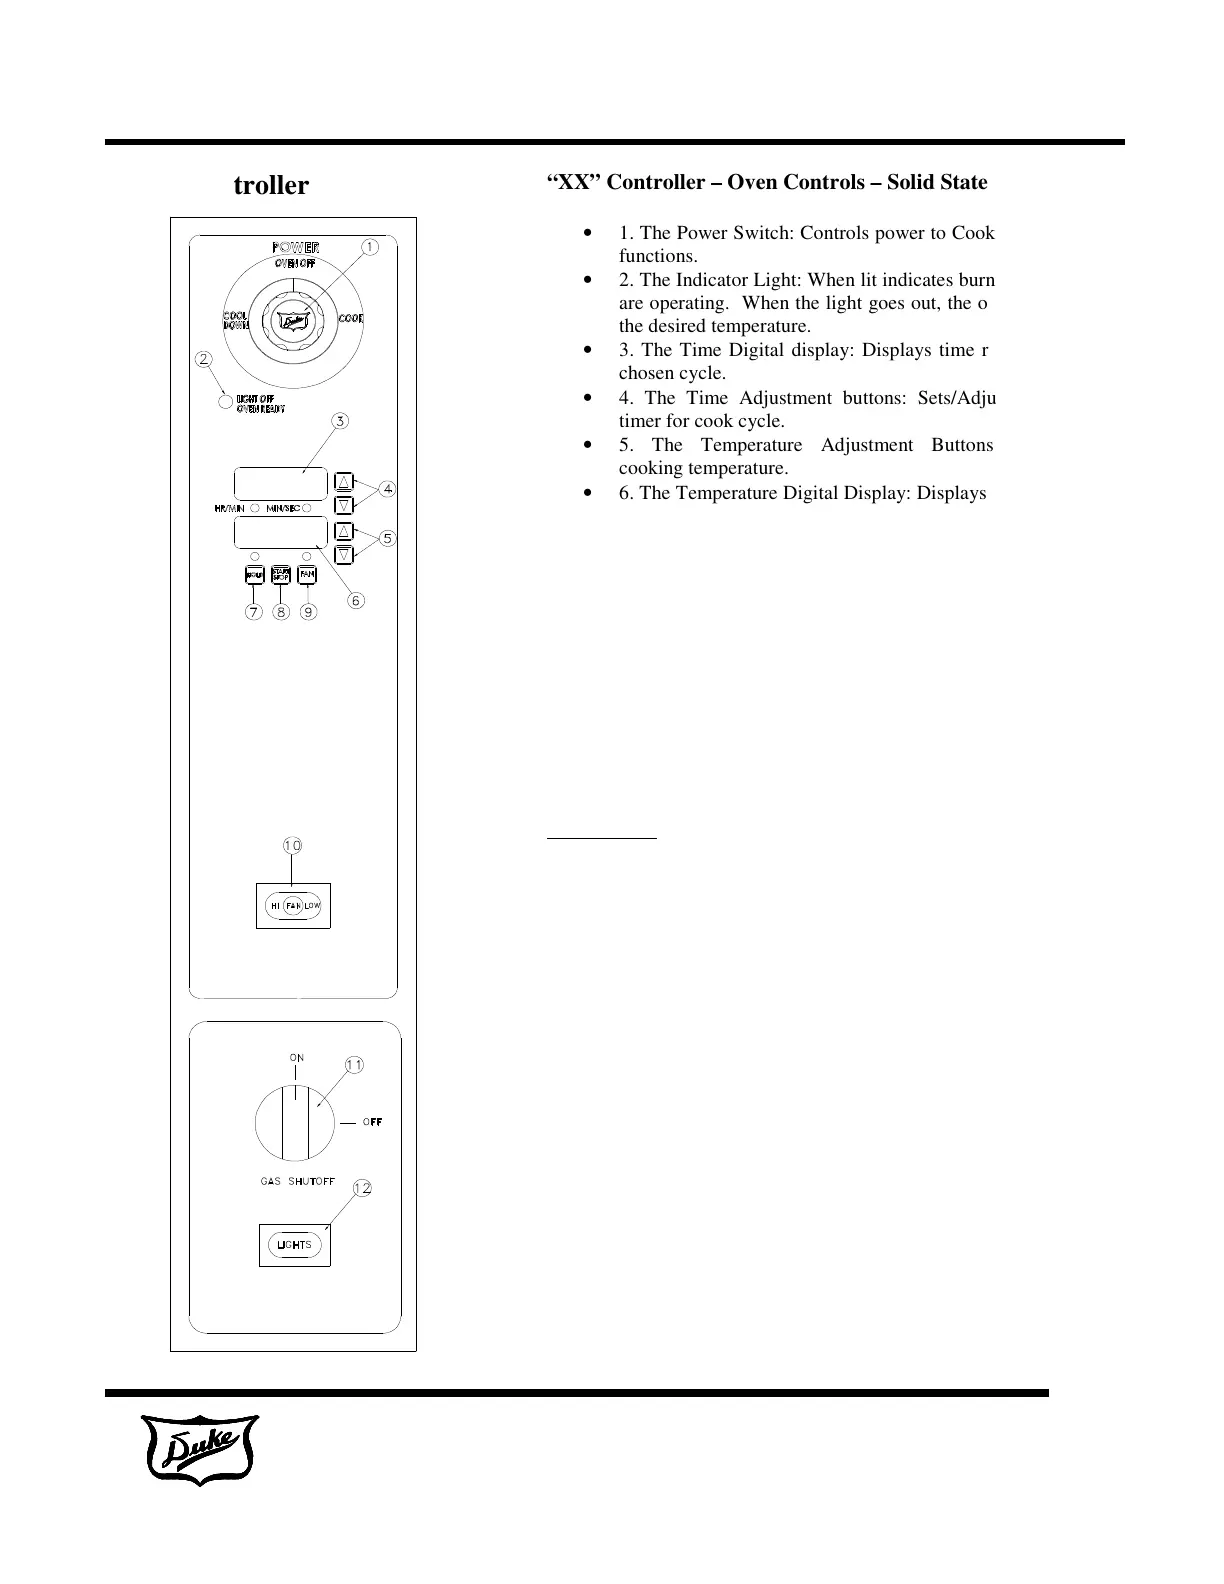
“XX” Controller – Oven Controls – Solid State Digital
• 1. The Power Switch: Controls power to Cook or Cool Down
functions.
• 2. The Indicator Light: When lit indicates burners or elements
are operating. When the light goes out, the oven has reached
the desired temperature.
• 3. The Time Digital display: Displays time remaining in the
chosen cycle.
• 4. The Time Adjustment buttons: Sets/Adjusts countdown
timer for cook cycle.
• 5. The Temperature Adjustment Buttons: Sets/Adjusts
cooking temperature.
• 6. The Temperature Digital Display: Displays the temperature
inside the oven
• 7. The Hold Button: Enable/Disables the Hold Function.
• 8. The Start/Stop Button: Starts/Stops the cooking cycle.
• 9. The Pulse Fan Button: Enables/Disables the Pulse Fan
Function.
• 10. The Fan Speed Switch: (Optional) – Sets fan speed to
high or low.
• 11. The Gas OFF/ON Button: Shuts the gas OFF or turns the
gas ON.
• 12. The Light Switch: Turns interior lights on/off.
Programming and Operating Instructions – “XX”
Controller
Timer Scale: the timer displays in two (2) different scales. From O to
60 minutes, the timer is displayed in Minutes/Seconds. This is
indicated by the MIN/SEC light on the controller. From 1 to 12 hours,
the time is displayed in Hours/Minutes, indicated by the HOUR/MIN
light on the controller. When the oven is first turned on, the display
will show the last cook time programmed.
Timer Adjustment: To increase the cook time, press the top (▲) button
located next to the Time Display. To decrease the cook time, press the
bottom button (▼) located next to the Time Display.
Temperature Scale: The controller can be set to display the
temperature in °F and °C as follows:
1) Remove/move control panel so that you have access to the back of
the control board.
2) Located the blue jumper at connection J3.
3) For °F operation the jumper is not needed. Place the jumper on
one of the pins for future use.
4) For °C operation place the jumper across the two pins of J3.
When the oven is turned on, the display will show the last cook
temperature programmed. You can view the actual temperature of
the oven by pressing both of the Temperature Adjustment buttons
at the same time.
 Loading...