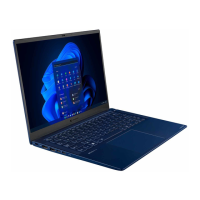
3. Removing the LCD and Printed Circuit / Wiring Boards
Beside the LCD and the main PCB, there are further small PCBs and components which
are in the scope of the WEEE Directive. The removal of these components is described in
detail in the chapter 4 of the associated maintenance manual.
Replacement Procedures
Figure 4-3 Removing the Base Assembly (1) ........................................................... 4-8
Figure 4-4 Removing the Base Assembly (2) ........................................................... 4-9
Figure 4-5 Removing the Base Assembly (3) ........................................................... 4-9
Figure 4-6 Releasing the battery pack..................................................................... 4-10
Figure 4-7 Removing the SSD .................................................................................. 4-11
Figure 4-8 Removing the Fan ................................................................................... 4-12
Figure 4-9 Installing the Fan..................................................................................... 4-13
Figure 4-10 Removing the Fin .................................................................................. 4-14
Figure 4-11 Removing the system board (1)........................................................... 4-15
Figure 4-12 Removing the system board (2)........................................................... 4-15
Figure 4-13 Removing the Click pad (1) .................................................................. 4-18
Figure 4-14 Installing the Click pad (1).................................................................... 4-19
Figure 4-15 Installing the Click pad (2).................................................................... 4-19
Figure 4-16 Installing the Click pad (3).................................................................... 4-20
Figure 4-17 Removing the Speaker ......................................................................... 4-21
Figure 4-18 Removing the Power button & Fingerprint sensor ............................ 4-22
Figure 4-19 Installing the Power button (1)............................................................. 4-22
Figure 4-20 Installing the Power button & Fingerprint sensor (2) ........................ 4-23
Figure 4-21 Installing the Power button & Fingerprint sensor (3) ........................ 4-23
Figure 4-22 Removing the keyboard (1) .................................................................. 4-24
Figure 4-23 Removing the keyboard (2) .................................................................. 4-24
Figure 4-24 Installing the keyboard (1).................................................................... 4-25
Figure 4-25 Installing the keyboard (2).................................................................... 4-25
Figure 4-26 Removing the W-LAN ANTENNA (1) ................................................... 4-26
Figure 4-27 Removing the W-LAN antenna (2) ....................................................... 4-27
Figure 4-28 Installing the W-LAN antenna (1)......................................................... 4-28
Figure 4-29 Installing the W-LAN antenna(2).......................................................... 4-28
Figure 4-30 Removing the LCD unit (1) ................................................................... 4-29
Figure 4-31 Installing the LCD unit (1)..................................................................... 4-30
Figure 4-32 Installing the LCD unit (2)..................................................................... 4-31
Figure 4-33 Installing the LCD unit (3)..................................................................... 4-31
Figure 4-34 Removing the camera module (1)........................................................ 4-32
 Loading...
