2. Removing the SSD
To remove the SSD the mainboard must be removed first.
Please refer to the information listed in section 4.15 of the Portege X40L-K Series Maintenance
Manual to check how the mainboard is removed.
Please refer to the information below for the removal of the SSD.
One Philips screwdriver with type 1 bit will be required to remove the screws indicated in the
locations below. Once removed, these components should be recycled as per local
requirements.
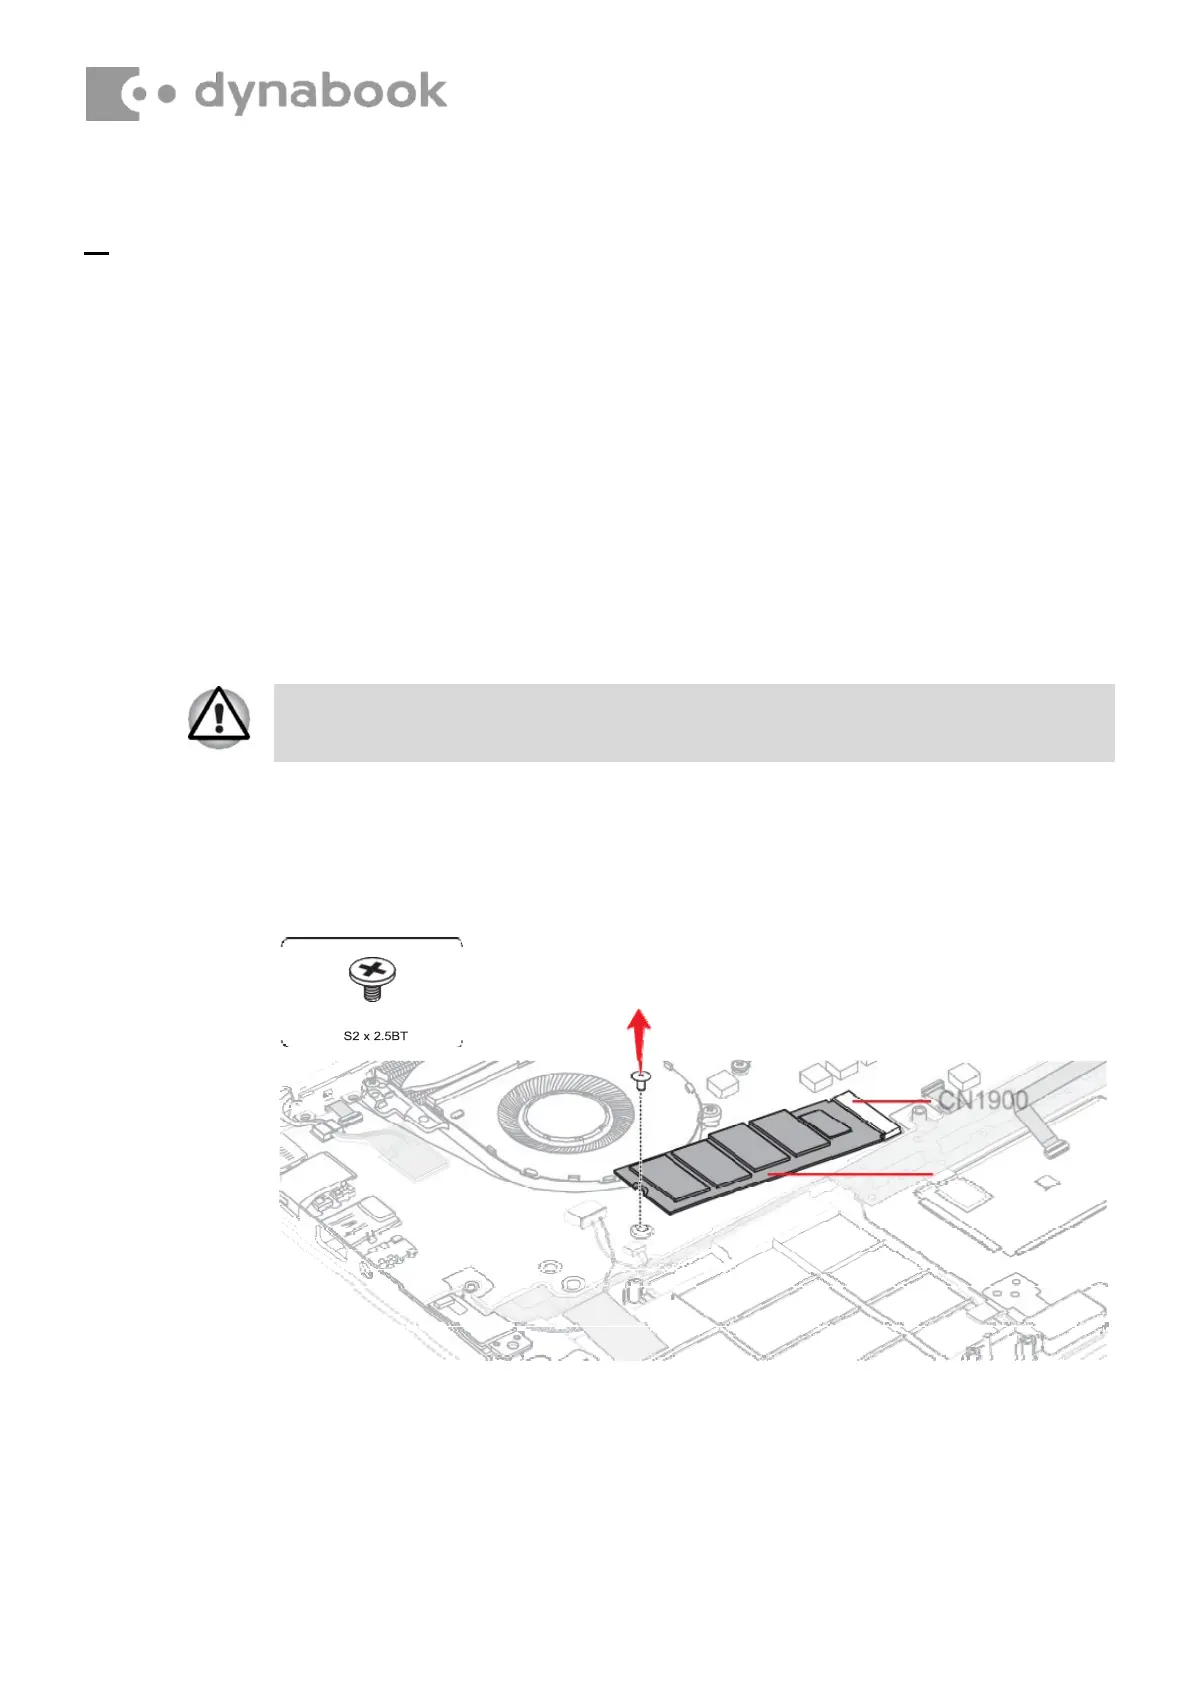
4.12.1
Removing the SSD
To remove the SSD, follow the steps below .
1. Remove the the following screw and disconnect the SSD from the
connector CN19
00 on the System board.
Figure 4-7 Removing the SSD
Take care not to press on the top or bottom of a SSD. Pressure may cause
the data loss or damage to the device.
 Loading...