Page 8
4.0 Meter Installation (Continued)
4.3 Current Sensor Installation & Wiring (Continued)
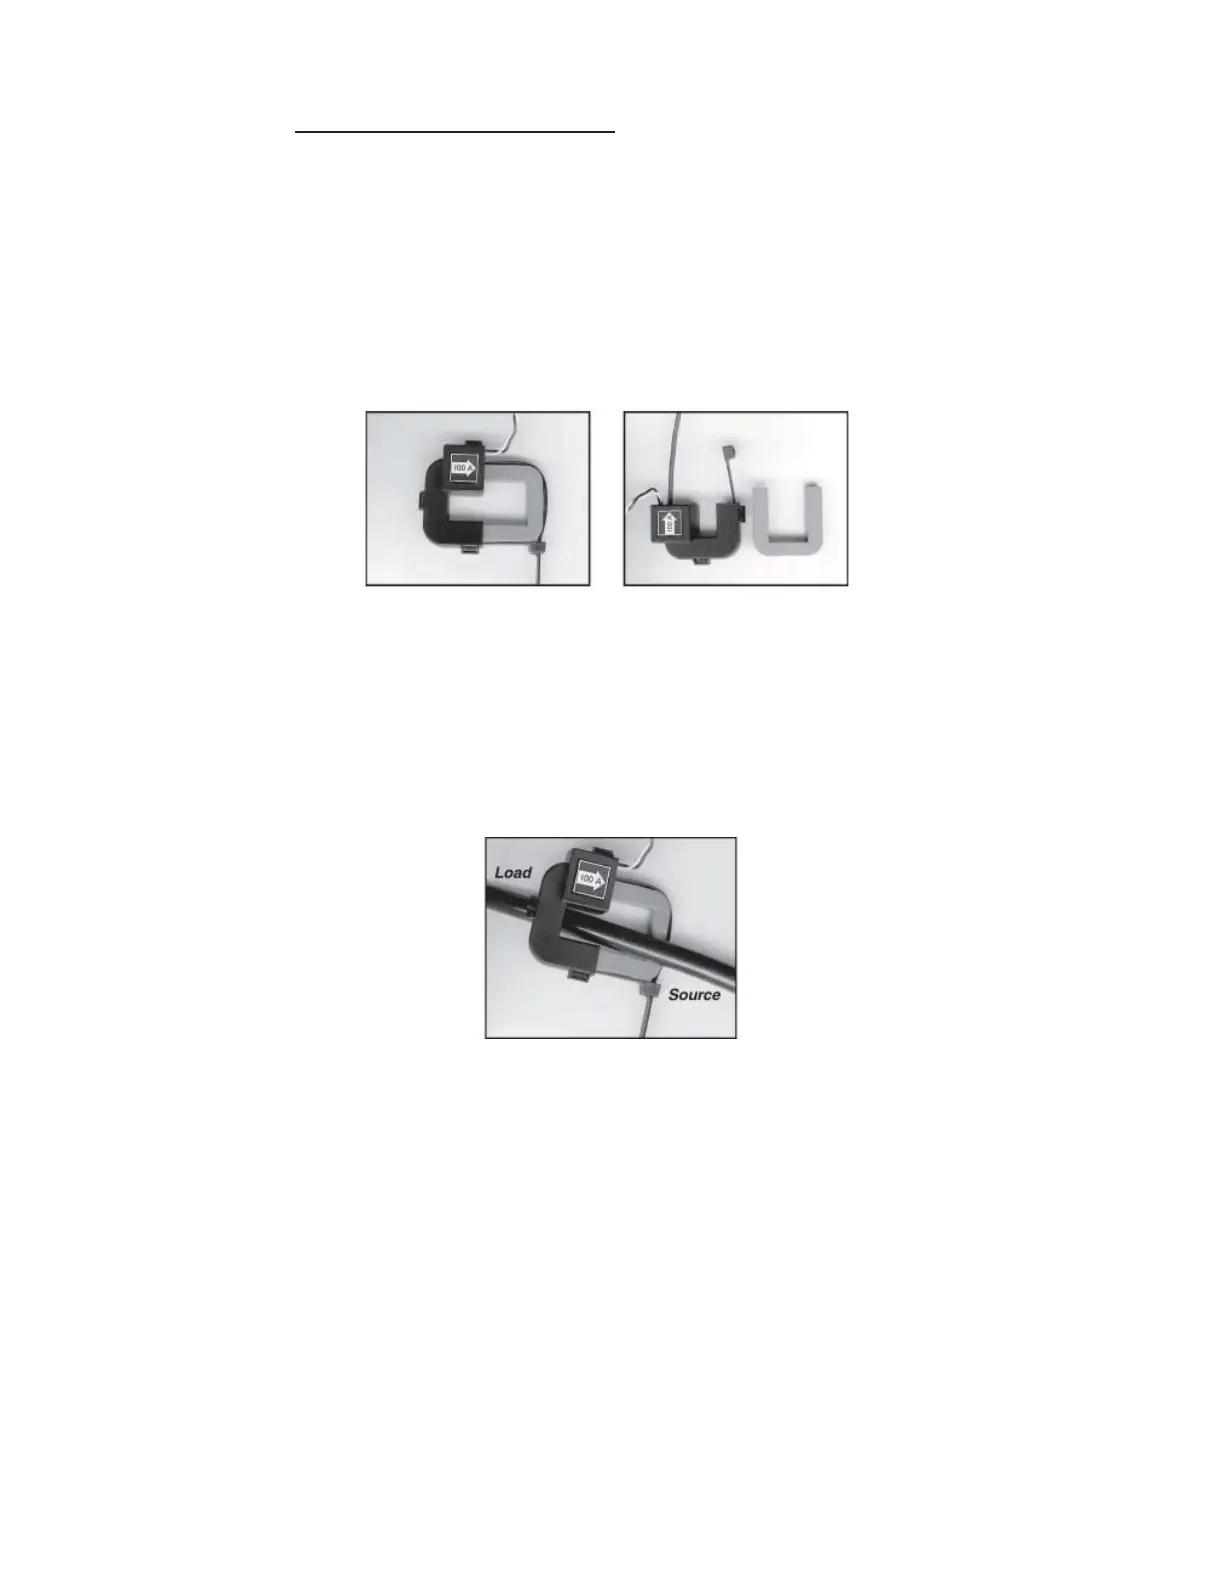
Installing the Split-Core Current Sensor Assembly
STEP 1: Each phase being monitored will require one two-piece current
sensor assembly. Therefore, a three-phase meter will require three (3)
assemblies. Open the two-piece current sensor assembly by releasing
the nylon clamp using a fl at head screwdriver.
STEP 2: Reassemble the current sensor assembly around the conductor(s) to be
monitored. Ensure the current sensor halves marked “Load” are both
facing the load side of the conductor. The colored arrow will be on the
source side of the conductor being monitored and MUST be pointed in
a clockwise direction around the conductor being monitored. Tighten
the nylon clamp to complete the assembly.
IMPORTANT: When looking from the source side of the conductor(s) being
monitored, you should see the arrow on the current sensor assembly. The
arrow should be pointing in a clockwise direction around the conductor(s)
being monitored. If the arrow is not positioned on the source side, inaccu-
rate readings will result.
 Loading...