SAFETY
Page B-7
Repair and Service Manual
Read all of Section A and this section before attempting any procedure. Pay particular attention to all Notes, Cautions and Warnings
and flushed with water.
Wrap wrenches with
vinyl tape to prevent
the possibility of a
dropped wrench from
‘shorting out’ a battery, which could
result in an explosion and severe per-
sonal injury or death.
Aerosol containers of battery terminal
protectant must be used with extreme
care. Insulate metal container to prevent
can from contacting battery terminals
which could result in an explosion.
Overfilling batteries may result
in electrolyte being expelled
from the battery during the charge cycle. Expelled
electrolyte may cause damage to the vehicle and
storage facility.
BATTERY REMOVAL &
INSTALLATION
Tool List Qty. Required
Insulated wrench, 1/2"................................................. 1
Socket, 1/2", 3/8" drive................................................ 1
Ratchet, 3/8" drive....................................................... 1
Battery carrier ............................................................. 1
Torque wrench (in. lbs.), 3/8" drive.............................. 1
In the following text, there are references to
removing/installing bolts etc. Additional hard-
ware (nuts, washers etc.) that are removed must always be
installed in its original position unless otherwise specified. Non-
specified torques are as shown in table contained in Section
“A”.
Before any electrical service is
performed on 48 volt model
vehicles, the Run-Tow/Maintenance switch must be
placed in the ‘Tow/Maintenance’ position.
If a power wire (battery, motor or controller) is dis-
connected for any reason on the 48 volt model vehi-
cle, the Run-Tow/Maintenance switch must be left in
the ‘Tow/Maintenance’ position for at least 30 sec-
onds after the circuit is restored.
Turn vehicle key to ‘OFF’ and remove. Insure all optional
electrical accessories are turned OFF.
Using an insulated wrench, remove the negative (-) cable
first, the positive (+) cable and then all other cables from
the vehicle batteries. Remove the battery hold down by
removing the hardware and lifting the retainer from the
batteries.
Remove the batteries using a commercial battery carrier.
If the batteries have been cleaned and any acid in the
battery rack area neutralized on a regular basis, no cor-
rosion to the battery racks or surrounding area should be
present. If any corrosion is found, it should be immedi-
ately removed with a putty knife and wire brush. The area
should be washed with a solution of sodium bicarbonate
(baking soda) and water and thoroughly dried before
priming and painting with a corrosion resistant paint.
Place batteries into the battery rack. Install the battery
hold downs and tighten to 45 - 55 in. lbs. (5 - 6 Nm)
torque, to prevent movement but not tight enough to
cause distortion of the battery cases.
Inspect all wires and terminals and clean any corrosion
from the battery terminals or the wire terminals with a
solution of sodium bicarbonate (baking soda) and wire
brush if required.
Aerosol containers
of battery terminal
protectant must be
used with extreme care. Insulate metal con-
tainer to prevent can from contacting bat-
tery terminals which could result in an
explosion.
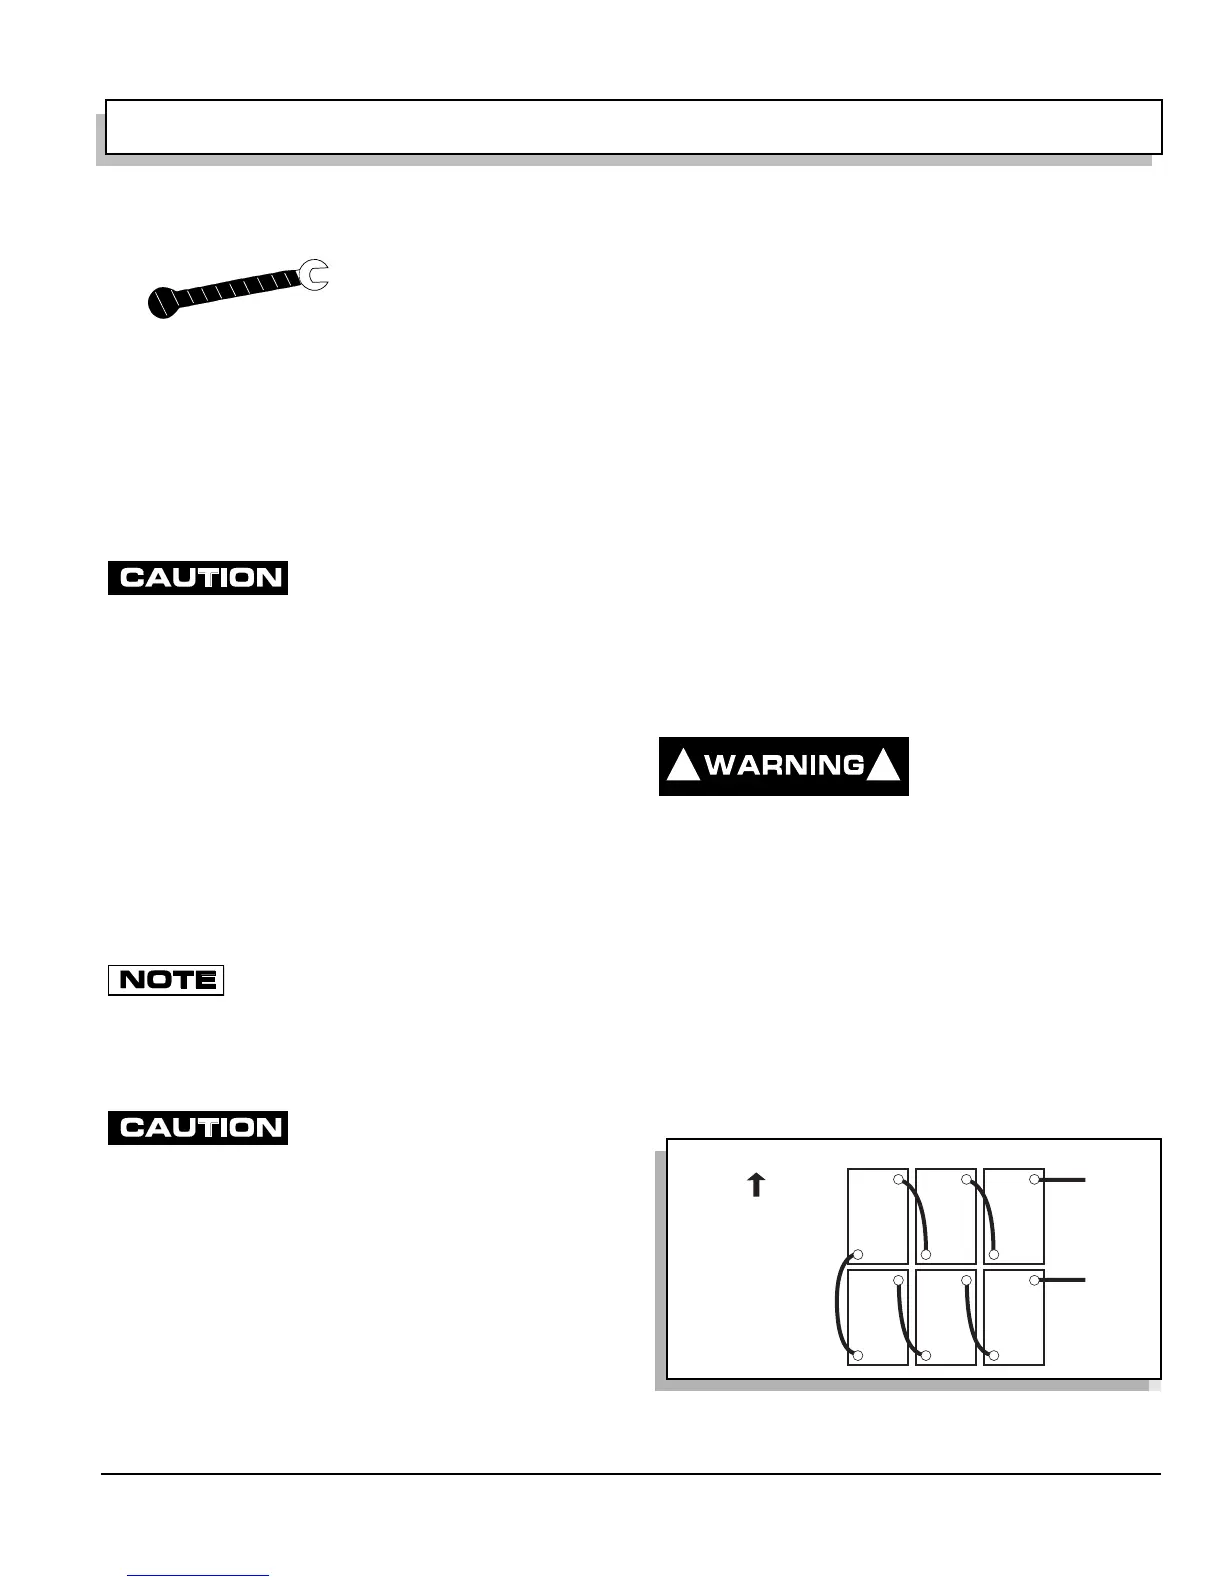
Use care to connect battery cables as shown in the fol-
lowing illustration (Ref Fig. 1 on page B-7)(Ref Fig. 2 on
page B-8). Connect the positive (+) battery cable first,
other battery connecting cables, and then connect the
negative (-) cable last. Ensure that all battery terminals
are installed with crimp up. Tighten the battery post hard-
ware to 90 - 110 in. lbs. (10 - 12 Nm).
Protect the battery
terminals and battery cable terminals with a commer-
cially available protective coating.
Fig. 1 36 Volt Battery Connections
! !
+
-
+
-
+
-
+
-
+
-
+
-
Front of Vehicle
BL +
BL -
ef Bat 1
 Loading...


