FRONT SUSPENSION AND STEERING
Page E-16
Repair and Service Manual
Read all of Section B and this section before attempting any procedure. Pay particular attention to all Notes, Cautions and Warnings
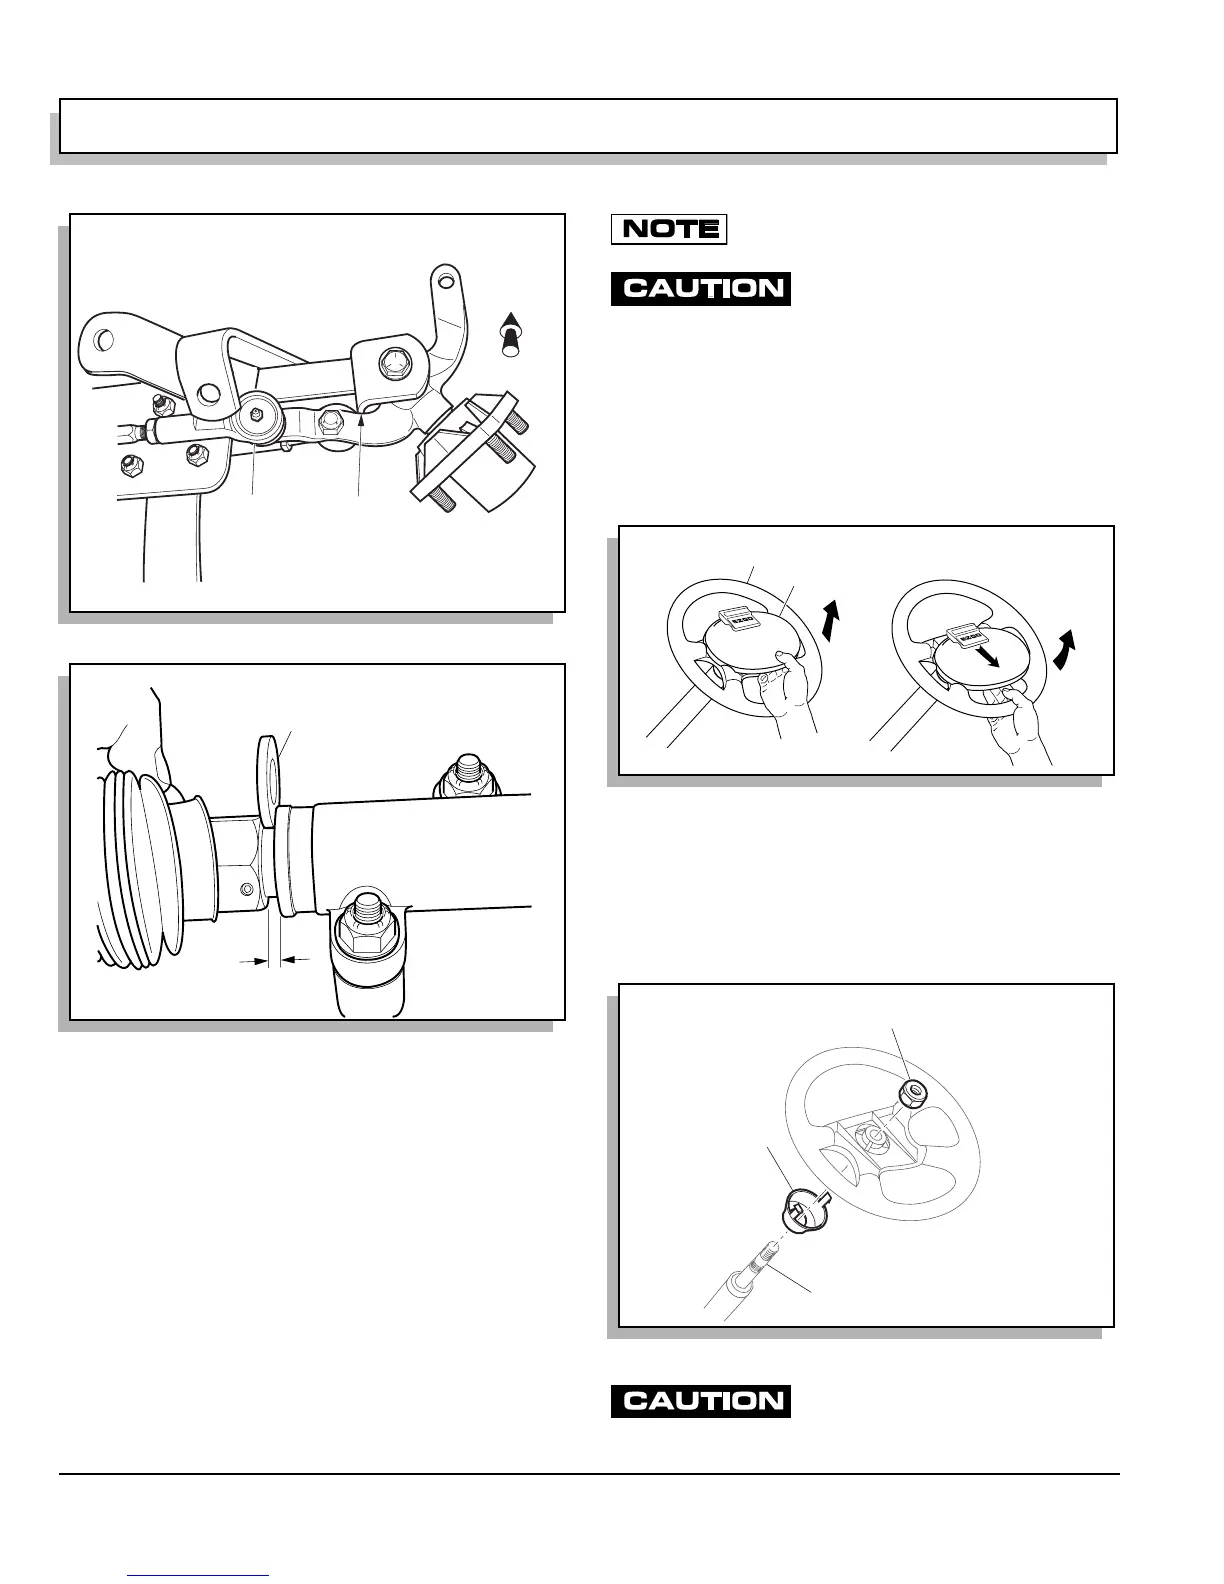
Adjust, using an 1/8" thick washer as a gauge, by turning
shaft of rack extension with wrench to create the 1/8"
gap. Tighten jam nut (5) to 35 - 45 ft. lbs. (47 - 61 Nm)
torque. Secure bellows to rack and pinion unit with new
wire tie (14).
Steering Wheel Replacement
Tool List Qty. Required
Socket, 15/16", 1/2" drive............................................ 1
Ratchet, 1/2" drive....................................................... 1
Plastic faced hammer.................................................. 1
Ball peen hammer ....................................................... 1
Anti-seize compound................................................... 1
Torque wrench, 1/2" drive, ft. lbs. ................................ 1
To maintain correct orientation when replacing
steering wheel, first turn wheels straight ahead.
To prevent damage to the clipboard,
perform the following removal proce-
dure. Do not use a screwdriver to push or pry the retaining tabs.
From the front side of the steering wheel (4), remove the
clipboard (5) by first pulling straight up on the bottom of
the clipboard to release the two bottom retaining tabs.
Then, using thumb for leverage as shown, reach from
behind steering wheel with fingertips to first pull down,
and then push up to release the two top clipboard retain-
ing tabs (Ref Fig. 22 on page E-16).
Loosen the steering wheel retaining nut (6) two to three
turns (Ref Fig. 23 on page E-16). DO NOT REMOVE
NUT AT THIS TIME. Apply upward pressure to the steer-
ing wheel. Place a plastic faced hammer against the
steering wheel nut and strike plastic faced hammer
sharply with a ball peen hammer.
Do not strike steering nut or end of
steering shaft directly with ball peen
Fig. 20 Spindle Contact with Front Axle
Fig. 21 Checking Gap
Passenger Side
Spindle Arm
Resting Against
Front Axle
Rack
Ball
Joint
Front
of Vehicle
Gap
Approximately
1/8" Thick Washer
Fig. 22 Clipboard Removal
Fig. 23 Steering Wheel Replacement
4
5
Step 1
Step 2
Steering Shaft
6
7
 Loading...


