21
Mark the center of each slot for the mounting screw pilot holes. You
will drill one hole in the center of each slot.
Drill the holes using the #29 bit (for the #10 screws).
Position transducer mount on transom and mark mounting holes.
Side view (left) and seen from above (right).
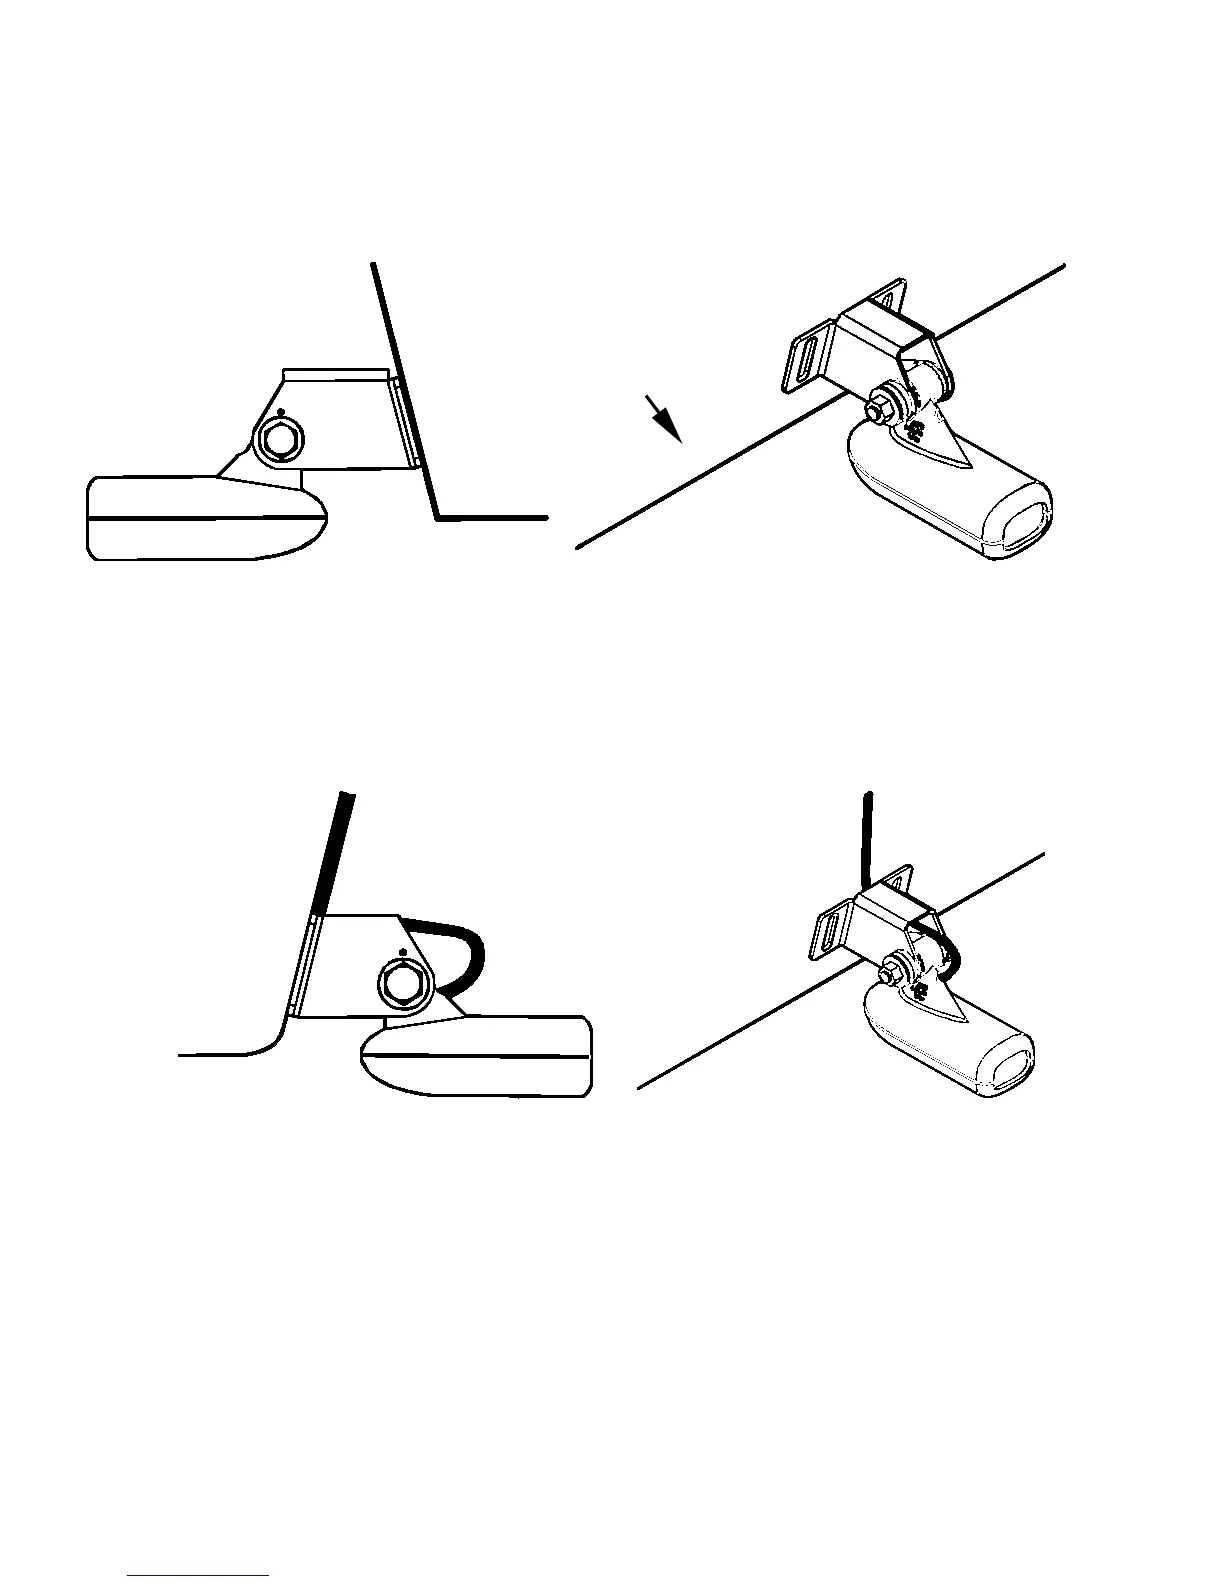
5. Attaching transducer to transom. Remove the transducer from
the bracket and re-assemble it with the cable passing through the
bracket over the bolt as shown in the following figures.
Route cable over bolt and through bracket. Side view (left) and seen
from above (right).
Attach the transducer to the transom. Slide the transducer up or
down until it's aligned properly with the bottom of the hull as shown
in the preceding and following figures. Tighten the bracket's mount-
ing screws, sealing them with the sealant/adhesive compound.
Transom
Transom