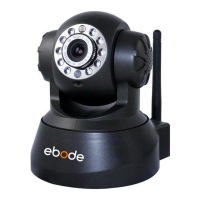
3.7.1 To change the camera’s port.
Open the IP Camera Tool from your Desktop select the ebode camera (it will turn blue) and right-mouse
click and choose network configuration. The default port of camera is “80”, please change “80” to any
other one you like, such as “81”, “100”, “8091” etc. Click “OK”, the camera will reboot, wait about 30
seconds.
Figure 7.4
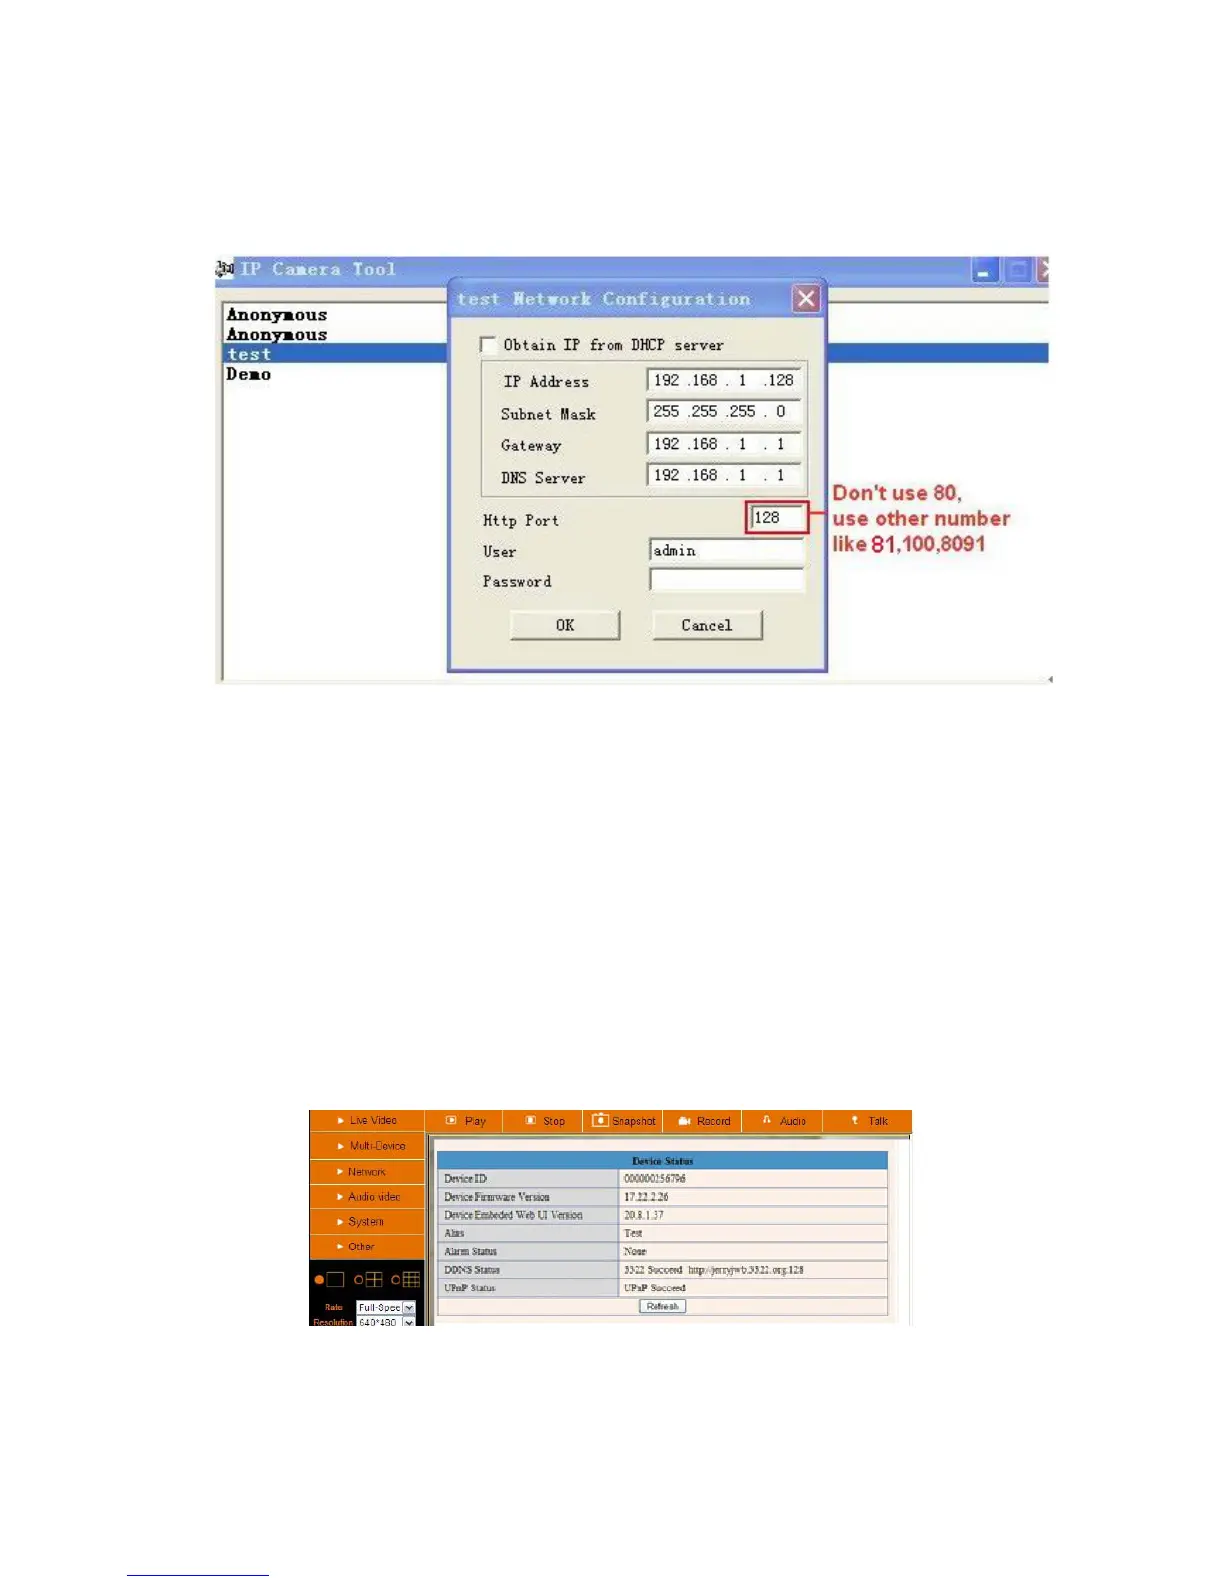
3.7.2 DDNS Status
After all these steps are done you should be able to access your camera from your mobile device or tablet
(using an app). You can also access your camera via your computers’ or laptops’ web browser using the
DDNS address.
Before you can access it, you first need to check the DDNS status from the camera. Login to the camera
and choose “System”>”Device Info”. Please check that ‘DDNS Status’ shows ‘succeed’ followed by the
address. This is illustrated in the image below. It is important that you get the address link of DDNS to access
the camera from anywhere in the world. You can also find this address on the bottom of your camera. Write
this address somewhere or add is as your Favourite in your web browser to visit the camera from outside the
network (from your mobile device for example at work, school, on the road etc.)
Figure 7.8
Congratulations! You’ve know successfully installed your IP camera. It is always a good idea to ask friends or
family to login to the camera from their own place. Don’t forget to change the password of the camera