Maintenance
Maintenance
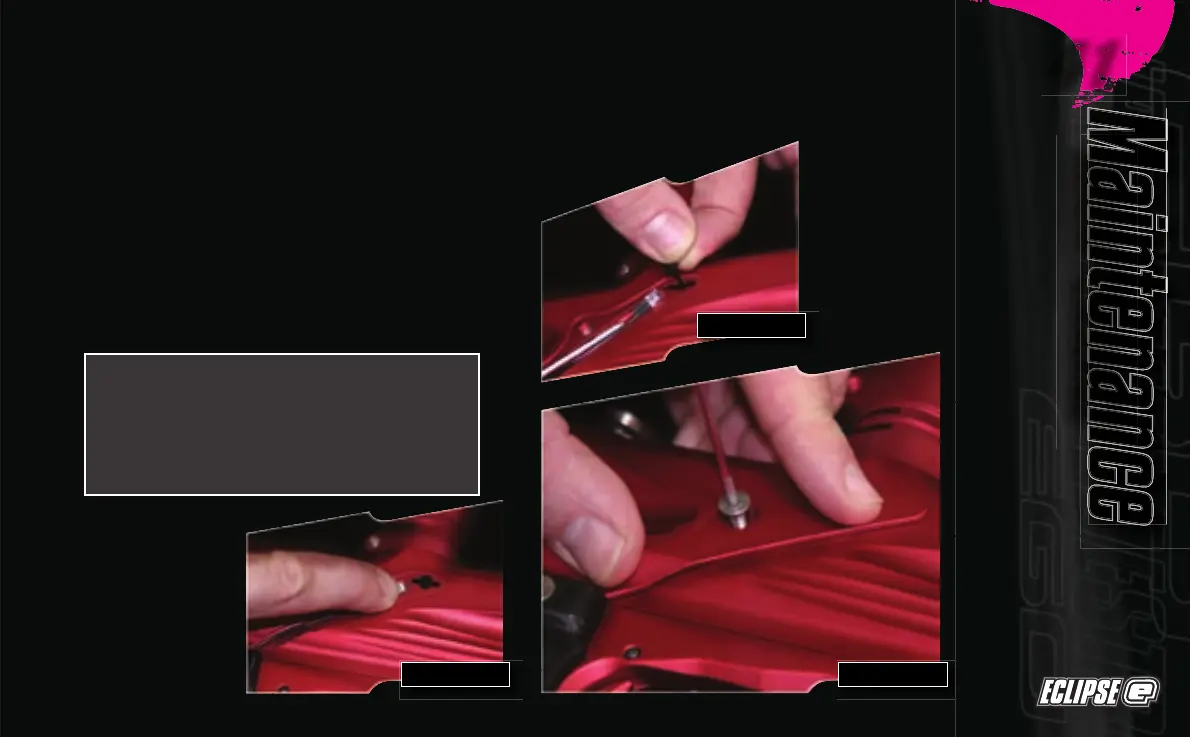
Remove the rubber finger detent and using a dry
Q-tip clean detent and it’s location point in the Eclipse
Ego Body. Replace clean detent back into the Eclipse
Ego body
(See Figure 6.5)
and slide sensor unit back into
place
(See Figure 6.6)
.
Replace the Sensor Cover and using a 5/64th" hex
key, replace the Bream Beam Sensor Cover retaining
screw to hold the sensor cover in place
(See Figure 6.7)
.
Be careful not to cross-thread the screw. Do not over
tighten the screw.
Repeat procedure for opposite side of the Eclipse Ego.
You have now cleaned your Break Beam Sensor System.
FIGURE 6.6
FIGURE 6.5
FIGURE 6.7
Note: When cleaning Break Beam Sensor
System inspect condition of rubber finger
detents and replace if necessary. Ensure that
the receiver sensor (indicated by a red mark
& red heat shrink) is located on the right-hand
side of the marker body.